Power775 Disk Enclosure Fan Service Procedure
57 of 61
STEP 48
Using the 2mm Hex Torque Driver P/N 74Y0983 with torque setting of 0.07Nm,
r
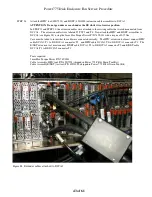
econnect the four DCCA Power
Cables (HPICs) to the DE DCCAs (see Figure 18).
STEP 49
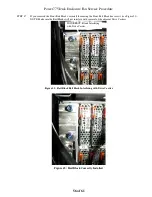
Reconnect the four DCCA Service Network Communications (E/NET) cables to the DE DCCAs (see Figure 16
and Figure 17).
STEP 50
Reconnect the front SAS cables. Using the Location Codes labels, install the cables to the correct Port
Card connectors. If velcro ties were removed, reinstall them.
STEP 51
Reposition UEPO assembly if moved in an earlier step.
STEP 52
Close the front door of the frame.
3.11 Power on the Disk Enclosure <= CUSTOMER TASK
STEP 53
If you are running AIX, remove the appropriate mpt2sas devices (those attached to the DE) from the Operating
Systems owning the DE now before the DE is turned back on so that there is not time wasted in spinning down the
drives.
If you are running Linux, no action is necessary.
STEP 54
Power On the Disk Enclosure from the BPC FSP command line by using the following command:
This is the command syntax:
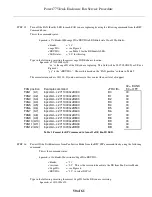
bpccmd –c 41<blank>0000<Cage ID>
<blank>
= “11”
<Cage ID>
= see Figure 6
Type in the following, inserting the correct Cage ID for the damaged DE chassis location:
bpccmd –c 41110000xx
Where “xx” is the Cage ID of the DE you are replacing.
This field will be 05,07,09,0B,0D, or 0F (see Figure 6).
The correct return code is 001100. If you do not receive this, contact the next level of support.
ATTENTION:
Be very careful that you are in the correct frame and that you type this command exactly as it will
power on the cage you type. If you are off by just one digit, you can easily power on a CEC or DE in another cage
of the frame.

