Power 775 D-Link Service Procedure
PN: 41U8487, EC N44172
21 of 27
3.9
Replace an Individual D-Link Optical Cable <= SSR Task
STEP 26
If the system includes multiple frames, and the cable is confirmed defective after the wrap test, then pull the cable
through the system's cable tray raceways to remove it completely from the system.
If the system is a single frame, simply remove the cable from the system.
STEP 27
Obtain a replacement cable that the same or longer length than the cable being replaced.
STEP 28
Label the new cable, to match the cable being replaced.
STEP 29
Clean one end of the cable. See
Section 2.3.1
.
STEP 30
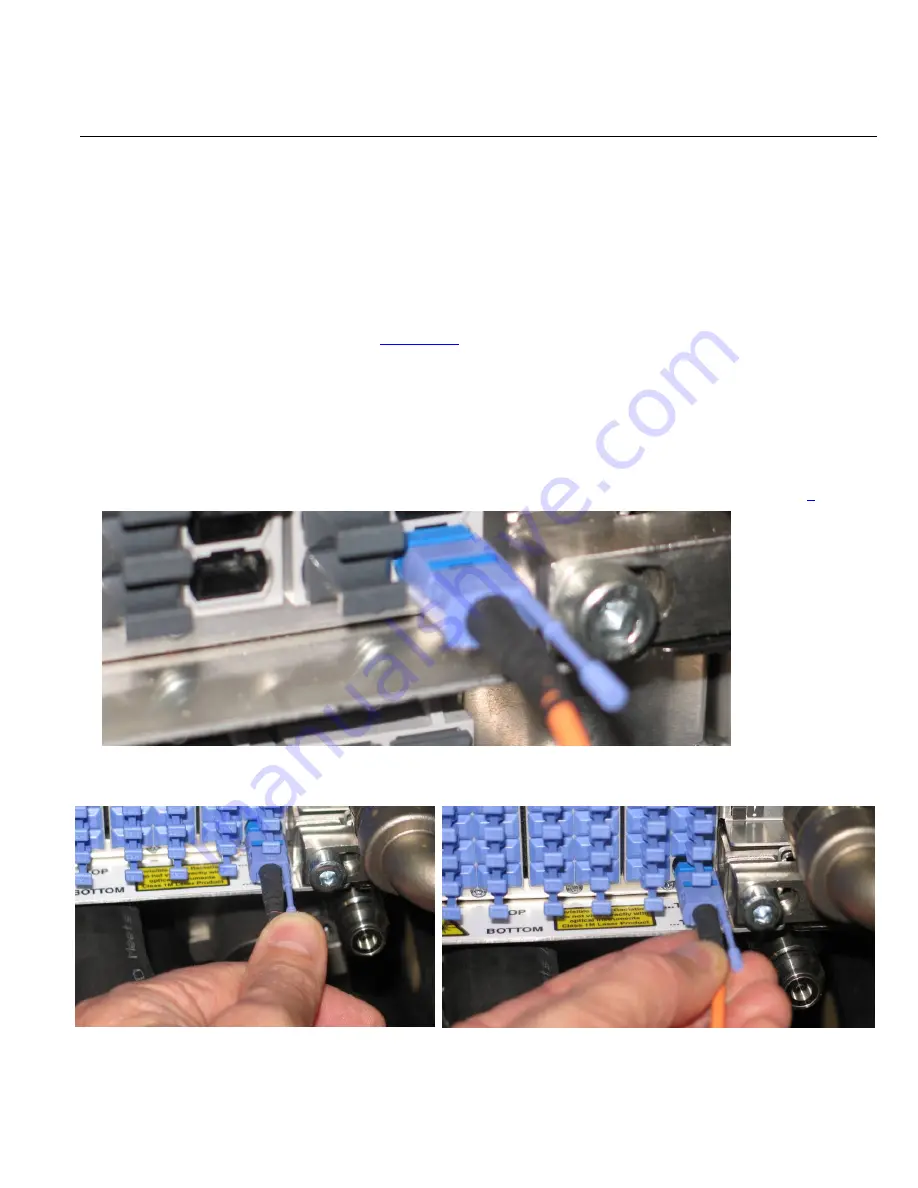
Remove the wrap plug and insert the cleaned connector of the D-Link cable into the D-Port at that end. Do the
final actuation of the connector into the port by pushing on the push/pull tab , or by pushing on the strain relief
boot at the rear of the connector (see Figure 16 and Figure 10). When D-Link cables are installed, it is important
that
(a) the key of the MPO connector is oriented upward, to align with the Key-Up orientation of the MPO D-Port
adapters (see Figure 15).
(b) the handle of the push/pull tab is on the upper-right side of the D-Link connector (see Figure 15
).
Figure 15 Individual D-Link Connector with push/pull tab on upper right
Figure 16 Insert one connector
Figure 17 Perform final actuation
STEP 31
Route the D-Link cable to the D-Port at the other end, routing the cable through the systems cable tray raceways, if
necessary.


