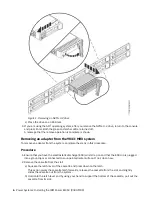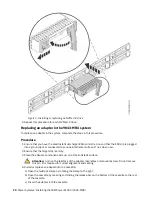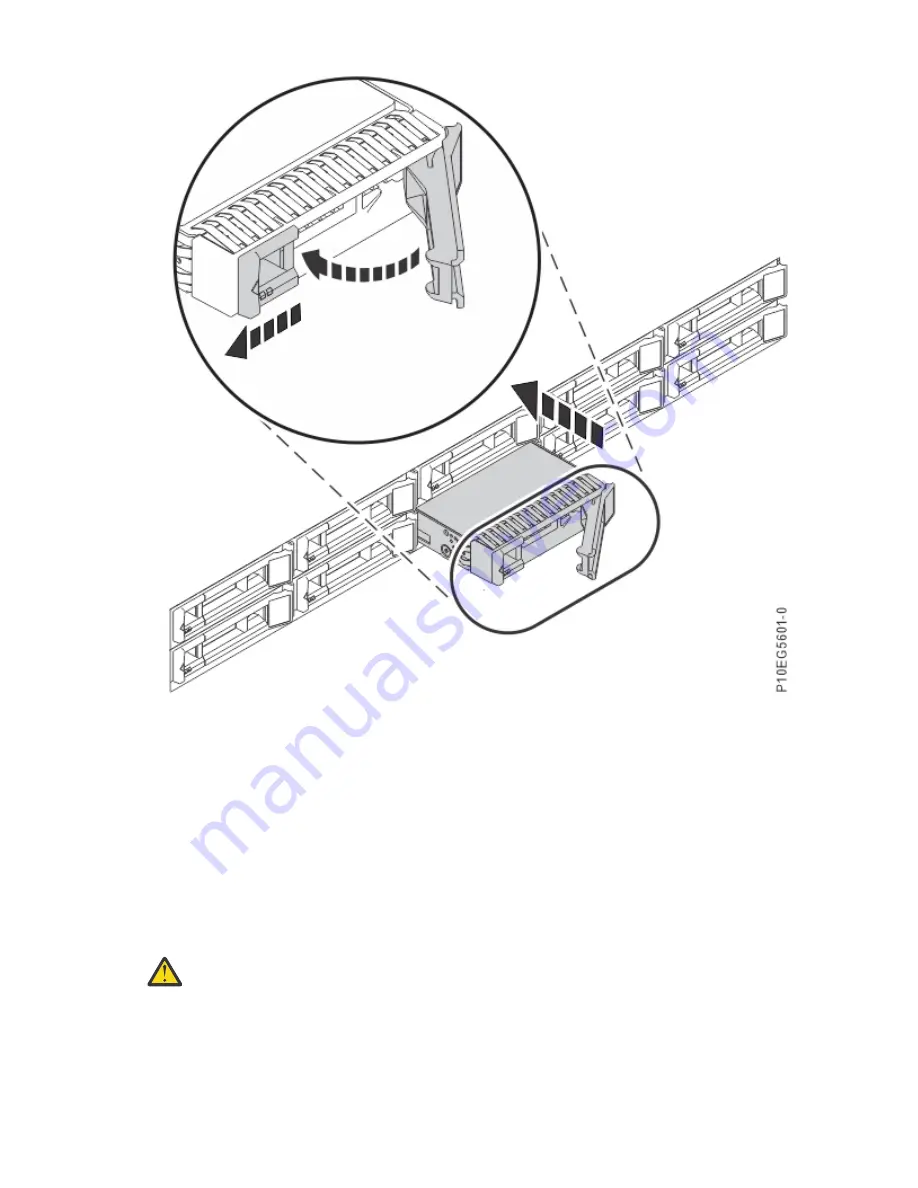
Figure 3. Installing or replacing an NVMe U.2 drive
4. Repeat this procedure for each NVMe U.2 drive.
Replacing an adapter in the 9043-MRX system
To replace an adapter in the system, complete the steps in this procedure.
Procedure
1. Ensure that you have the electrostatic discharge (ESD) wrist strap on and that the ESD clip is plugged
into a ground jack or connected to an unpainted metal surface. If not, do so now.
2. Ensure that the target slot is empty.
3. Place the adapter, component-side up, on a flat, antistatic surface.
Attention: A pin on the tailstock of the adapter resembles a removable screw. Do not remove
this pin. It is required for correct alignment and seating.
4. Install or replace an adapter into the cassette:
a) Open the tailstock clamp by rotating the clamp to the right.
b) Open the cassette by pressing and sliding the release bar on the bottom of the cassette to the rear
of the cassette.
c) Insert the adapter into the cassette.
10 Power Systems: Installing the IBM Power E1050 (9043-MRX)
Summary of Contents for Power E1050
Page 1: ...Power Systems Installing the IBM Power E1050 9043 MRX IBM GI11 0003 00...
Page 4: ...iv...
Page 14: ...xiv Power Systems Installing the IBM Power E1050 9043 MRX...
Page 36: ...22 Power Systems Installing the IBM Power E1050 9043 MRX...
Page 47: ......
Page 48: ...IBM Part Number 03KG355 GI11 0003 00 1P P N 03KG355...

