Procedure
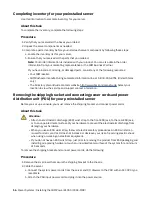
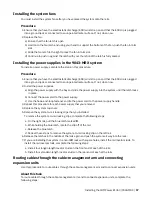
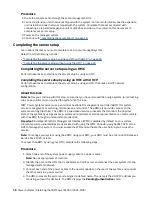
1. Route the console cable through the cable management arm.
2. Connect expansion units that were shipped with the system. For more information, see the expansion
unit installation book that was shipped with the system. Complete the tasks associated with
connecting a preinstalled expansion unit or disk drive enclosure, then return to this document to
complete your server setup.
3. Power on the managed system.
4. Continue with “Completing the server setup” on page 18.
Completing the server setup
Learn about the tasks you must complete to set up your managed system.
Select from the following options:
• “Completing the server setup by using an HMC with DHCP ” on page 18
• “Completing the server setup without using the HMC” on page 20
Completing the server setup using an HMC
Perform these tasks to complete the server setup by using an HMC.
Completing the server setup by using an HMC with DHCP
Perform these tasks to complete the server setup by using an HMC that uses a DHCP network
configuration.
About this task
Note: Before you continue with this step, ensure that you have removed the orange system-to-rail locking
clips on each slide rail and pushed the system into the rack.
IBM
®
Power Systems servers use a enterprise baseboard management controller (eBMC) for system
service management, monitoring, maintenance, and control. The eBMC also provides access to the
system event log files (SEL). The eBMC is a specialized service processor that monitors the physical
state of the system by using sensors. A system administrator or service representative can communicate
with the eBMC through an independent connection.
Important: Intelligent Platform Management Interface (IPMI) is disabled by default on your system.
Inherent security vulnerabilities are associated with using the IPMI. Consider using Redfish APIs or the
GUI to manage your system. You must enable the IPMI and authorize the user before you can use the
service.
Note: To manage your system using the eBMC using your HMC, your HMC must be at Version 10 Release 1
Service Pack 1020, or later.
To access the eBMC by using your HMC, complete the following steps:
Procedure
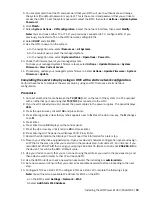
1. Attach one end of the system power supply cable to a power source.
Note: No not apply power at this time.
2. Identify the port on the HMC that is enabled as a DHCP server and connect the new system it to the
managed system network.
3. Connect each end of the power cables to the power supplies on the rear of the system, and connect
the other ends to a power source.
4. The HMC discovers the system and assigns it a default name. The name is the DHCP IP address you
are using, without the decimals. The BMC displays the Pending Authentication state.
18 Power Systems: Installing the IBM Power E1050 (9043-MRX)
Summary of Contents for Power E1050
Page 1: ...Power Systems Installing the IBM Power E1050 9043 MRX IBM GI11 0003 00...
Page 4: ...iv...
Page 14: ...xiv Power Systems Installing the IBM Power E1050 9043 MRX...
Page 36: ...22 Power Systems Installing the IBM Power E1050 9043 MRX...
Page 47: ......
Page 48: ...IBM Part Number 03KG355 GI11 0003 00 1P P N 03KG355...

