Important:
When you install an SSD, ensure that the SSD is fully seated and is all the way into the
system.
22.
On the console, press
Enter
to indicate that you installed the drive.
23.
If you are installing more than one drive, repeat the steps in this procedure until all drives are
installed.
Preparing the 8284-21A or 8284-22A system for operation after installing a drive
with the power turned on in IBM i
Learn to prepare the system for operation after you install a disk drive or solid-state drive (SSD) in the
system with the IBM i operating system or IBM i logical partition that controls the drive location
powered on.
To prepare the system for operation, complete the following steps:
1.
Return to the console and wait until the Concurrent Maintenance Results display is shown, and then
press
Enter
.
2.
When the HSM display is shown, press F12 twice and then press
Enter
.
3.
Ensure that you have the electrostatic discharge (ESD) wrist strap on and that the ESD clip is
connected to an unpainted metal surface. If not, do so now.
4.
On the front of the system, verify that the power LED is ON (green) for the installed or replaced
drive.
5.
If applicable, cover the SSD cage with the perforated plate (A) as shown in Figure 27 on page 29.
P8HAL507-2
A
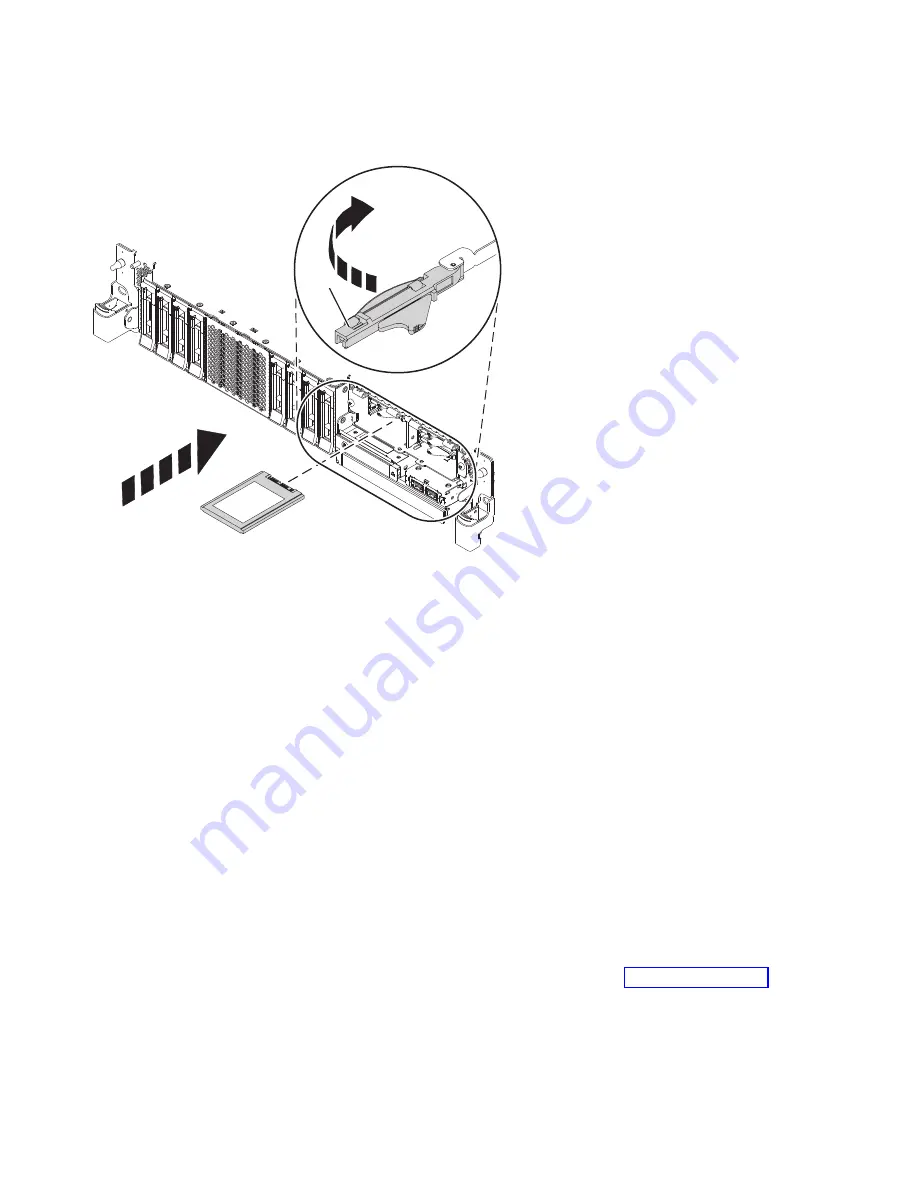
Figure 26. Installing an SSD in an expanded function system
28
Disk drives or solid-state drives
Summary of Contents for Power System 5148-21L
Page 2: ......
Page 18: ...xvi Disk drives or solid state drives ...
Page 202: ...184 Disk drives or solid state drives ...
Page 203: ......
Page 204: ...IBM ...


