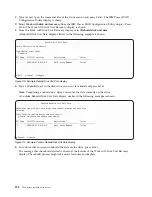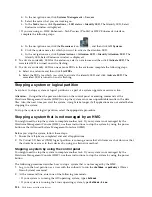
g.
Press F3 (Exit) to return to the Exit SST display and press
Enter
.
h.
Return to the procedure that sent you here.
6.
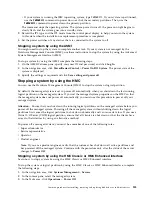
If the drive that you replaced had mirrored protection, follow these steps:
a.
Select Replace configured unit on the Work with Disk unit recovery display. Press
Enter
.
b.
Select the configured drive that you are exchanging (suspended drive) on the Select Configured
Unit to Replace display. Press
Enter
.
c.
Select the drive that you just installed on the Select Replacement Unit display. This drive has a
non-configured status.
Note:
In some cases, it might take several minutes for a new drive to display. Repeat these steps
until the new drive is shown.
Press
Enter
.
d.
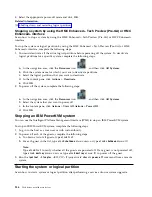
Press
Enter
on the Confirm Replace of Configured Unit display to confirm your choice for
replacement.
The replacement process might take several minutes to complete. When the process is complete,
the Work with Disk unit recovery display is shown.
e.
Press F3 (Exit) to return to the Work with disk units display.
f.
Select Display disk configuration on the Work with disk units display.
g.
Select Display disk configuration status on the Display Disk Configuration display.
Mirrored status shows Resuming. When complete, the mirrored status shows Active. This process
might take several minutes to complete. You can either monitor this display to completion, or
press F3 (Exit) three times, and then press
Enter
to return to the IBM i main menu.
Rebuilding data on a replacement disk drive or solid-state drive in a system or
logical partition that is running the Linux operating system
You can rebuild data on the replacement drive that was replaced because of a failed disk drive or
solid-state drive or as a new installation.
If a hot-spare drive was available and protected the disk array throughout the drive failure, you can
configure the newly installed drive as a hot spare. For SAS RAID controller information, see SAS RAID
controllers for Linux (http://www.ibm.com/support/knowledgecenter/POWER8/p8ebk/
p8ebk_kickoff.htm).
If a hot-spare rebuild was not initiated by the controller, you need to initiate a rebuild on the newly
installed drive. To initiate the rebuild, follow these steps:
For an unprotected disk drive
If the drive you are replacing is in a RAID Level 0 disk array or in a failed RAID Level 5 or RAID Level
10 disk array, complete these tasks:
1.
Re-create the disk array.
2.
Re-create the file systems on the disk array.
3.
Copy the data back to the restored disk array from your backup media.
Rebuilding data by using the
iprconfig
command:
If a hot-spare rebuild was not initiated by the controller, you must initiate a rebuild on the newly
installed drive. To initiate the rebuild, complete the following procedure by using the
iprconfig
command.
For a disk drive in a RAID Level 5 or RAID Level 10 disk array
1.
Log in as root user.
Disk drives or solid-state drives
121
Summary of Contents for Power System 5148-21L
Page 2: ......
Page 18: ...xvi Disk drives or solid state drives ...
Page 202: ...184 Disk drives or solid state drives ...
Page 203: ......
Page 204: ...IBM ...


