• If you do not have an ESD wrist strap, just prior to removing the product from ESD packaging
and installing or replacing hardware, touch an unpainted metal surface of the system for a
minimum of 5 seconds. If at any point in this service process you move away from the
system, it is important to again discharge yourself by touching an unpainted metal surface for
at least 5 seconds before you continue with the service process.
2. Label and remove the power cord from the power supply that you want to remove.
For instructions, see “Disconnecting the power cords from the 9006-12P system” on page 102.
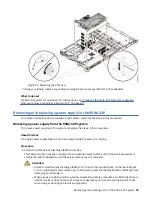
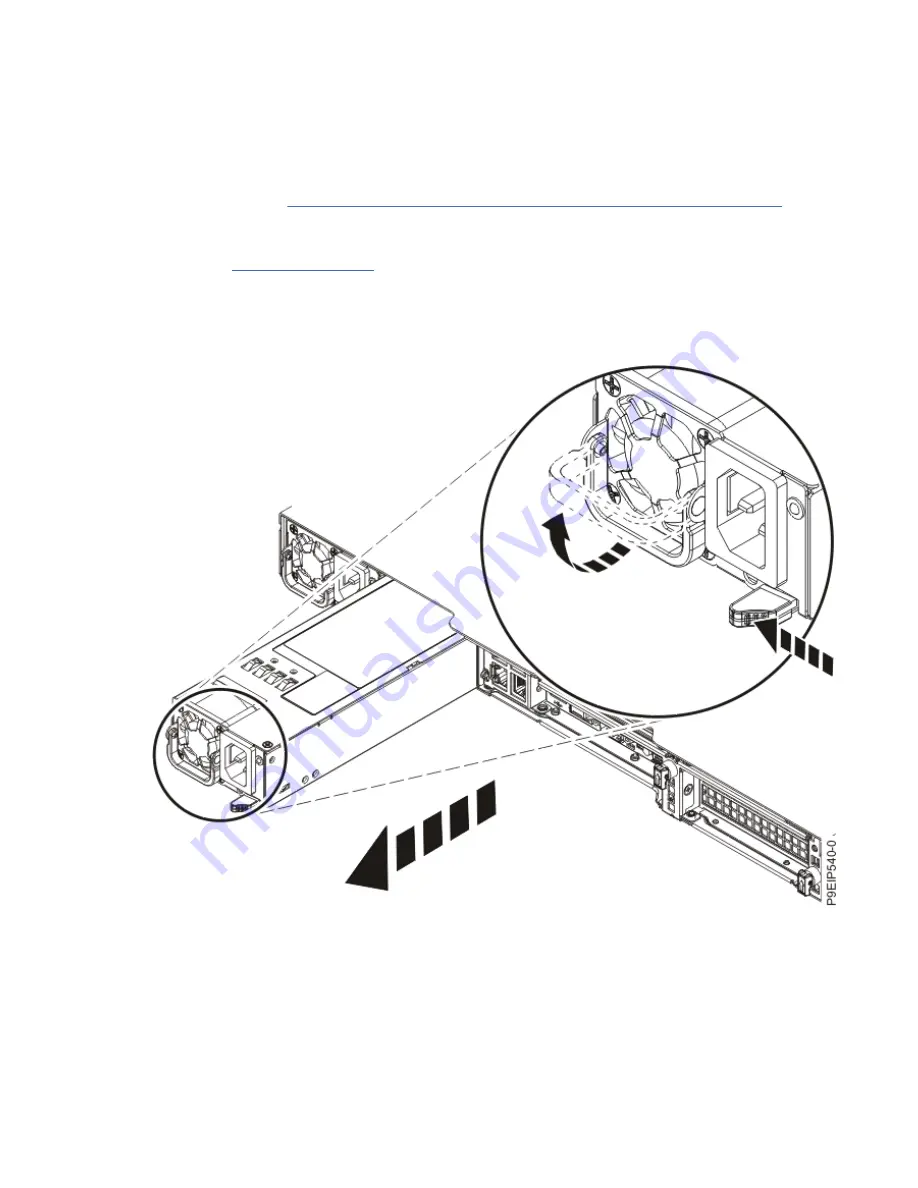
3. Remove the power supply from the system.
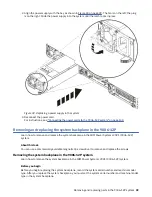
a) To unseat the power supply from its position in the system, push the locking-tab to the left as
shown in Figure 33 on page 38.
b) Grasp the power supply handle with one hand, and pull the power supply partially out of the
system.
c) Place your other hand underneath the power supply and pull the power supply out of the system
and place it on an ESD mat.
Figure 33. Removing a power supply from the system
Replacing a power supply in the 9006-12P system
To replace power supplies in the system, complete the steps in this procedure.
Procedure
1. Ensure that you have the electrostatic discharge (ESD) wrist strap on and that the ESD clip is plugged
into a ground jack or connected to an unpainted metal surface. If not, do so now.
38 Power Systems: Servicing the IBM Power System LC921 (9006-12P)
Summary of Contents for Power System LC921 9006-12P
Page 1: ...Power Systems Servicing the IBM Power System LC921 9006 12P IBM...
Page 14: ...xiv Power Systems Servicing the IBM Power System LC921 9006 12P...
Page 118: ...104 Power Systems Servicing the IBM Power System LC921 9006 12P...
Page 120: ...106 Power Systems Servicing the IBM Power System LC921 9006 12P...
Page 131: ......
Page 132: ...IBM...

