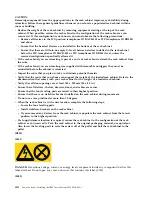
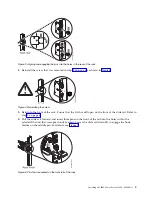
background image

CAUTION:
Regarding IBM provided VENDOR LIFT TOOL:

v

Operation of LIFT TOOL by authorized personnel only.

v

LIFT TOOL intended for use to assist, lift, install, remove units (load) up into rack elevations. It is
not to be used loaded transporting over major ramps nor as a replacement for such designated tools
like pallet jacks, walkies, fork trucks and such related relocation practices. When this is not
practicable, specially trained persons or services must be used (for instance, riggers or movers).

v

Read and completely understand the contents of LIFT TOOL operator's manual before using.
Failure to read, understand, obey safety rules, and follow instructions may result in property
damage and/or personal injury. If there are questions, contact the vendor's service and support.
Local paper manual must remain with machine in provided storage sleeve area. Latest revision
manual available on vendor's web site.

v

Test verify stabilizer brake function before each use. Do not over-force moving or rolling the LIFT
TOOL with stabilizer brake engaged.

v

Do not move LIFT TOOL while platform is raised, except for minor positioning.

v

Do not exceed rated load capacity. See LOAD CAPACITY CHART regarding maximum loads at
center versus edge of extended platform.

v

Only raise load if properly centered on platform. Do not place more than 200 lb (91 kg) on edge of
sliding platform shelf also considering the load's center of mass/gravity (CoG).

v

Do not corner load the platform tilt riser accessory option. Secure platform riser tilt option to main
shelf in all four (4x) locations with provided hardware only, prior to use. Load objects are designed
to slide on/off smooth platforms without appreciable force, so take care not to push or lean. Keep
riser tilt option flat at all times except for final minor adjustment when needed.

v

Do not stand under overhanging load.

v

Do not use on uneven surface, incline or decline (major ramps).

v

Do not stack loads.

v

Do not operate while under the influence of drugs or alcohol.

v

Do not support ladder against LIFT TOOL.

v

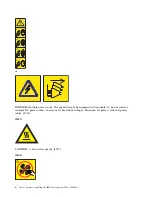
Tipping hazard. Do not push or lean against load with raised platform.

v

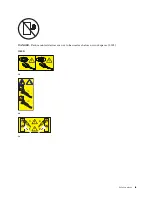
Do not use as a personnel lifting platform or step. No riders.

v

Do not stand on any part of lift. Not a step.

v

Do not climb on mast.

v

Do not operate a damaged or malfunctioning LIFT TOOL machine.

v

Crush and pinch point hazard below platform. Only lower load in areas clear of personnel and
obstructions. Keep hands and feet clear during operation.

v

No Forks. Never lift or move bare LIFT TOOL MACHINE with pallet truck, jack or fork lift.

v

Mast extends higher than platform. Be aware of ceiling height, cable trays, sprinklers, lights, and
other overhead objects.

v

Do not leave LIFT TOOL machine unattended with an elevated load.

v

Watch and keep hands, fingers, and clothing clear when equipment is in motion.

v

Turn Winch with hand power only. If winch handle cannot be cranked easily with one hand, it is
probably over-loaded. Do not continue to turn winch past top or bottom of platform travel.
Excessive unwinding will detach handle and damage cable. Always hold handle when lowering,
unwinding. Always assure self that winch is holding load before releasing winch handle.

v

A winch accident could cause serious injury. Not for moving humans. Make certain clicking sound
is heard as the equipment is being raised. Be sure winch is locked in position before releasing
handle. Read instruction page before operating this winch. Never allow winch to unwind freely.
Freewheeling will cause uneven cable wrapping around winch drum, damage cable, and may cause
serious injury. (C048)

Power and cabling information for NEBS (Network Equipment-Building System)
GR-1089-CORE

The following comments apply to the IBM servers that have been designated as conforming to NEBS
(Network Equipment-Building System) GR-1089-CORE:

xii

Power Systems: Installing the IBM Power System S824 (8286-42A)

Summary of Contents for Power System S824

Page 1: ...Power Systems Installing the IBM Power System S824 8286 42A GI11 9905 06 IBM...

Page 2: ......

Page 3: ...Power Systems Installing the IBM Power System S824 8286 42A GI11 9905 06 IBM...

Page 4: ...Notices manual G229 9054 and the IBM Environmental Notices and User Guide Z125 5823 This edition applies to IBM Power Systems servers that contain the POWER8 processor and to all associated models Cop...

Page 5: ...t using an HMC 20 Setting up a preinstalled server 21 Prerequisite for installing the preinstalled server 21 Completing inventory for your preinstalled server 22 Removing the shipping bracket and conn...

Page 6: ...iv Power Systems Installing the IBM Power System S824 8286 42A...

Page 7: ...tional copies of safety information documentation can be obtained by calling the IBM Hotline at 1 800 300 8751 German safety information Das Produkt ist nicht f r den Einsatz an Bildschirmarbeitspl tz...

Page 8: ...nect 1 Turn off everything unless instructed otherwise 2 For AC power remove the power cords from the outlets 3 For racks with a DC power distribution panel PDP turn off the circuit breakers located i...

Page 9: ...mperatures will exceed the manufacturer s recommended ambient temperature for all your rack mounted devices v Do not install a unit in a rack where the air flow is compromised Ensure that air flow is...

Page 10: ...e potential hazards v Verify that the route that you choose can support the weight of the loaded rack cabinet Refer to the documentation that comes with your rack cabinet for the weight of a loaded ra...

Page 11: ...DANGER Rack mounted devices are not to be used as shelves or work spaces L002 L003 1 2 or 1 2 or 1 2 3 4 or Safety notices ix...

Page 12: ...be equipped with multiple AC power cords or multiple DC power cables To remove all hazardous voltages disconnect all power cords and power cables L003 L007 CAUTION A hot surface nearby L007 L008 x Pow...

Page 13: ...tacle Although shining light into one end and looking into the other end of a disconnected optical fiber to verify the continuity of optic fibers many not injure the eye this procedure is potentially...

Page 14: ...rhanging load v Do not use on uneven surface incline or decline major ramps v Do not stack loads v Do not operate while under the influence of drugs or alcohol v Do not support ladder against LIFT TOO...

Page 15: ...ing interfaces only Type 2 or Type 4 ports as described in GR 1089 CORE and require isolation from the exposed OSP cabling The addition of primary protectors is not sufficient protection to connect th...

Page 16: ...xiv Power Systems Installing the IBM Power System S824 8286 42A...

Page 17: ...The latest version of this document is maintained online see Installing the IBM Power System S824 8286 42A http www ibm com support knowledgecenter POWER8 p8egg p8egg_840_kickoff htm v To plan your s...

Page 18: ...ntact information Determining and marking the location in the rack You might need to determine where to install the system unit into the rack To determine where to install the system unit into a rack...

Page 19: ...unit 6 Repeat step 5 for the corresponding holes located on the left side of the rack 7 Go to the rear of the rack 8 On the right side find the EIA unit that corresponds to the bottom EIA unit marked...

Page 20: ...mplete the following steps 1 Each slide rail is marked with either an R right or an L left when you look from the front Select the left slide rail bring it to the rear of the rack and locate the selec...

Page 21: ...and insert three pins on the front of the rail into the holes within the selected EIA unit that were previously marked Lower the slide rail down 1 to engage the hook feature on the middle pin For det...

Page 22: ...c control It does not increase or decrease your risk of receiving electric shock when using or working on electrical equipment v If you do not have an ESD wrist strap just prior to removing the produc...

Page 23: ...procedure to install the cable management arm To install the cable management arm complete the following steps 1 Ensure that you have the following parts Item Description A Support arm B Cable manage...

Page 24: ...d DOWN Ensure that the side labeled UP is facing upward and to the right 3 Locate the hole at the bottom inside corner of the L shaped cable management stop bracket B Position the unattached end of th...

Page 25: ...into place For details see Figure 12 5 Slide the extension bracket E into the right slide rail until the spring loaded pin snaps into place For details see Figure 13 on page 10 Figure 11 Securing the...

Page 26: ...e slot on the mounting bracket C Push the tab until the spring loaded latch snaps into place Slide the other cable management arm tab into the extension bracket E on the outside of the right slide rai...

Page 27: ...u install in your primary partition and whether you install a Virtual I O Server VIOS in one of your logical partitions P7EF3502 2 1 D A C Figure 15 Sliding the cable management arm tab into the mount...

Page 28: ...a subset of the web interface functions The ASCII terminal for the ASMI interface is available only when the system is in the standby state It is not available during the initial program load IPL or r...

Page 29: ...er admin for the user ID and password 7 Change the default password when you are prompted 8 Press Enter until the server information appears You have completed the setup for an ASCII terminal and have...

Page 30: ...d htm 3 If you are connecting a second HMC to your managed server connect it to the Ethernet port that is labeled HMC2 on the managed server 4 Continue with Cabling the server and connecting expansion...

Page 31: ...e CD or DVD as the boot device a Select Select Boot Options and press Enter b Select Select Install Boot Device and press Enter c Select CD DVD and press Enter d Select the media type that corresponds...

Page 32: ...DU A and E3 and E4 to PDU B Note Confirm that the system is in standby mode The green power status indicator on the front control panel is flashing and the dc out indicator lights on the power supplie...

Page 33: ...required server d Select Actions View all actions Operations Change system Password For more information about setting passwords for the managed system by using the HMC Classic or HMC Enhanced interfa...

Page 34: ...ystem f Click Change Licensed Internal Code for the current release g Select View system information and then click OK h In the Specify LIC Repository window select None Display current values and the...

Page 35: ...dgecenter POWER8 p8efc p8efc_partition_template_concept htm v If you want to use an existing template from another source you can import that and use it For more information see Importing a partition...

Page 36: ...are level on the managed system and to update the time of day complete the following steps a Access the Advanced System Management Interface ASMI For instructions see Accessing the ASMI without an HMC...

Page 37: ...ttp www ibm com support knowledgecenter POWER8 p8ha5 fix_virtual_firm_ivm htm 6 If you have a stand alone server install the front door if necessary by completing the following steps a Hold the front...

Page 38: ...er If you have incorrect missing or damaged parts consult any of the following resources v Your IBM reseller v IBM Rochester manufacturing automated information line at 1 800 300 8751 United States on...

Page 39: ...the server a Plug the top two power cords into the power supply and attach the cables to the handles on the power supply with cable ties or hook and loop fasteners Figure 18 Removing the shipping bra...

Page 40: ...lable Go to the instructions for the applicable console interface or terminal in the following table Table 4 Available console types Console type Operating system Logical partitions Cable required Cab...

Page 41: ...POWER8 p8ecs p8ecs_locations htm To cable an ASCII terminal to the server complete the following steps 1 Using a serial cable that is equipped with a null modem connect the ASCII terminal to the seri...

Page 42: ...navigation area click Updates 2 In the work area view and record the information that appears in the HMC Code Level section including the HMC version release Service Pack build level and base version...

Page 43: ...ou are installing the Integrated Virtualization Manager For an AIX or Linux partition complete the following steps to change the partition boot mode 1 In the navigation area expand Power Restart Contr...

Page 44: ...Use this procedure to route cables through the cable management arm and to connect expansion units To route cables through the cable management arm and to connect expansion units complete the followin...

Page 45: ...vanced System Management Interface ASMI To access ASMI by using the HMC choose one of the following navigation options depending on the interface type of the HMC If you are using an HMC Classic or HMC...

Page 46: ...to view system information c In the menu pod expand System Actions and then expand Updates d Select View System Information e Select a LIC repository from the list and click OK f When you have complet...

Page 47: ...POWER8 p8hch p8hch_installvios htm 9 If you have a stand alone server install the front door if necessary by completing the following steps a Hold the front door at an approximate 120 degree angle to...

Page 48: ...crocode with an Internet connection http www ibm com support knowledgecenter POWER8 p8ha5 fix_virtual_firm_ivm htm 5 If you have a stand alone server install the front door if necessary by completing...

Page 49: ...x htm v Install the VIOS operating system For instructions see Installing VIOS http www ibm com support knowledgecenter POWER8 p8hch p8hch_installvios htm 4 If required update the system firmware v Fo...

Page 50: ...34 Power Systems Installing the IBM Power System S824 8286 42A...

Page 51: ...efore this statement may not apply to you This information could include technical inaccuracies or typographical errors Changes are periodically made to the information herein these changes will be in...

Page 52: ...ta in sensitive or critical operations Users should periodically check IBM s support websites for updated information and fixes applicable to the system and related software Homologation statement Thi...

Page 53: ...www ibm com able Privacy policy considerations IBM Software products including software as a service solutions Software Offerings may use cookies or other technologies to collect product usage inform...

Page 54: ...to radio communications Operation of this equipment in a residential area is likely to cause harmful interference in which case the user will be required to correct the interference at his own expense...

Page 55: ...erence may occur in which case the user may be required to take corrective actions Japan Electronics and Information Technology Industries Association Statement This statement explains the Japan JIS C...

Page 56: ...eed to perform practical action Electromagnetic Interference EMI Statement Taiwan The following is a summary of the EMI Taiwan statement above Warning This is a Class A product In a domestic environme...

Page 57: ...g kann im Wohnbereich Funk St rungen verursachen in diesem Fall kann vom Betreiber verlangt werden angemessene Ma nahmen zu ergreifen und daf r aufzukommen Deutschland Einhaltung des Gesetzes ber die...

Page 58: ...to an outlet on a circuit different from that to which the receiver is connected v Consult an IBM authorized dealer or service representative for help Properly shielded and grounded cables and connect...

Page 59: ...tion Statement This statement explains the Japan JIS C 61000 3 2 product wattage compliance This statement explains the Japan Electronics and Information Technology Industries Association JEITA statem...

Page 60: ...ohne Zustimmung von IBM ver ndert bzw wenn Erweiterungskomponenten von Fremdherstellern ohne Empfehlung von IBM gesteckt eingebaut werden Deutschland Einhaltung des Gesetzes ber die elektromagnetisch...

Page 61: ...oprietary notices are preserved You may not make derivative works of these publications or reproduce distribute or display these publications or any portion thereof outside your enterprise without the...

Page 62: ...46 Power Systems Installing the IBM Power System S824 8286 42A...

Page 63: ......

Page 64: ...IBM Part Number 01LK523 Printed in USA GI11 9905 06 1P P N 01LK523...

Reviews: