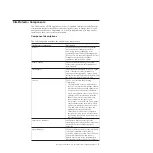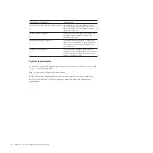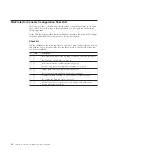
Use this button...
To do this...
Move down or specify digits. Referred to as
the DOWN button.
Move up or specify digits. Referred to as the
UP button.
Enter information, or confirm a selection and
move to a new screen. Referred to as the
ENTER button.
Entering Network Information
Procedure
1.
Locate the LCD panel at the front of the SiteProtector SP1001 appliance, and
then make sure that “IBM ISS Proventia SP1001” appears on the screen.
2.
Press the
ENTER
button. The Appliance PIN screen appears.
Note:
If you want to require that users enter a personal identification number
(PIN) to use the LCD panel, see.“Securing the SiteProtector SP1001 Appliance
Hardware” on page 28.
3.
Press the
DOWN
button.
4.
When the message appears asking you to confirm that you want to change
your configuration, select
OK
, and then press
ENTER
. A default IP address
appears.
5.
Is the default IP address correct?
v
If
yes
, return to the configuration menu, and then go to Step 7.
v
If no, enter the IP address of the SiteProtector SP1001 appliance in the field
provided.
Note:
Press
UP
or
DOWN
to select a number, and then use the
LEFT
or
RIGHT
buttons to move to another digit.
6.
Select
OK
, and then press the
ENTER
button to confirm.
7.
Repeat Steps 4 through 6 to enter the following information:
v
subnet mask
v
default gateway
v
DNS Server
v
hostname
Note:
The SiteProtector SP1001 appliance provides a default subnet mask and
gateway address that is based on the IP address that you enter. You can skip
the procedure for entering these addresses if you verify that the default
gateway and subnet addresses are correct. See “SiteProtector SP1001 Appliance
Configuration Checklist” on page 12.
A final confirmation screen appears.
Note:
If you want the SiteProtector SP1001 appliance to ignore the information
that you have entered, select
Cancel
, and then press
ENTER
.
8.
Select
OK
, and then press
ENTER
to confirm. The SiteProtector SP1001
appliance saves the configuration information you entered.
16
SiteProtector System: SP1001 Hardware Configuration
Summary of Contents for Proventia Management SiteProtector SP1001
Page 2: ......
Page 6: ...iv SiteProtector System SP1001 Hardware Configuration...
Page 8: ...vi SiteProtector System SP1001 Hardware Configuration...
Page 23: ...Korean Class A Compliance Statement Overview xxi...
Page 24: ...xxii SiteProtector System SP1001 Hardware Configuration...
Page 30: ...6 SiteProtector System SP1001 Hardware Configuration...
Page 48: ...24 SiteProtector System SP1001 Hardware Configuration...
Page 56: ...32 SiteProtector System SP1001 Hardware Configuration...
Page 60: ...36 SiteProtector System SP1001 Hardware Configuration...
Page 62: ...38 SiteProtector System SP1001 Hardware Configuration...
Page 63: ......
Page 64: ...Printed in USA...


