5.
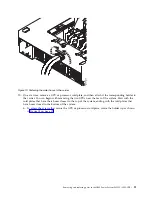
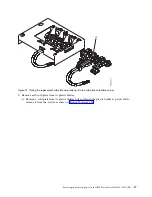
Rest the removed hoses on the top of the rear wall as shown in Figure 5.
6.
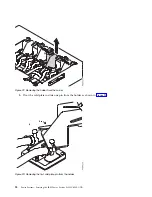
Familiarize yourself with the cold plate installation carrier. In this step, learn about the carrier and
how to use it to more easily work with the cold plate assembly.
Figure 4. Passing the connectors through the rear wall, one at a time
Figure 5. Resting the hoses on the rear wall
Removing and replacing parts in the IBM Power System S822LC (8335-GTB)
5
Summary of Contents for S822LC
Page 1: ...Power Systems Servicing the IBM Power System S822LC 8335 GTB IBM ...
Page 2: ......
Page 3: ...Power Systems Servicing the IBM Power System S822LC 8335 GTB IBM ...
Page 16: ...xiv Power Systems Servicing the IBM Power System S822LC 8335 GTB ...
Page 204: ...188 Power Systems Servicing the IBM Power System S822LC 8335 GTB ...
Page 242: ...226 Power Systems Servicing the IBM Power System S822LC 8335 GTB ...
Page 243: ......
Page 244: ...IBM ...


