Attention:
v
Attach an electrostatic discharge (ESD) wrist strap to the front ESD jack, to the rear ESD jack, or to
an unpainted metal surface of your hardware to prevent the electrostatic discharge from damaging
your hardware.
v
When you use an ESD wrist strap, follow all electrical safety procedures. An ESD wrist strap is
used for static control. It does not increase or decrease your risk of receiving electric shock when
using or working on electrical equipment.
v
If you do not have an ESD wrist strap, just prior to removing the product from ESD packaging and
installing or replacing hardware, touch an unpainted metal surface of the system for a minimum of
5 seconds.
3.
Locate the faulty drive. The amber drive LED is turned on when a drive has an issue. If a drive has
an issue and if the amber LED is not lit, use the following procedure to locate the drive.
a.
Determine which drive to replace as determined by the operating system. For example, the drive
might be referenced as
sda
or
sdb
.
Attention:
The operating system is typically on
sda
. Do not continue with removing the drive
with the power on unless
sda
is part of a RAID configuration. If the drive contains the operating
system, needs to be removed, and is not part of a RAID array, you need to first power down the
system.
b.
Disable the drive to prepare for removal with the following command, where
sdX
is the drive to
replace.
sh –c “echo 0 >/sys/block/sdX/device/delete”
c.
Verify that you disabled the drive from writing by using the
lsscsi
command. The drive should
no longer appear in the output.
lsscsi
d.
Gather the physical serial number of the identified drive with the following command, where
sdX
is the drive to replace:
hdparm –i /dev/sdX | grep –i serial
e.
Run the following command to identify the physical drive, where
sdX
is the drive to replace:
dd if=/dev/sdX of =/dev/null
The green LED on the drive flashes.
You can also use the optional
ledmon
package turn the identify LED on or off. Run this command
to turn on the LED, where
sdX
is the drive to replace:
ledctl locate=/dev/rssdX
Run this command to turn off the LED:
ledctl locate_off=/dev/rssdX
4.
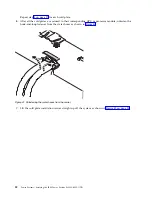
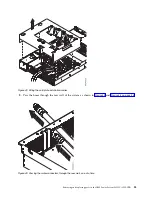
Unlock the drive bay handle (B) by pushing the handle release (A) up. The handle (B) snaps out
towards you. If the handle does not snap out all the way, the drive does not slide out of the system.
See Figure 47 on page 37.
36
Power Systems: Servicing the IBM Power System S822LC (8335-GTB)
Summary of Contents for S822LC
Page 1: ...Power Systems Servicing the IBM Power System S822LC 8335 GTB IBM ...
Page 2: ......
Page 3: ...Power Systems Servicing the IBM Power System S822LC 8335 GTB IBM ...
Page 16: ...xiv Power Systems Servicing the IBM Power System S822LC 8335 GTB ...
Page 204: ...188 Power Systems Servicing the IBM Power System S822LC 8335 GTB ...
Page 242: ...226 Power Systems Servicing the IBM Power System S822LC 8335 GTB ...
Page 243: ......
Page 244: ...IBM ...


