Attention:
– Removing and replacing the power supply is a time sensitive task when you are servicing with
the system power turned on (concurrent).
– To avoid a system shutdown, you must replace the failed power supply within five minutes
after you remove the power supply from the system.
– Ensure that you have read the complete procedure to remove and replace a power supply and
that you are prepared to remove and replace the power supply within the time limit.
v
If you are servicing an 8335-GTA system, concurrent repair of the power supply is not supported;
the system must be turned off. Continue with step 7 and follow the instructions for a noncurrent
repair.
7.
Select an action:
v
To do a concurrent repair with the system running:
a.
Continue the procedure with the system power turned on.
b.
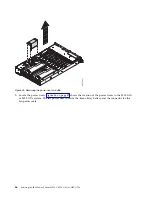
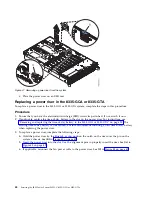
Remove the failed power supply that is indicated by the amber fault LED. For instructions, see
“Removing a power supply from the 8335-GCA or 8335-GTA.”
Remember:
Failure to replace the power supply after removing the power supply from the
system within five minutes can cause the system to automatically power off.
v
To do a non-concurrent repair with the system power turned off:
a.
Label the failed power supply that is indicated by the amber fault LED.
b.
Stop the system. For instructions, see “Stopping the system” on page 108.
c.
Disconnect the power source from the system by unplugging the system. For instructions, see
“Disconnecting the power cords from an 8335-GCA or 8335-GTA system” on page 113.
d.
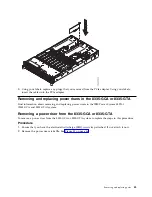
Using your label, remove the failed power supply. For instructions, see “Removing a power
supply from the 8335-GCA or 8335-GTA.”
Removing a power supply from the 8335-GCA or 8335-GTA
To remove a power supply from the system, complete the steps in this procedure.
Procedure
1.
Ensure that you have the electrostatic discharge (ESD) wrist strap attached. If not, attach it now.
2.
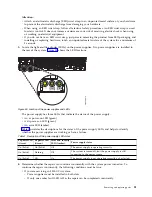
Label and disconnect the power cord from the failed power supply.
Attention:
Do not remove the power cord from the cable-management arm, if applicable.
a.
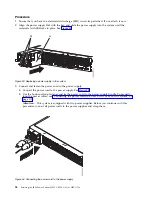
Label the power cord, and then unstrap the hook-and-loop fastener to release the power cord from
the power supply handle. Refer to Figure 51 on page 53.
b.
Pull the end of the power cord out of the power supply.
c.
Retain the hook-and-loop fastener for future use.
52
Servicing the IBM Power System S822LC (8335-GCA or 8335-GTA)
Summary of Contents for S822LC
Page 1: ...Power Systems Servicing the IBM Power System S822LC 8335 GCA or 8335 GTA IBM...
Page 2: ......
Page 3: ...Power Systems Servicing the IBM Power System S822LC 8335 GCA or 8335 GTA IBM...
Page 16: ...xiv Servicing the IBM Power System S822LC 8335 GCA or 8335 GTA...
Page 134: ...118 Servicing the IBM Power System S822LC 8335 GCA or 8335 GTA...
Page 145: ...Notices 129...
Page 146: ...IBM Printed in USA...


