4.
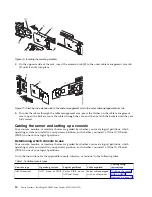
Swivel the rail retention bracket so that it locks onto the rack flange (5).
5.
Repeat these steps for the right rail.
Installing the system into the rack
Use the procedure to install the system into the rack.
About this task
Attention:
v
Attach an electrostatic discharge (ESD) wrist strap to the front ESD jack, to the rear ESD jack, or to an
unpainted metal surface of your hardware to prevent the electrostatic discharge from damaging your
hardware.
v
When you use an ESD wrist strap, follow all electrical safety procedures. An ESD wrist strap is used
for static control. It does not increase or decrease your risk of receiving electric shock when using or
working on electrical equipment.
v
If you do not have an ESD wrist strap, just prior to removing the product from ESD packaging and
installing or replacing hardware, touch an unpainted metal surface of the system for a minimum of 5
seconds.
CAUTION:
This system requires three people to install the system into the rack.
To install the system into the rack, complete the following steps:
Procedure
1.
Remove the shipping cover on the rear and the front of the system, if present.
Figure 5. Lock the rail retention bracket onto the rack flange
6
Power Systems: Installing the IBM Power System S922L (9008-22L)
Summary of Contents for S922L
Page 1: ...Power Systems Installing the IBM Power System S922L 9008 22L GI11 9932 00 IBM...
Page 2: ......
Page 3: ...Power Systems Installing the IBM Power System S922L 9008 22L GI11 9932 00 IBM...
Page 6: ...iv Power Systems Installing the IBM Power System S922L 9008 22L...
Page 16: ...xiv Power Systems Installing the IBM Power System S922L 9008 22L...
Page 50: ...34 Power Systems Installing the IBM Power System S922L 9008 22L...
Page 51: ......
Page 52: ...IBM Part Number 01LK648 Printed in USA GI11 9932 00 1P P N 01LK648...


