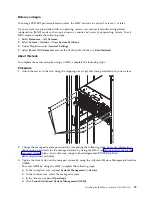
b.
Set the subnet mask to the
opcon
LAN adapter subnet.
c.
Set the default gateway to the
opcon
LAN adapter primary router, or gateway address. This
address is the same address as the IP address.
5.
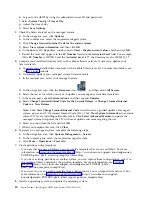
To disable the PC firewall, complete the following steps.
Note:
All PC firewalls must be disabled for the initial connection.
a.
In the Windows control panel, click Firewall settings and disable the firewall.
b.
In the Windows control panel, click Security center. Check for a firewall and, if present, disable
it.
c.
Scan all tasks that are running on the PC for any other software firewalls and disable the firewall.
6.
To configure the Operations Console on your system, complete the following steps:
a.
Start Operations Console. To start the Operations Console, select Start > All Programs > IBM
iSeries
> Access > Operations Console.
b.
Start the Configuration Wizard. If the Operations Console is started for the first time, the
connection wizard starts automatically. If it does not start automatically, click Connection > New
Connection
to manually start the wizard. Read the notifications, and click Next.
c.
Select the local console on a network. Click Next.
d.
Specify a service host name and IP address by completing the following types:
1)
Enter a name for your session. The name must be one of the following names:
v
A valid host name that was registered in the site Domain Name Service (DNS) for the
console IP address.
v
A unique name that is not currently registered in the DNS for any other IP address.
2)
If you are using IBM i V6R1, or later, press the Tab key. The Service TCP/IP Address field is
enabled.
3)
Specify the service TCP/IP address. Enter the LAN console adapter IP address.
4)
Click Next.
e.
Specify the LAN console interface information.
1)
In the Service TCP/IP Address field, type the IP address that you recorded.
2)
In the Service Subnet Mask field, type the subnet mask that you recorded.
3)
In the Service gateway address field, type the default gateway that you recorded.
4)
The system serial number must match the tag on the server. It must be 7 characters long,
without a dash.
5)
Set the Target partition to 1.
6)
Click Next.
f.
Specify the device ID. If you are prompted to specify a service tools device ID, enter
QCONSOLE
.
Click Next.
g.
Click Next > Finish. Your session is now ready to connect. Double-click the session name to start
the connection.
7.
Power on the server by completing the following steps:
a.
Set the manual initial program load (IPL) by completing the following steps:
1)
Locate the server's control panel. Look for the blue tab on the front of the server. Push it to
the side, and pull the control panel out slowly.
2)
Press the Up arrow key until you see 02, and press Enter.
3)
Press Enter again. A < (less than symbol) appears next to N.
4)
Press the Up Arrow key. The N changes to an M.
5)
Press Enter.
6)
Press Enter twice. A 02 is displayed on the control panel.
Installing the IBM Power System S922L (9008-22L)
15
Summary of Contents for S922L
Page 1: ...Power Systems Installing the IBM Power System S922L 9008 22L GI11 9932 00 IBM...
Page 2: ......
Page 3: ...Power Systems Installing the IBM Power System S922L 9008 22L GI11 9932 00 IBM...
Page 6: ...iv Power Systems Installing the IBM Power System S922L 9008 22L...
Page 16: ...xiv Power Systems Installing the IBM Power System S922L 9008 22L...
Page 50: ...34 Power Systems Installing the IBM Power System S922L 9008 22L...
Page 51: ......
Page 52: ...IBM Part Number 01LK648 Printed in USA GI11 9932 00 1P P N 01LK648...


