12.
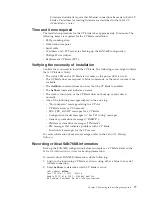
Pack the faulty CP blade in the packaging provided with the new CP blade
for return to IBM, following local procedures.
13.
Install the chassis door (“Removing and installing the chassis door” on page
69).
Removing and installing a core switch blade (CR8)
This section describes how to remove and install a core switch blade. Each
SAN768B has two core switch blades: one in slot 5 and one in slot 8. Note that the
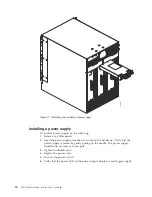
blade in Figure 34 on page 83 is shown with EMI plugs installed.
Time and items required
The installation procedure for the core switch blade takes approximately 30
minutes. The following items are required for the core switch blade installation:
v
ESD grounding strap
v
Phillips #2 screwdriver
v
Replacement core switch blade (CR8).
Verifying the necessity of installation
Confirm that you need to replace the core switch blade before continuing. The
following events might indicate that a core switch blade is faulty:
v
The status LED on the core switch blade is lit amber, or the power LED is not
lit.
v
The
slotShow
command does not show that the core switch blade is enabled.
v
The
haShow
command indicates an error.
v
Any of the following messages display in the error log:
– “Slot unknown” message relating to a core switch blade slot
– core switch blade errors or I
2
C timeouts
– FRU: FRU_FAULTY messages for a core switch blade
– Configuration loader messages or “Sys PCI config” messages
– Generic system driver messages (“FABSYS”)
– Platform system driver messages (“Platform”)
– Error messages that indicate a problem with a core switch blade
– Function fail messages for the core switch blade master
For more information about error messages, refer to the
Fabric OS Message
Reference
.
Removing a core switch blade (CR8)
The SAN768B continues to operate while a core switch blade is being replaced.
Attention:
Follow ESD precautions (“ESD precautions” on page xxi).
Note:
The CR8 blade is compatible only with the SAN768B
To remove a CR blade, complete these steps:
1.
Remove the chassis door (see “Removing and installing the chassis door” on
page 69).
82
SAN768B Installation, Service, and User Guide
Summary of Contents for SAN768B
Page 2: ......
Page 8: ...vi SAN768B Installation Service and User Guide ...
Page 12: ...x SAN768B Installation Service and User Guide ...
Page 14: ...xii SAN768B Installation Service and User Guide ...
Page 16: ...xiv SAN768B Installation Service and User Guide ...
Page 28: ...xxvi SAN768B Installation Service and User Guide ...
Page 32: ...xxx SAN768B Installation Service and User Guide ...
Page 42: ...10 SAN768B Installation Service and User Guide ...
Page 62: ...30 SAN768B Installation Service and User Guide ...
Page 78: ...46 SAN768B Installation Service and User Guide ...
Page 100: ...68 SAN768B Installation Service and User Guide ...
Page 154: ...122 SAN768B Installation Service and User Guide ...
Page 178: ...146 SAN768B Installation Service and User Guide ...
Page 184: ...152 SAN768B Installation Service and User Guide ...
Page 202: ...170 SAN768B Installation Service and User Guide ...
Page 207: ......
Page 208: ... Part Number 45W8666 Printed in USA GA32 0574 05 1P P N 45W8666 ...


