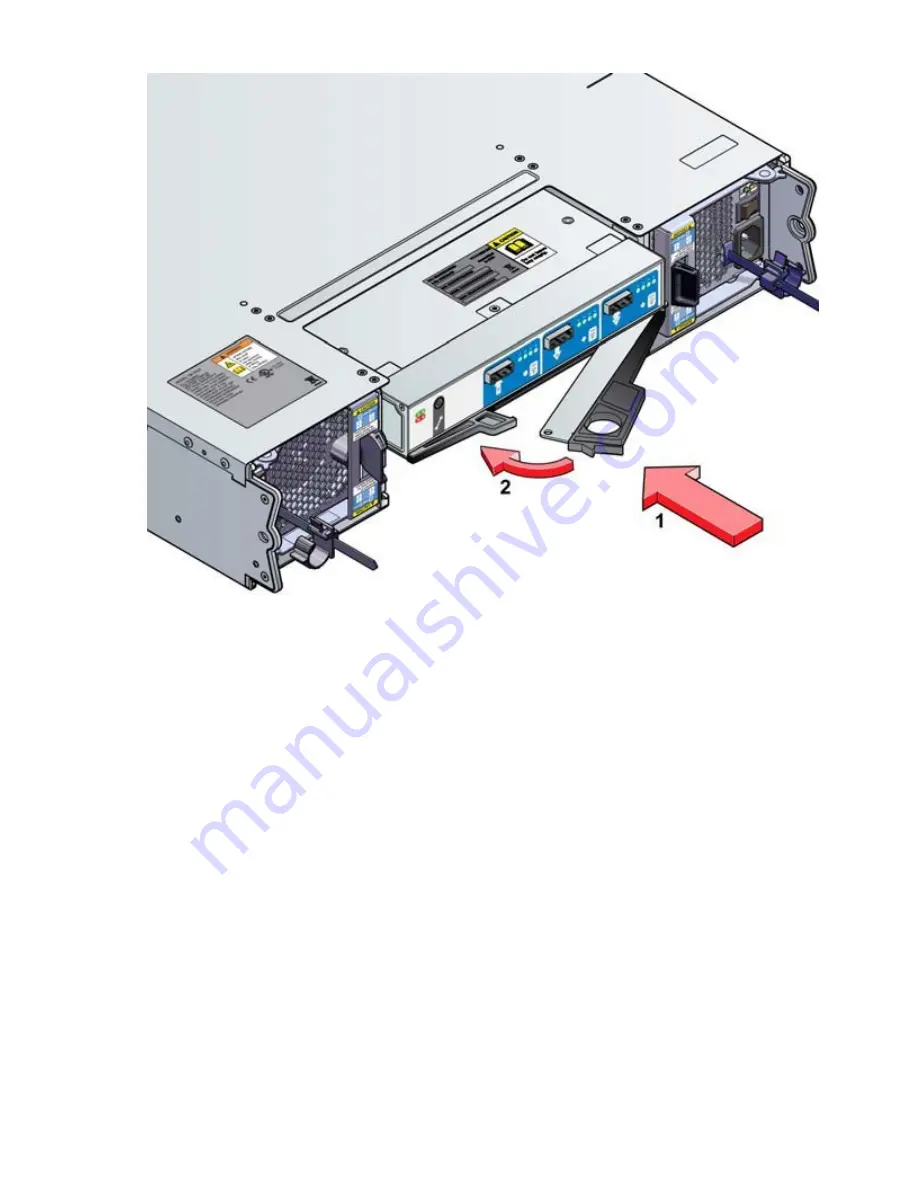
Figure 33. Installing an I/O Module
Note: This picture is shown for illustrative purposes only. The unit you are provided may be different
than the one pictured and represents the task of replacingthe module. The top module is populated in
the small disk enclosure.
3. Set the module in position by manually closing the latches. A click should be heard as the latches
engage.
Note: The I/O module may take up to one minute to re-initialize after the cables are inserted.
Spare parts and ancillary items
The following replaceable parts are available for the IBM COS Small Disk Enclosure system:
• Chassis (including midplane and motherboard)
• I/O module
• AC power cooling module
• Power cords C13-C14
• 19 inch rack mounting rail kit
42 IBM Cloud Object Storage System: IBM Small J10 Disk Enclosure Manual
Summary of Contents for Small J10 Series
Page 8: ...viii...
Page 10: ...x IBM Cloud Object Storage System IBM Small J10 Disk Enclosure Manual...
Page 15: ...European Community and Morocco Notice Germany Notice Safety and environmental notices xv...
Page 20: ...xx IBM Cloud Object Storage System IBM Small J10 Disk Enclosure Manual...
Page 33: ...Figure 13 Anti tamper Lock 3 5 Drive Chapter 2 System overview 13...
Page 34: ...14 IBM Cloud Object Storage System IBM Small J10 Disk Enclosure Manual...
Page 40: ...20 IBM Cloud Object Storage System IBM Small J10 Disk Enclosure Manual...
Page 44: ...24 IBM Cloud Object Storage System IBM Small J10 Disk Enclosure Manual...
Page 52: ...32 IBM Cloud Object Storage System IBM Small J10 Disk Enclosure Manual...
Page 68: ...48 IBM Cloud Object Storage System IBM Small J10 Disk Enclosure Manual...
Page 69: ......
Page 70: ...IBM...


