Prerequisites
Before you configure your SiteProtector SP3001 appliance, you must have completed the following tasks:
v
Ensure that you meet the requirements for configuring the SiteProtector SP3001 appliance.
See “Requirements and considerations” on page 7.
v
Gather the initial configuration items, including cables and network information.
See “Pre-configuration checklists” on page 8.
Checklist
Use the checklist in the following table as a guide to help you perform the tasks in this chapter. The
check boxes are provided as a convenience to help you check off the tasks as you complete them:
U
Task
Description
h
1
Connect the cables and start the SiteProtector SP3001 appliance.
See Chapter 3, “Connecting and configuring the SiteProtector SP3001 appliance,” on page 11.
h
2
Specify network information, such as IP addresses, gateways, and subnet masks.
See “Configuring the SiteProtector SP3001 appliance to communicate with the network” on page
14.
h
3
Download, install, and point the SiteProtector Console to the SiteProtector SP3001 appliance.
See “Installing and starting the SiteProtector Console” on page 15.
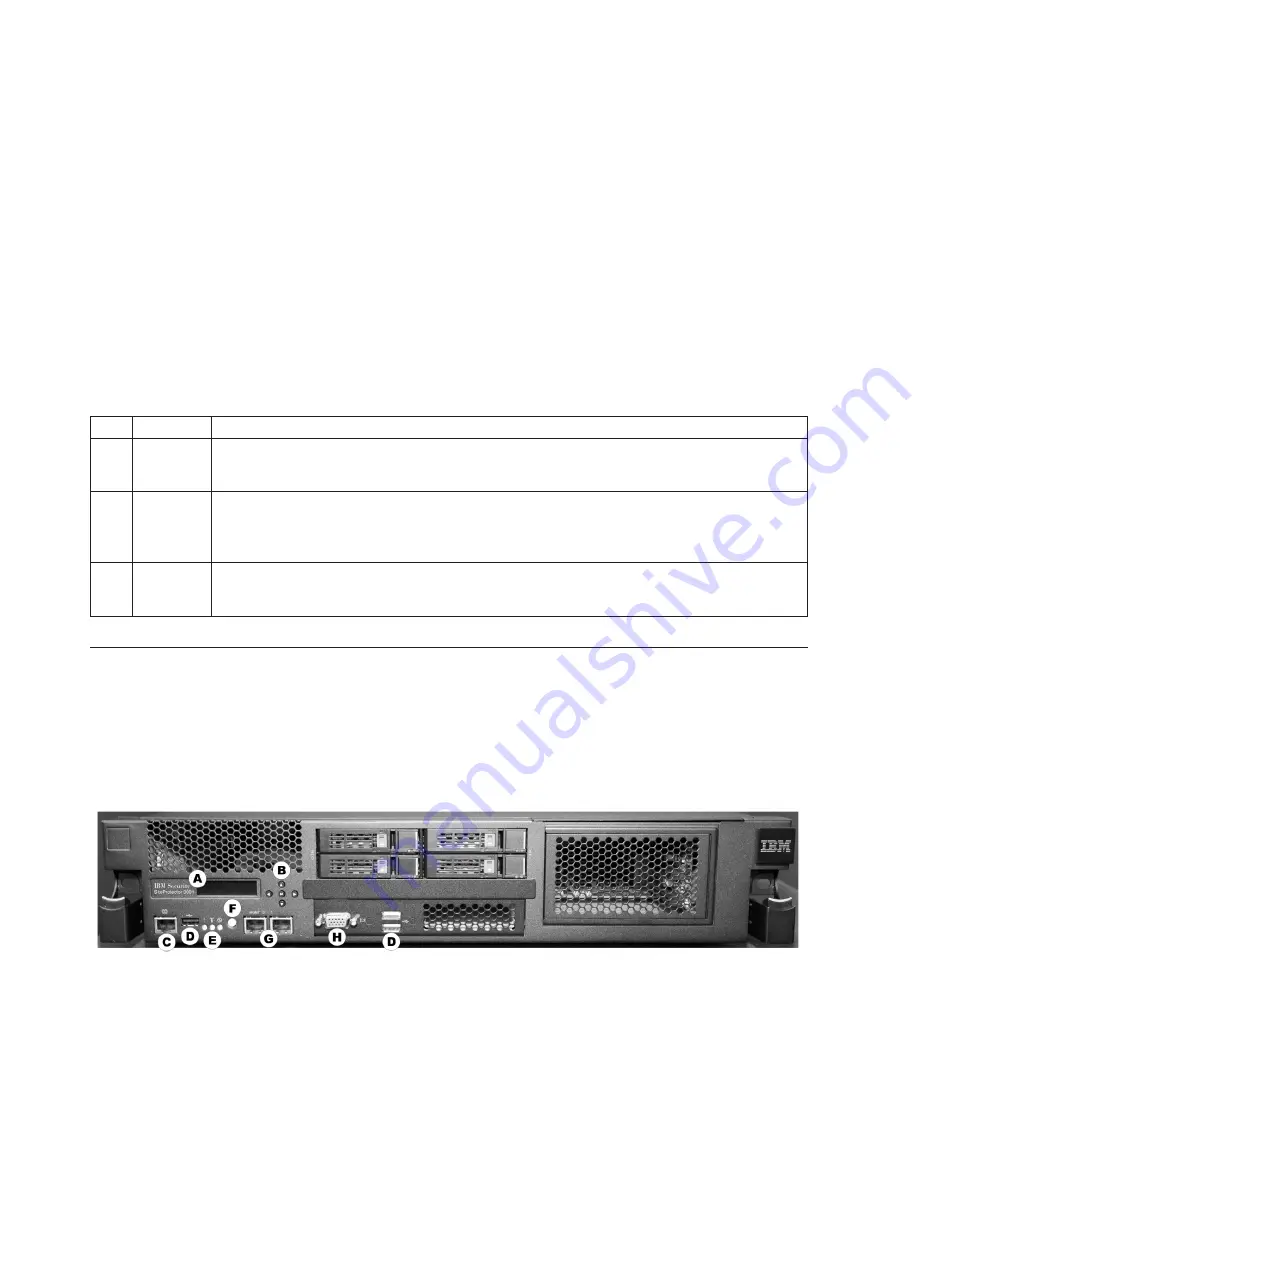
The SiteProtector SP3001 appliance front panel
The SiteProtector SP3001 appliance front panel consists of multiple features.
SiteProtector SP3001 appliance front panel
The following figure shows the SiteProtector SP3001 appliance front panel:
Front panel features
The following list describes the front panel features.
v
A: LCD panel -
use for initial network configuration, restarting or shutting down the appliance,
viewing the serial number of the appliance, and setting the appliance PIN.
v
B: Arrow and enter keys -
use to select menu choices and interact with the appliance using the LCD
panel.
v
C: Serial console RJ-45 port -
use for optional terminal-based setup, diagnostic testing, and recovery.
v
D: USB ports (3) -
for keyboard, mouse, and external DVD-ROM to retrieve data and install firmware.
Figure 1. SP3001 appliance front panel
12
SiteProtector System: SP3001 Hardware Configuration
Summary of Contents for SP3001
Page 4: ...iv SiteProtector System SP3001 Hardware Configuration ...
Page 12: ...6 SiteProtector System SP3001 Hardware Configuration ...
Page 16: ...10 SiteProtector System SP3001 Hardware Configuration ...
Page 26: ...20 SiteProtector System SP3001 Hardware Configuration ...
Page 30: ...7 Close the Remote Desktop session 24 SiteProtector System SP3001 Hardware Configuration ...
Page 32: ...26 SiteProtector System SP3001 Hardware Configuration ...
Page 42: ...36 SiteProtector System SP3001 Hardware Configuration ...
Page 46: ...40 SiteProtector System SP3001 Hardware Configuration ...
Page 48: ...42 SiteProtector System SP3001 Hardware Configuration ...
Page 49: ......
Page 50: ... Printed in USA ...


