2.
Remove
the
back
cover
as
described
at
“Rear
cover
–
removing
and
replacing”
on
page
61.
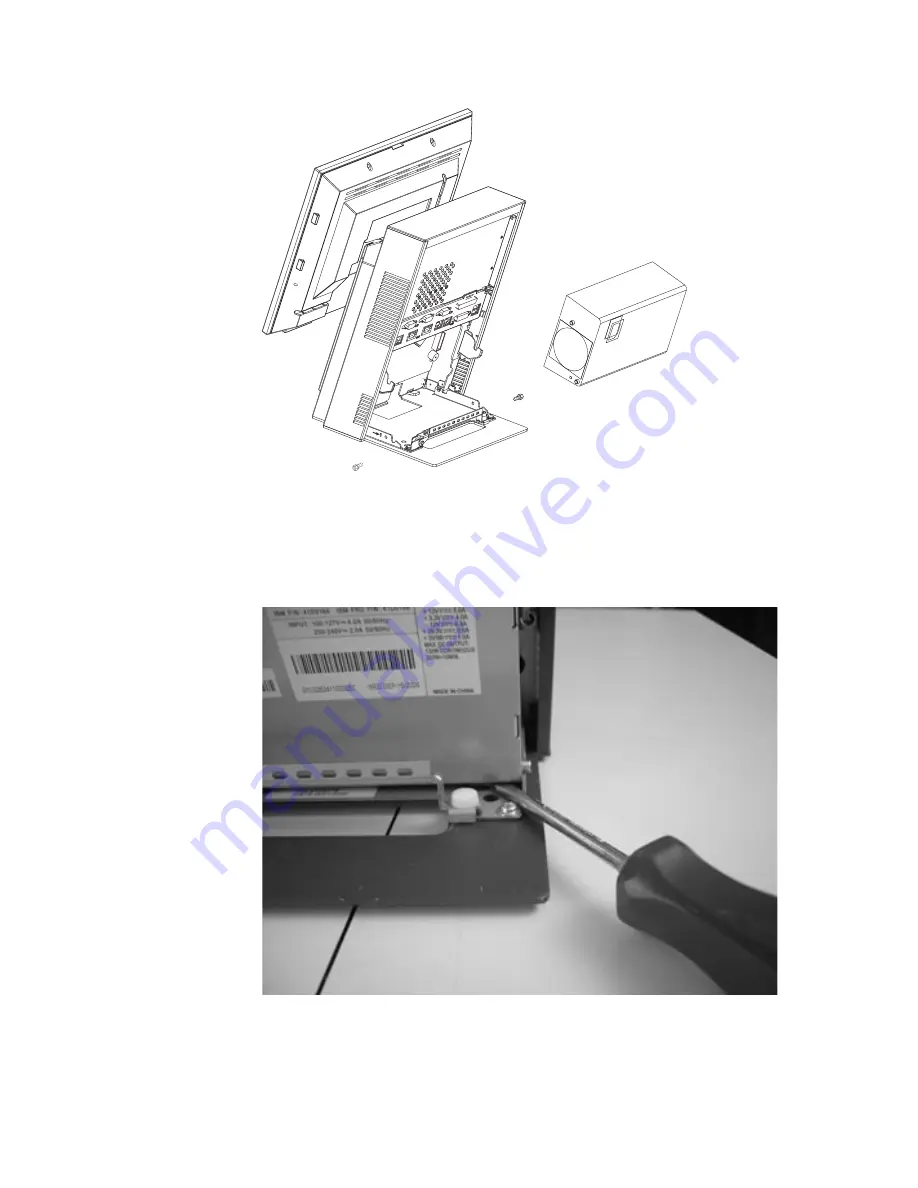
3.
See
Figure
54.
Remove
the
two
screws
located
at
the
base
of
the
power
supply.
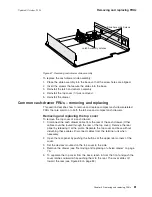
4.
If
necessary,
use
a
flat-head
screwdriver
as
a
lever
to
lift
upward
on
either
side
of
the
power
supply.
5.
Then,
lift
the
power
supply
upward
and
outward
to
remove.
Figure
54.
Power
supply
remove/replace
Figure
55.
Placement
of
the
screwdriver
to
remove
the
power
supply
Removing
and
replacing
FRUs
Updated
October,
2008
Chapter
5.
Removing
and
replacing
FRUs
69
Summary of Contents for SurePOS 514
Page 2: ......
Page 8: ...Updated October 2008 vi SurePOS 500 Model 514 ...
Page 12: ...Updated October 2008 x SurePOS 500 Model 514 ...
Page 16: ...Updated October 2008 xiv SurePOS 500 Model 514 ...
Page 20: ...Figure 2 Serial number location Updated October 2008 4 SurePOS 500 Model 514 ...
Page 32: ...Installing the IBM SurePOS 500 Model 514 Updated October 2008 16 SurePOS 500 Model 514 ...
Page 64: ...Installing additional peripheral devices Updated October 2008 48 SurePOS 500 Model 514 ...
Page 68: ...Updated October 2008 52 SurePOS 500 Model 514 ...
Page 102: ...Updated October 2008 86 SurePOS 500 Model 514 ...
Page 138: ...Updated October 2008 122 SurePOS 500 Model 514 ...
Page 143: ...IBM IBM GA27 4004 GA27 4004 Updated October 2008 Appendix D Safety information 127 ...
Page 152: ...Updated October 2008 136 SurePOS 500 Model 514 ...
Page 156: ...Updated October 2008 140 SurePOS 500 Model 514 ...
Page 158: ...Updated October 2008 142 SurePOS 500 Model 514 ...
Page 161: ......


