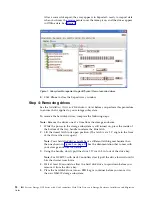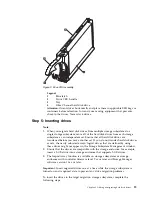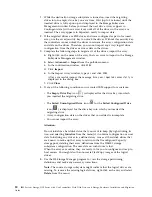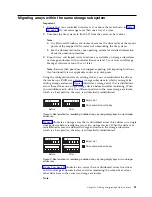
connecting the ESM port of the top ESM in the last storage enclosure on the
existing drive loop/channel A to the ESM port of the top ESM in the new
storage enclosure.
2.
Ensure that there are not any drives fully inserted in the drive bays; then, turn
on the power to the added storage enclosure.
3.
Wait a few seconds. Check the drive port LEDs to ensure that the link to the
new storage enclosure is up and optimal and that there are no link problems in
the modified drive loop A. Ensure that the SAS link service (SAS port) LEDs
are not lit or intermittently lit. Using the DS Storage Manager Client Subsystem
Management window, verify that the storage enclosure is added and displayed
in the Logical/Physical view of the window. To return the drive loop/channel
to optimal state, see “Returning the drive/loop channel to optimal state” on
page 33.
4.
In the drive loop/channel that is connected to controller B, move the
connection from controller B drive port to the ESM port in the bottom ESM of
the last storage enclosure in the existing drive loop/channel B to the ESM port
of the bottom ESM in the new storage enclosure. Controller B drive port is now
connected to the ESM port of the new storage enclosure.
5.
Wait a few seconds. Check the drive port LEDs to ensure that the link to the
new storage enclosure is up and optimal and that there are no link problems in
the modified drive loop B. Ensure that the SAS link service (SAS port) LEDs
are not lit or intermittently lit. Using the DS Storage Manager Client Subsystem
Management window, verify that the storage enclosure is added and displayed
in the Logical/Physical view of the window. To return the drive loop/channel
to optimal state, see “Returning the drive/loop channel to optimal state” on
page 33. The existing storage enclosures are shown with
Drive enclosure lost
redundancy
path errors until you establish the cabling connection described in
the next step.
6.
In drive loop B, cable the ESM port in the bottom ESM of the new storage
enclosure to the ESM port in the bottom ESM of the last storage enclosure in
drive loop B.
7.
Wait a few seconds. Check the drive port LEDs to ensure that the link to the
new storage enclosure is up and optimal and that there are no link problems in
the modified drive loop B. Ensure that the SAS link service (SAS port) LEDs
are not lit or intermittently lit. Using the DS Storage Manager Client Subsystem
Management window, verify that the storage enclosure is added and displayed
in the Logical/Physical view of the window. To return the drive loop/channel
to optimal state, see “Returning the drive/loop channel to optimal state” on
page 33. The existing storage enclosures are shown with
Drive enclosure lost
redundancy
path errors until you establish the cabling connection described in
the earlier step.
8.
The DS Storage Manager Client Subsystem Management window displays a
new storage enclosure with no drives in the configuration.
Connecting storage enclosures at the end (bottom) of a SAS
drive cable loop scheme in a DCS3700 and DCS3860 storage
subsystems with Gen2 controllers configuration
For DCS3700 and DCS3860 storage subsystem with Gen2 controllers configurations
with an initial drive loop/channel cabling scheme, Table 8 on page 33 shows how
you cable the ports. A port enclosed by () indicates that you remove the connection
as part of the step.
32
IBM System Storage DCS Series with Gen2 controllers Hard Disk Drive and Storage Enclosure Installation and Migration
Guide
Summary of Contents for System Storage DCS Series
Page 89: ......

