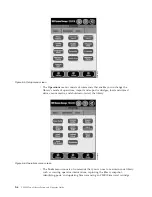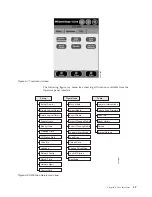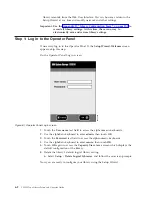
Step
2:
Access
the
Setup
Wizard
Important:
If
at
any
point
you
touch
Cancel
while
in
the
Setup
Wizard,
the
Setup
Wizard:
Cancel
screen
appears.
The
screen
is
dynamically
updated
to
indicate
what
the
current
configuration
of
the
library
is,
including
any
settings
that
have
been
applied
thus
far
in
the
Wizard.
Touching
Cancel
on
the
Cancel
screen
navigates
you
back
to
the
last
accessed
screen
in
the
Setup
Wizard.
Touching
OK
applies
the
current
settings
and
returns
you
to
the
Capacity
View
screen.
1.
If
the
Setup
Wizard:
Welcome
screen
does
not
display
automatically,
select
Setup
→
Setup
Wizard
to
display
the
Welcome
screen.
2.
After
reading
the
information
on
the
screen,
touch
Begin
.
Step
3:
Ensure
that
all
Hardware
is
Installed
1.
Read
the
Hardware
Installation
screen.
2.
Ensure
that
all
tape
drives
and
the
customer-supplied
Ethernet
cable
are
installed.
3.
If
the
drives
and
Ethernet
cable
are
installed,
touch
Next
to
continue.
Step
4:
Set
up
the
Library
Network
Configuration
Read
before
beginning
this
step.
Important:
You
will
not
be
able
to
access
the
library
remotely
until
the
network
settings
are
applied.
Library
firmware
can
only
be
updated
using
the
remote
Web
User
Interface.
Touch
No
if
you
do
not
know
your
network
settings
and
to
continue
configuring
your
library.
To
set
up
the
network
configuration:
1.
Determine
your
network
settings
(IP
Address,
Default
Gateway,
and
Subnet
Mask)
and
record
this
information
on
the
2.
Touch
Yes
to
begin
configuring
the
library
network.
3.
Choose
a
name
for
your
library.
4.
Touch
the
Library
Name
text
box
to
access
the
alphanumeric
keyboards.
5.
Using
the
alphanumeric
keyboards,
enter
the
name
into
the
Library
Name
field.
Note:
The
library
name
can
be
a
maximum
of
12
alphanumeric
characters.
Any
letters
used
in
the
library
name
must
be
lowercase.
6.
Select
Dynamic
Host
Configuration
Protocol
(DHCP)
to
have
the
library
network
setting
automatically
configured.
To
configure
your
network
manually,
enter
the
following
network
settings:
v
IP
Address
-
the
Internet
protocol
(IP)
address
of
the
library
v
Default
Gateway
-
the
IP
address
of
the
default
gateway
for
your
portion
of
the
Ethernet
network
Note:
Do
not
use
″
0
″
in
the
last
octet
of
the
address
because
it
will
reset
the
Gateway
to
the
original
address
set
at
the
factory.
Chapter
6.
Configuring
the
Library
6-3
Summary of Contents for System Storage TS3310
Page 1: ...IBM System Storage TS3310 Tape Library Setup and Operator Guide GA32 0477 00...
Page 2: ......
Page 3: ...IBM System Storage TS3310 Tape Library Setup and Operator Guide GA32 0477 00...
Page 6: ...iv TS3310 Tape Library Setup and Operator Guide...
Page 12: ...x TS3310 Tape Library Setup and Operator Guide...
Page 14: ...xii TS3310 Tape Library Setup and Operator Guide...
Page 22: ...xx TS3310 Tape Library Setup and Operator Guide...
Page 24: ...xxii TS3310 Tape Library Setup and Operator Guide...
Page 42: ...1 18 TS3310 Tape Library Setup and Operator Guide...
Page 54: ...2 12 TS3310 Tape Library Setup and Operator Guide...
Page 63: ...a66ug019 Figure 3 6 Rails installed in rack front view Chapter 3 Installing the Library 3 9...
Page 78: ...3 24 TS3310 Tape Library Setup and Operator Guide...
Page 86: ...4 8 TS3310 Tape Library Setup and Operator Guide...
Page 98: ...5 12 TS3310 Tape Library Setup and Operator Guide...
Page 106: ...6 8 TS3310 Tape Library Setup and Operator Guide...
Page 220: ...11 22 TS3310 Tape Library Setup and Operator Guide...
Page 226: ...12 6 TS3310 Tape Library Setup and Operator Guide...
Page 236: ...A 10 TS3310 Tape Library Setup and Operator Guide...
Page 240: ...B 4 TS3310 Tape Library Setup and Operator Guide...
Page 266: ...F 8 TS3310 Tape Library Setup and Operator Guide...
Page 273: ......
Page 274: ...Part Number 95P2271 Printed in USA GA32 0477 00 1P P N 95P2271...

