Solving power problems
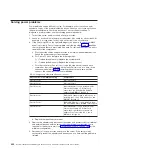
Power problems can be difficult to solve. For example, a short circuit can exist
anywhere on any of the power distribution buses. Usually, a short circuit will cause
the power subsystem to shut down because of an overcurrent condition. To
diagnose a power problem, use the following general procedure:
1. Turn off the server and disconnect all ac power cords.
2. Check for loose cables in the power subsystem. Also check for short circuits, for
example, if a loose screw is causing a short circuit on a circuit board.
3. If the check log LED on the light path diagnostics panel is lit, check the IMM2
event log for faulty Pwr rail and complete the following steps. Table 5 identifies
the components that are associated with each Pwr rail and the order in which to
troubleshoot the components.
a. Disconnect the cables and power cords to all internal and external devices.
Leave the power-supply cords connected.
b. For Pwr rail 1 error, complete the following steps:
1) (Trained technician only) Replace the system board.
2) (Trained technician only) Replace the microprocessor.
c. For other rail errors (Pwr rail 1 error, see the step above), remove each
component that is associated with the faulty Pwr rail, one at a time, in the
sequence indicated in Table 5, restarting the server each time, until the
cause of the overcurrent condition is identified.
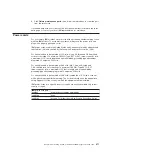
Table 5. Components associated with power rail error
Pwr rail error in the IMM2 event log
Components
Pwr rail 1 error
Microprocessor 1
Pwr rail 2 error
Microprocessor 2
Pwr rail 3 error
Optional adapter if one is installed in PCI
riser-card assembly 1, PCI riser-card
assembly 1, the ServeRAID SAS/SATA
adapter, and DIMMs 1 through 6
Pwr rail 4 error
Optional PCI adapter power cable if one is
installed, fan 1, fan 2, hard disk drives, and
DIMMs 7 through 12
Pwr rail 5 error
Optional DVD drive if one is installed, fan 3,
fan 4, hard disk drives, DIMMs 13 through 18
Pwr rail 6 error
Optional adapter if one is installed in PCI
riser-card assembly 2, PCI riser-card
assembly 2, optional dual-port network
adapter if one is installed, fan 5, fan 6,
DIMMs 19 through 24
d. Replace the identified component.
4. Remove the adapters and disconnect the cables and power cords to all internal
and external devices until the server is at the minimum configuration that is
required for the server to start (see “Power-supply LEDs” on page 188 for the
minimum configuration).
5. Reconnect all ac power cords and turn on the server. If the server starts
successfully, reseat the adapters and devices one at a time until the problem is
isolated.
256
System x iDataPlex dx360 M4 Types 7912 and 7913: Problem Determination and Service Guide
Summary of Contents for System x iDataPlex dx360 M4 7912
Page 1: ...System x iDataPlex dx360 M4 Types 7912 and 7913 Problem Determination and Service Guide...
Page 2: ......
Page 3: ...System x iDataPlex dx360 M4 Types 7912 and 7913 Problem Determination and Service Guide...
Page 22: ...4 System x iDataPlex dx360 M4 Types 7912 and 7913 Problem Determination and Service Guide...
Page 278: ...260 System x iDataPlex dx360 M4 Types 7912 and 7913 Problem Determination and Service Guide...
Page 292: ...274 System x iDataPlex dx360 M4 Types 7912 and 7913 Problem Determination and Service Guide...
Page 392: ...374 System x iDataPlex dx360 M4 Types 7912 and 7913 Problem Determination and Service Guide...
Page 399: ......
Page 400: ...Part Number 46W8218 Printed in USA 1P P N 46W8218...

