1. Read the safety information that begins on page vii and “Installation guidelines”
2. Turn off the server and all attached devices; then, disconnect all power cords
and external cables.
3. Carefully turn the server on its side so that it is lying flat, with the cover facing
up.
Attention:
Do not allow the server to fall over.
4. Remove the side cover (see “Removing the side cover” on page 25).
5. Remove the air duct.
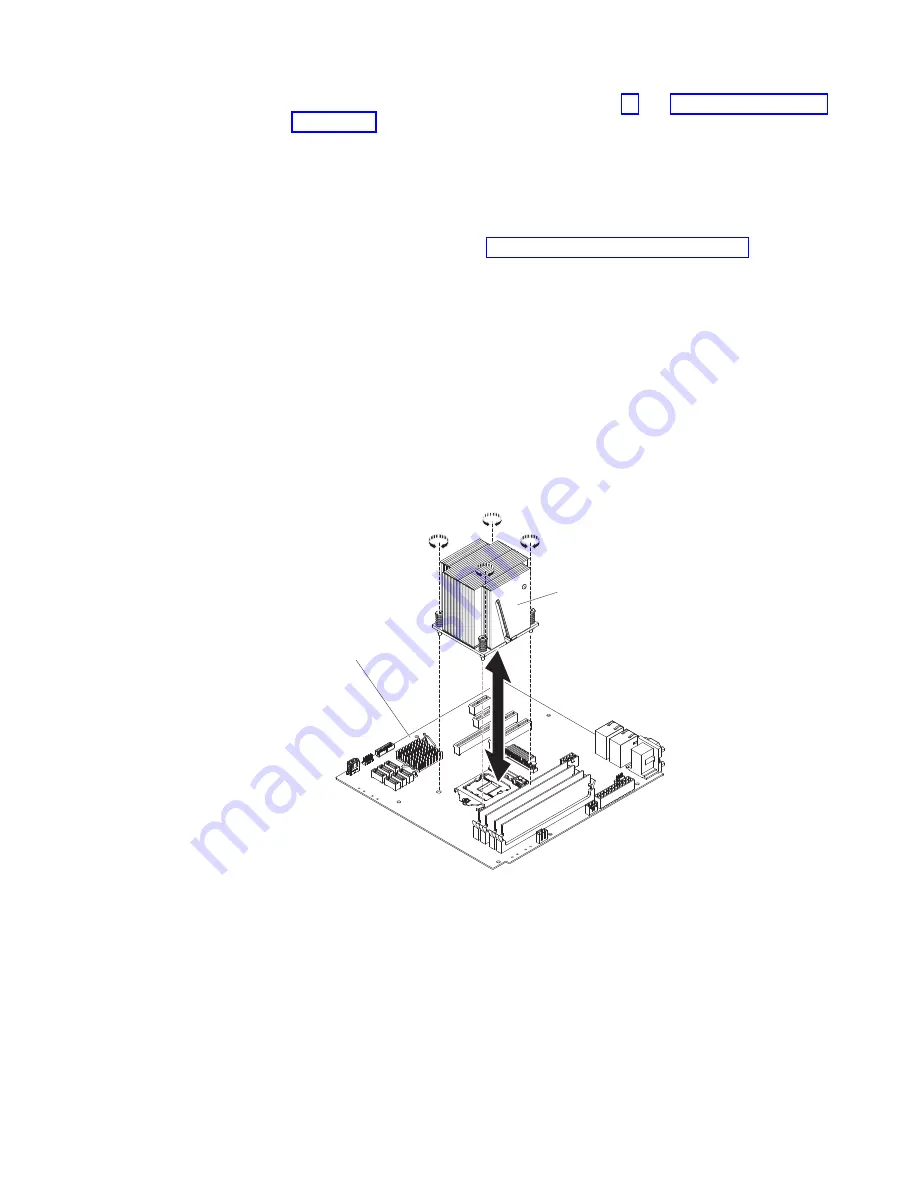
6. Remove the heat sink from the microprocessor:
Attention:
The heat sink may become very hot during normal operation.
Allow time for the heat sink to cool down before you touch it.
a. Loosen the screws and alternate among the screws until they break the
seal with the microprocessor.
b. Press firmly on the captive screws and loosen them with a screwdriver.
c. Use your fingers to gently pull the heat sink from the microprocessor.
Important:
Be careful when you handle the microprocessor and heat sink.
If the microprocessor and heat sink will be reused, do not contaminate the
thermal material between them.
Heat sink
System board
Attention:
The microprocessor retention latch is spring-loaded when the
microprocessor is in place. Releasing the latch too quickly or allowing it to
spring upward can damage the microprocessor and surrounding components.
7. Release the microprocessor retention latch by pressing down on the end,
moving it to the side, and slowly releasing it to the open (up) position.
Chapter 2. Installing optional devices
27
Summary of Contents for System x3100 M4
Page 1: ...System x3100 M4 Type 2582 Installation and User s Guide...
Page 2: ......
Page 3: ...System x3100 M4 Type 2582 Installation and User s Guide...
Page 8: ...vi System x3100 M4 Type 2582 Installation and User s Guide...
Page 18: ...xvi System x3100 M4 Type 2582 Installation and User s Guide...
Page 90: ...72 System x3100 M4 Type 2582 Installation and User s Guide...
Page 100: ...82 System x3100 M4 Type 2582 Installation and User s Guide...
Page 106: ...88 System x3100 M4 Type 2582 Installation and User s Guide...
Page 107: ......
Page 108: ...Part Number 00D3167 Printed in USA 1P P N 00D3167...


