CAUTION:
Never remove the cover on a power supply or any part that has the following
label attached.
Hazardous voltage, current, and energy levels are present inside any
component that has this label attached. There are no serviceable parts inside
these components. If you suspect a problem with one of these parts, contact
a service technician.
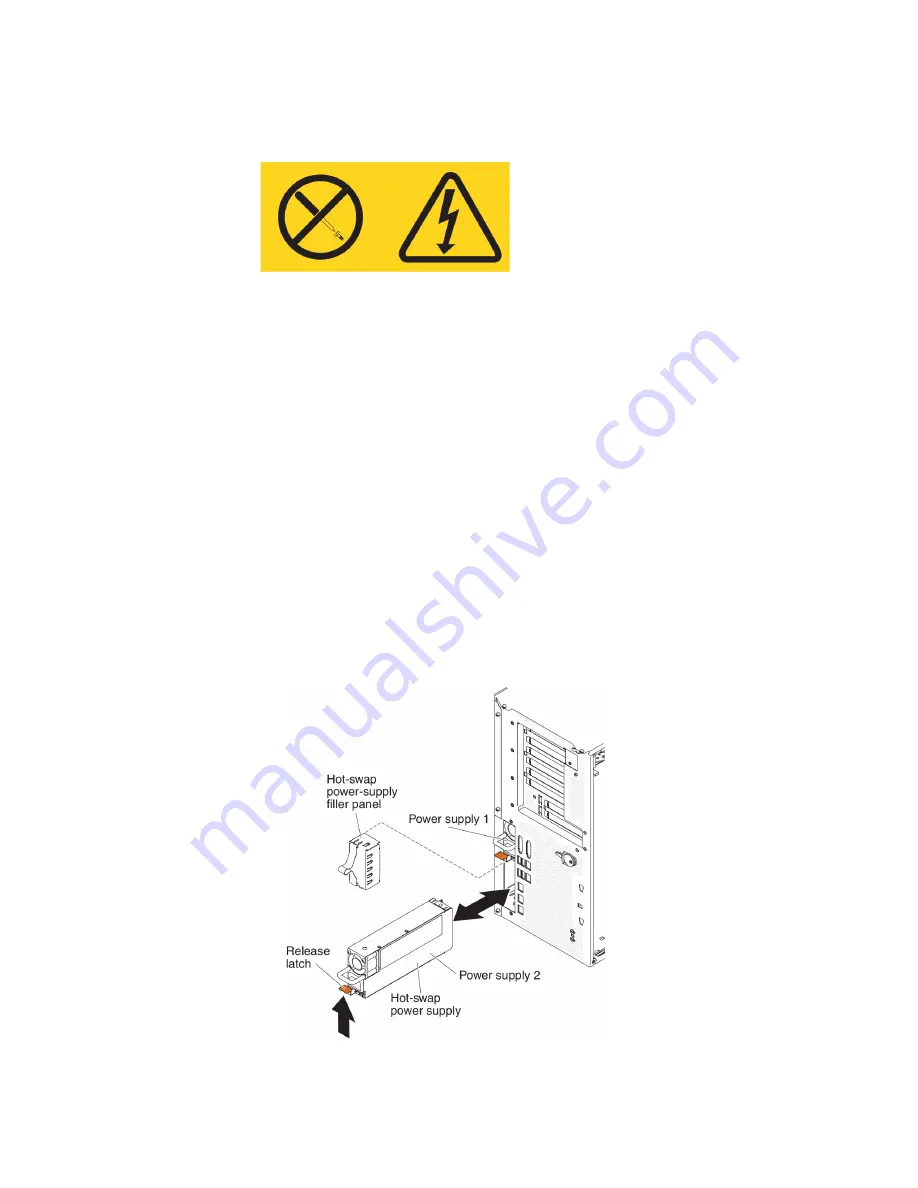
To install a hot-swap ac power supply, complete the following steps:
Note:
You must install the fan cage assembly before removing or installing the
power supply.
1. Read the safety information that begins vii and “Installation guidelines” on page
37.
Attention:
Static electricity that is released to internal server components
when the server is powered-on might cause the server to halt, which might
result in the loss of data. To avoid this potential problem, always use an
electrostatic-discharge wrist strap or other grounding system when you work
inside the server with the power on.
2. Touch the static-protective package that contains the hot-swap power supply to
any unpainted metal surface on the server; then, remove the power supply from
the package and place it on a static-protective surface.
3. Remove the power-supply filler panel from the power bay, if one is installed.
4. Install the power supply and push it in until it locks into place.
Chapter 2. Installing optional devices
107
Summary of Contents for System x3500 M4
Page 1: ...IBM System x3500 M4 Type 7383 Installation and User s Guide ...
Page 2: ......
Page 3: ...IBM System x3500 M4 Type 7383 Installation and User s Guide ...
Page 8: ...vi IBM System x3500 M4 Type 7383 Installation and User s Guide ...
Page 18: ...xvi IBM System x3500 M4 Type 7383 Installation and User s Guide ...
Page 129: ...Chapter 2 Installing optional devices 111 ...
Page 134: ...116 IBM System x3500 M4 Type 7383 Installation and User s Guide ...
Page 154: ...136 IBM System x3500 M4 Type 7383 Installation and User s Guide ...
Page 162: ...144 IBM System x3500 M4 Type 7383 Installation and User s Guide ...
Page 168: ...150 IBM System x3500 M4 Type 7383 Installation and User s Guide ...
Page 169: ......
Page 170: ... Part Number 00V9727 Printed in USA 1P P N 00V9727 ...


