Replacing an IBM ServeRAID M1015 SAS/SATA Controller
Note:
1.
You can only use 2.5-inch hot-swap drives with this adapter.
2.
When the IBM 4x4 Drive Backplane ServeRAID Expansion adapter is installed
in the server, this adapter installs in slot 2 on the two-slot PCI riser card ( see
“PCI riser card with two slots” on page 26).
Some server models come with an IBM ServeRAID M1015 SAS/SATA Controller
installed. This adapter can be installed only in the PCI slots list in Table 15 on page
276. The IBM ServeRAID M1015 SAS/SATA adapter enables integrated RAID
levels 0, 1, and 10 capability on hot-swap drives. For configuration information, see
the ServeRAID documentation at http://www.ibm.com/systems/support/. To
install the adapter if your server model did not come with this adapter, complete
the following steps to install an IBM ServeRAID M1015 SAS/SATA Controller.
Attention:
Some cluster solutions require specific code levels or coordinated code
updates. If the device is part of a cluster solution, verify that the latest level of
code is supported for the cluster solution before you update the code.
1.
Read the safety information that begins on page “Safety” on page vii and
“Installation guidelines” on page 261.
2.
Touch the static-protective package that contains the new ServeRAID M1015
SAS/SATA adapter to any unpainted surface on the outside of the server;
then, grasp the adapter by the top edge or upper corners of the adapter and
remove it from the package.
3.
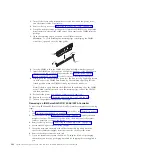
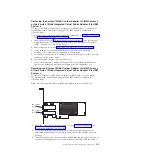
Align the ServeRAID M1015 SAS/SATA adapter so that the keys align
correctly with the connector on the riser-card assembly.
4.
Insert the SAS/SATA adapter into the connector on the riser-card until it is
firmly seated.
Attention:
Incomplete insertion might cause damage to the server or the
adapter.
5.
Reinstall the riser-card assembly onto the connector on the system board.
6.
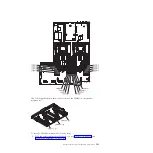
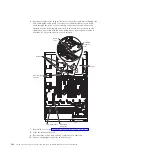
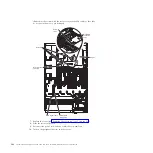
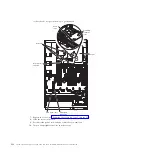
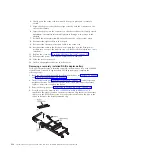
Reconnect the signal cables to the adapter. Be sure to route the signal cables
through the SAS cable guide and up and over the rear of the microprocessor
air baffle; then, through the loops on the scalability connector cover and then
to the adapter (see the following illustration). Use the cable ties (as shown in
the illustration) that come with the drive backplane to secure the SAS cables
so that they do not get in the way or get damaged.
Chapter 5. Removing and replacing components
303
Summary of Contents for System x3690 X5
Page 1: ...System x3690 X5 Types 7147 7148 7149 and 7192 Problem Determination and Service Guide...
Page 2: ......
Page 3: ...System x3690 X5 Types 7147 7148 7149 and 7192 Problem Determination and Service Guide...
Page 8: ...vi System x3690 X5 Types 7147 7148 7149 and 7192 Problem Determination and Service Guide...
Page 13: ...Safety statements Safety xi...
Page 22: ...4 System x3690 X5 Types 7147 7148 7149 and 7192 Problem Determination and Service Guide...
Page 266: ...248 System x3690 X5 Types 7147 7148 7149 and 7192 Problem Determination and Service Guide...
Page 278: ...260 System x3690 X5 Types 7147 7148 7149 and 7192 Problem Determination and Service Guide...
Page 386: ...368 System x3690 X5 Types 7147 7148 7149 and 7192 Problem Determination and Service Guide...
Page 407: ...1 2 Chapter 5 Removing and replacing components 389...
Page 444: ...426 System x3690 X5 Types 7147 7148 7149 and 7192 Problem Determination and Service Guide...
Page 454: ...436 System x3690 X5 Types 7147 7148 7149 and 7192 Problem Determination and Service Guide...
Page 461: ...weight of memory enclosure 28 Index 443...
Page 462: ...444 System x3690 X5 Types 7147 7148 7149 and 7192 Problem Determination and Service Guide...
Page 463: ......
Page 464: ...Part Number 47C8865 Printed in USA 1P P N 47C8865...


