

The
server
model
number
will
change
when
you
install
this
upgrade.
A
new
label
comes
with
the
option
kit
for
you
to
place
over
the
existing
label
on
the
server.
The
following
table
lists
the
kit
server
model
numbers
before
and
after
the
dual-core
upgrade
is
installed.
Table
4.
Model
numbers
before
the
dual-core
upgrade
is
installed
Model
numbers
after
the
dual-core
upgrade
is
installed
5Ax,
5Bx,
5Dx,
5Ex,
5Rx
ZZZ,
PPP
6Ax,
6Bx,
6Dx,
6Ex,
6Rx
333,
QQQ
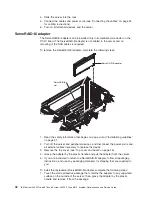
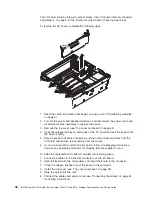
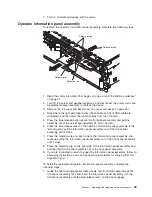
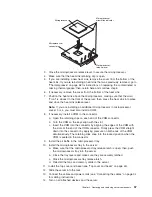
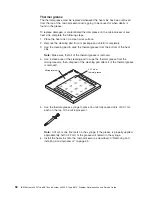
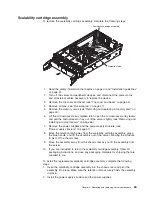
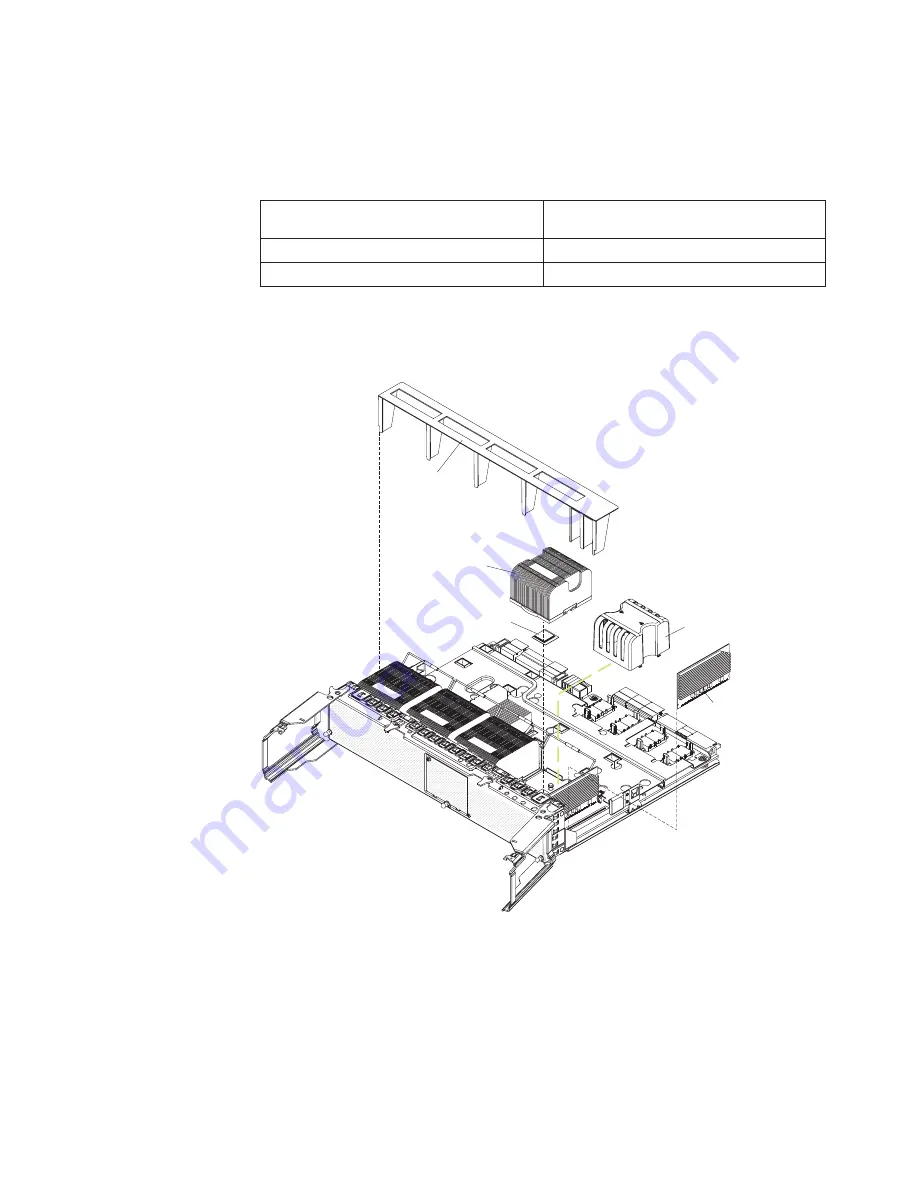
Removing
and
installing
a
microprocessor
To
remove
the
microprocessor
tray
and
a
microprocessor,
complete
the
following
steps:
FR
ONT
Heat sink
Microprocessor
Microprocessor
baffle
VRM 4
Air baffle
FR
ONT
FR
ONT
FR
ONT
1.
Read
the
safety
information
that
begins
on
page
vii
and
“Installation
guidelines”
on
page
31.
2.
Turn
off
the
server
and
peripheral
devices,
and
disconnect
the
power
cords
and
all
external
cables
necessary
to
replace
the
device.
3.
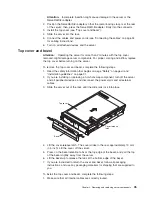
Remove
the
top
cover
and
bezel
(see
“Top
cover
and
bezel”
on
page
45).
4.
Remove
all
fans
(see
“Hot-swap
fan”
on
page
37).
5.
Remove
the
memory
cards
(see
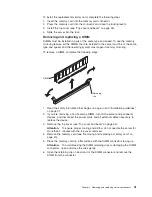
“Removing
and
replacing
a
memory
card”
on
page
40).
Chapter
4.
Removing
and
replacing
server
components
55
Summary of Contents for System x3950 Type 8878
Page 2: ......
Page 185: ...Japanese Voluntary Control Council for Interference VCCI statement Appendix B Notices 169...
Page 191: ......
Page 192: ...Part Number 31R1891 Printed in USA 1P P N 31R1891...


