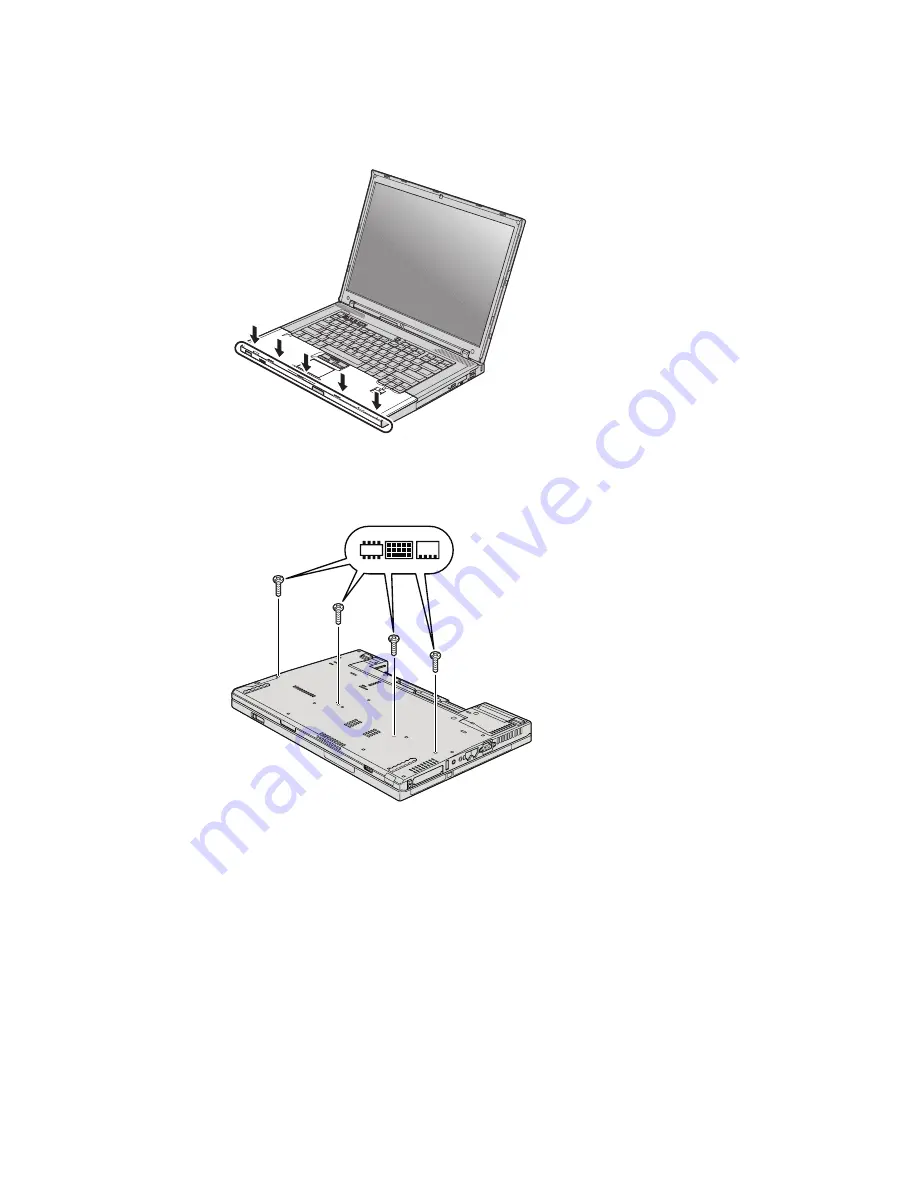
c.
Push the front side of the palm rest until it clicks into place.
d.
Close the computer display, and turn the computer over. Reinstall the
four screws for the palm rest.
12.
Reinstall the battery.
13.
Turn the computer over, and reconnect the AC adapter and the cables to
the computer.
To make sure that the SO-DIMM is installed correctly, do as follows:
1.
Turn on the computer.
2.
When the ThinkPad logo comes up, immediately press F1 to enter the
BIOS Setup Utility.
3.
The “Installed memory” item shows the total amount of memory installed
in your computer.
Chapter 5. Upgrading and replacing devices
53
Summary of Contents for ThinkPad T500 - LENOVO - Genuine Windows 7 Home Premium 64
Page 1: ...ThinkPad T500 and W500 Service and Troubleshooting Guide ...
Page 2: ......
Page 3: ...ThinkPad T500 and W500 Service and Troubleshooting Guide ...
Page 12: ...4 ThinkPad T500 and W500 Service and Troubleshooting Guide ...
Page 18: ...10 ThinkPad T500 and W500 Service and Troubleshooting Guide ...
Page 46: ...38 ThinkPad T500 and W500 Service and Troubleshooting Guide ...
Page 62: ...54 ThinkPad T500 and W500 Service and Troubleshooting Guide ...
Page 70: ...62 ThinkPad T500 and W500 Service and Troubleshooting Guide ...
Page 74: ...66 ThinkPad T500 and W500 Service and Troubleshooting Guide ...
Page 80: ...72 ThinkPad T500 and W500 Service and Troubleshooting Guide ...
Page 90: ...82 ThinkPad T500 and W500 Service and Troubleshooting Guide ...
Page 93: ......
Page 94: ...Part Number 44C9800 Printed in China 1P P N 44C9800 ...


