ThinkPad
Z61m
and
Z61e
computer
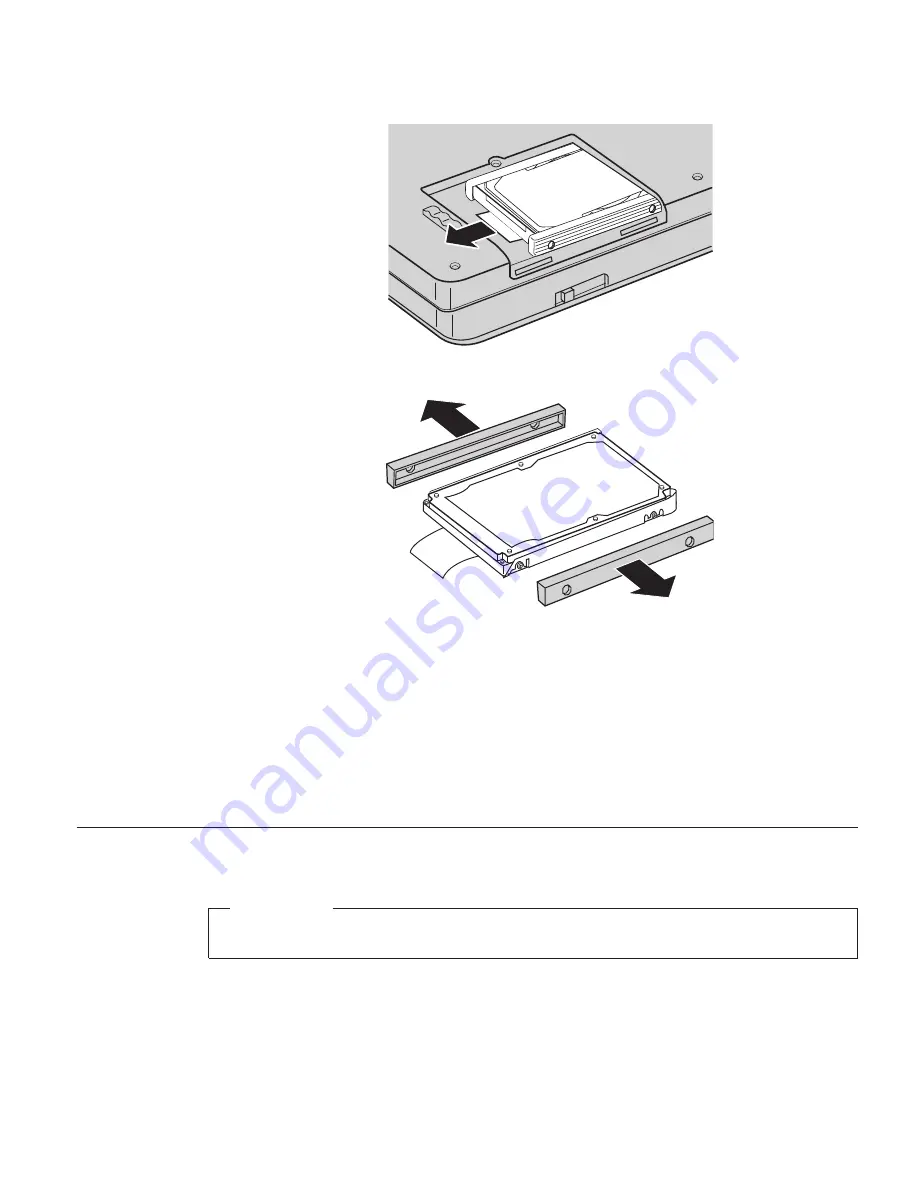
6.
Detach
the
side
rubber
rails
from
the
hard
disk
drive.
7.
Attach
the
side
rubber
rails
to
a
new
hard
disk
drive.
8.
Insert
the
hard
disk
drive
into
the
hard
disk
drive
bay;
then
firmly
install
it.
9.
Reinstall
the
cover
of
the
bay,
and
reinstall
the
screw.
10.
Reinstall
the
battery.
11.
Turn
the
computer
over
again.
Connect
the
ac
adapter
and
the
cables
to
the
computer.
Replacing
memory
Important
Read
Safety
and
Warranty
Guide
before
replacing
memory.
Increasing
memory
capacity
is
an
effective
way
to
make
programs
run
faster.
You
can
increase
the
amount
of
memory
in
your
computer
by
installing
a
double
data
rate
(DDR)
synchronous
dynamic
random
access
memory
Upgrading
the
hard
disk
drive
Chapter
7.
Upgrading
and
replacing
devices
49
Summary of Contents for ThinkPad Z61
Page 2: ......
Page 3: ...ThinkPad Z61 Series Service and Troubleshooting Guide ...
Page 8: ...Read first vi ThinkPad Z61 Series Service and Troubleshooting Guide ...
Page 50: ...42 ThinkPad Z61 Series Service and Troubleshooting Guide ...
Page 64: ...56 ThinkPad Z61 Series Service and Troubleshooting Guide ...
Page 72: ...64 ThinkPad Z61 Series Service and Troubleshooting Guide ...
Page 92: ...84 ThinkPad Z61 Series Service and Troubleshooting Guide ...
Page 94: ...86 ThinkPad Z61 Series Service and Troubleshooting Guide ...
Page 95: ......
Page 96: ...Part Number 41W3129 Printed in China 1P P N 41W3129 ...


