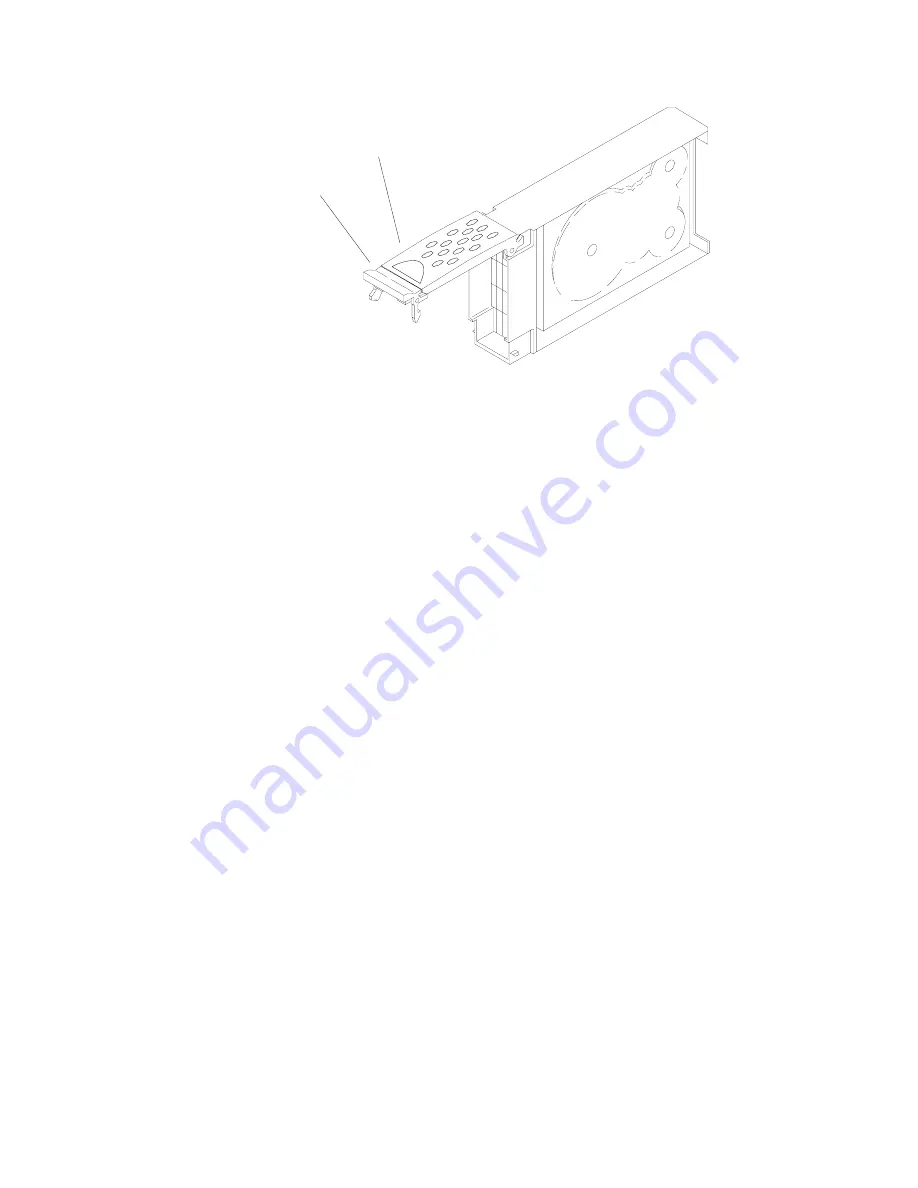
Tray handle
Tray latch
c.
Slide
the
drive
CRU
into
the
empty
bay
until
the
hinge
of
the
tray
handle
latches
beneath
the
expansion
enclosure
bezel.
d.
Push
the
tray
handle
down
until
it
latches
into
place.
Recommendation:
If
you
are
installing
more
than
two
drives,
IBM
recommends
that
you
install
the
drives
two
at
a
time,
as
follows:
1.
Insert
two
drives.
2.
Wait
five
to
eight
minutes
until
the
drives
are
recognized
and
displayed
in
the
Storage
Manager
Subsystem
Management
window.
3.
Then,
insert
the
next
two
drives.
Replacing
hot-swap
hard
disk
drives
Drive
problems
include
any
malfunctions
that
delay,
interrupt,
or
prevent
successful
I/O
activity
between
the
hosts
and
the
hard
disk
drives
in
the
expansion
enclosure.
This
includes
transmission
problems
between
the
host
controllers,
the
ESMs,
and
the
drives.
This
section
explains
how
to
replace
a
failed
hard
disk
drive.
Note:
If
you
want
to
remove
a
hard
disk
drive
that
is
not
in
a
failed
or
bypass
state,
always
use
the
Storage
Manager
client
program
either
to
place
the
drive
in
a
failed
state
or
to
place
the
array
that
is
associated
with
the
drive
(or
drives)
in
an
offline
state
before
you
remove
the
drive
from
the
expansion
enclosure.
Figure
44.
Drive
CRU
handle
76
IBM
TotalStorage
DS4000
EXP100
Storage
Expansion
Enclosure:
Installation,
User’s
and
Maintenance
Guide
Summary of Contents for TotalStorage EXP100
Page 2: ......
Page 187: ......
Page 188: ... Part Number 39M5947 Printed in USA GC26 7694 01 1P P N 39M5947 ...


