c.
In
the
Save
Profile
window,
select
or
enter
the
file
directory
and
file
name.
Click
Save
to
save
the
profile.
The
Save
Profile
window
closes.
Important:
Do
not
store
DS4000
profiles
in
the
same
location
as
the
logical
drives
that
are
defined
on
your
DS4000.
If
you
do,
and
the
logical
drives
fail
during
the
subsequent
migration,
you
will
lose
data.
d.
Click
Close
to
close
the
Storage
Subsystem
Profile
window.
4.
In
the
Physical
View
pane
of
the
Subsystem
Management
window,
click
the
Drive
Enclosure
Component
icon
(which
is
the
right
most
icon)
in
the
Drive
Enclosure
frame
of
the
EXP100
which
includes
the
ESM
that
you
want
to
replace.
The
Drive
Enclosure
Component
Information
window
opens.
5.
Click
the
ESM
icon
in
the
left
pane.
The
ESM
information
displays
in
the
right
pane
of
the
Drive
Enclosure
Component
Information
window.
6.
Locate
the
firmware
version
of
each
ESM
in
the
EXP100
expansion
enclosure.
7.
Use
to
verify
that
the
firmware
of
the
new
ESM
module
is
compatible
with
the
existing
ESM
in
the
EXP100
expansion
enclosure.
If
the
firmware
versions
are
not
compatible,
DO
NOT
proceed
further.
Contact
IBM
technical
support,
your
IBM
resellers
or
IBM
representatives
for
the
EXP100
CRU
that
is
compatible
with
the
ESM
firmware
of
the
existing
ESM
module.
If
the
firmware
versions
are
compatible,
continue
with
step
Important:
Do
not
mix
EXP100
R1
ESMs
and
EXP100
R2
ESMs
in
the
same
EXP100
expansion
enclosure
chassis.
8.
Label
each
cable
to
ensure
that
all
cables
are
properly
connected
to
the
new
ESM.
9.
Label
the
SFP
modules
when
you
remove
them.
You
must
install
the
SFP
modules
in
the
same
positions
on
the
new
ESM.
10.
Remove
the
SFP
modules
and
the
Fibre
Channel
cables
from
the
failed
ESM.
Attention:
Be
careful
not
to
bend
the
Fibre
Channel
cables
at
a
sharp
angle
or
pinch
them
with
objects.
This
can
decrease
the
performance
or
cause
data
loss.
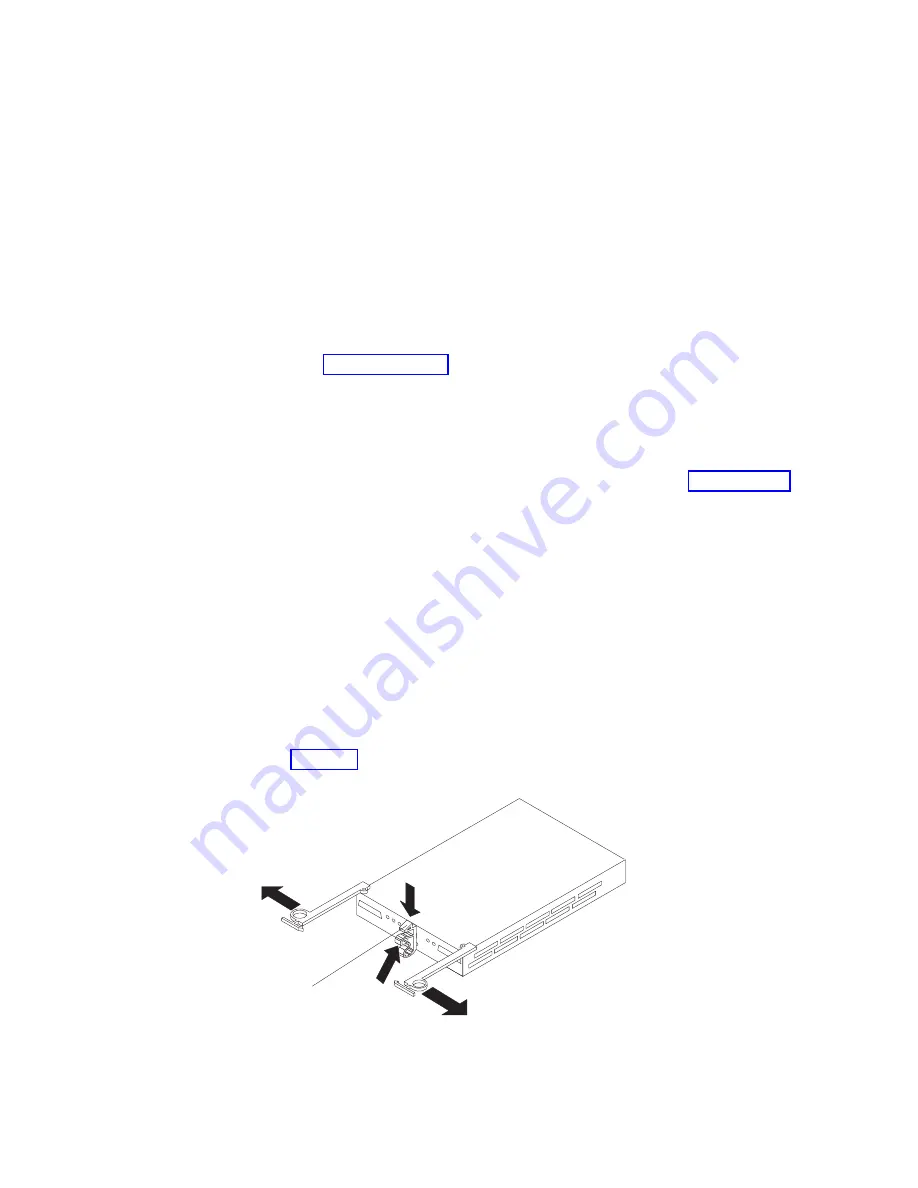
11.
Push
down
on
the
ESM
latch.
While
holding
down
the
ESM
latch,
grasp
the
pull
rings
and
pull
out
on
the
levers
to
disconnect
the
ESM
from
the
EXP100
midplane.
The
ESM
levers
will
pop
out
of
the
locked
position,
as
shown
in
12.
Remove
the
ESM.
Latch
Figure
47.
Removing
the
failed
ESM
Chapter
3.
Installing
and
replacing
devices
93
|
|
|
|
|
|
|
|
|
|
|
|
|
|
|
|
Summary of Contents for TotalStorage EXP100
Page 2: ......
Page 187: ......
Page 188: ... Part Number 39M5947 Printed in USA GC26 7694 01 1P P N 39M5947 ...


