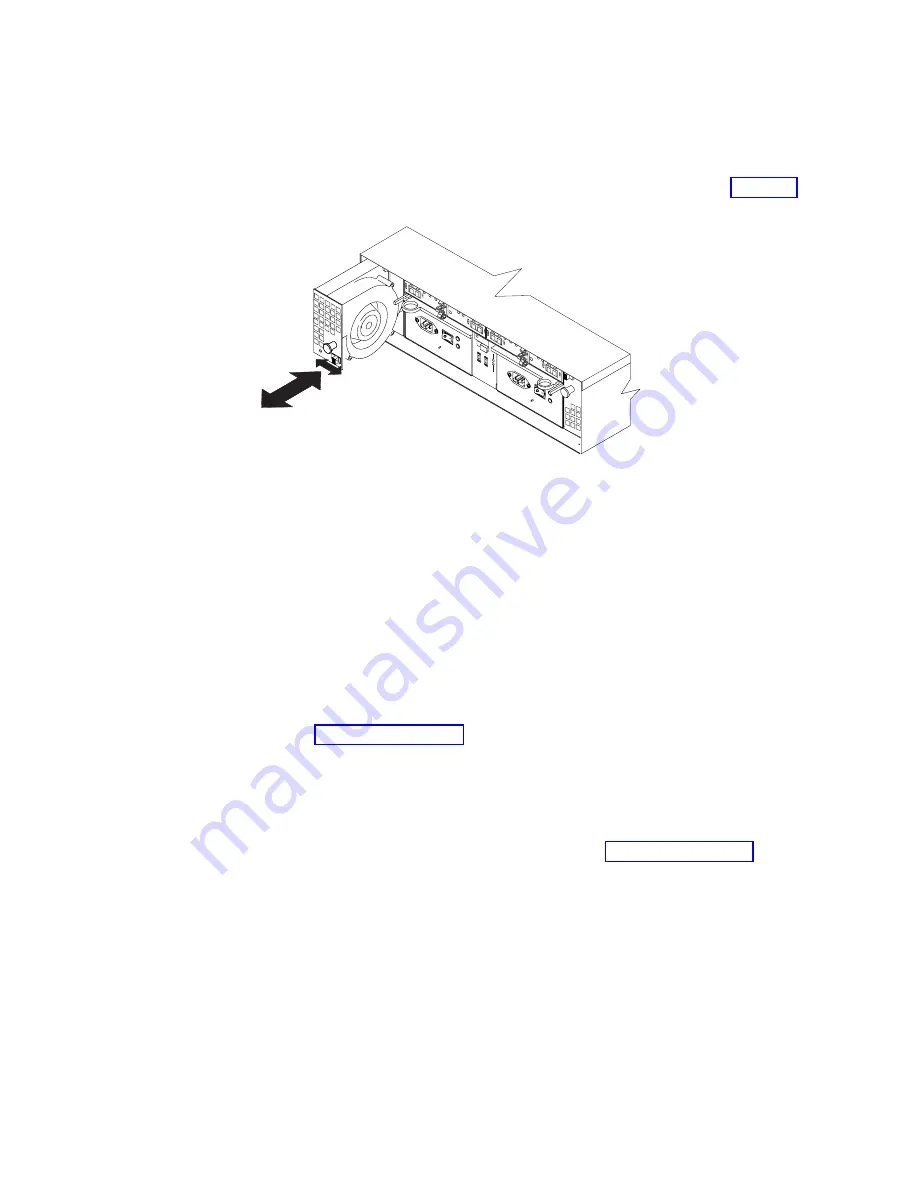
Removing
a
fan
Complete
the
following
steps
to
remove
a
fan:
1.
Unlock
the
latch
by
moving
the
latch
in
the
same
direction
as
the
latch
direction
arrow
shown
on
the
back
of
the
fan.
2.
Grasp
the
handle
and
pull
the
fan
unit
out
of
the
bay,
as
shown
in
3.
Place
the
fan
unit
on
a
level
surface.
4.
Repeat
step
1
through
step
3
for
the
second
fan
unit.
Removing
a
hard
disk
drive
Complete
the
following
steps
to
remove
a
hot-swap
hard
disk
drive:
Note:
The
hard
disk
drive
comes
installed
in
a
drive
tray.
Do
not
attempt
to
detach
the
drive
from
the
tray.
Attention:
After
you
remove
a
drive
CRU,
wait
70
seconds
before
replacing
or
reseating
the
drive
CRU
to
allow
the
drive
to
properly
spin
down.
Failure
to
do
so
may
cause
undesired
events.
1.
Use
to
record
the
location
and
identify
your
SATA
hard
disk
drives.
You
must
record
this
information
to
be
able
to
replace
the
hard
disk
drives
in
their
original
order
before
they
were
removed.
2.
Release
the
latch
on
the
drive
CRU
by
pinching
together
the
blue
line
on
the
tray
latch
and
the
finger
hole
on
the
tray
handle.
3.
Pull
the
tray
handle
out
so
that
it
is
in
the
open
position
to
release
the
drive
CRU.
Pull
the
drive
out
of
the
bay,
as
shown
in
2 G
b/s
X1
0
X1
Tra
y N
um
ber
Conflict
1 G
b/s
Figure
20.
Removing
a
fan
unit
Chapter
2.
Installing
the
EXP100
39
Summary of Contents for TotalStorage EXP100
Page 2: ......
Page 187: ......
Page 188: ... Part Number 39M5947 Printed in USA GC26 7694 01 1P P N 39M5947 ...


