Replacing
an
ESM
Complete
the
following
steps
to
replace
the
ESM
that
you
removed
before
the
installation:
Attention:
After
you
remove
an
ESM,
wait
70
seconds
before
reseating
or
replacing
the
ESM.
Failure
to
do
so
may
cause
undesired
events.
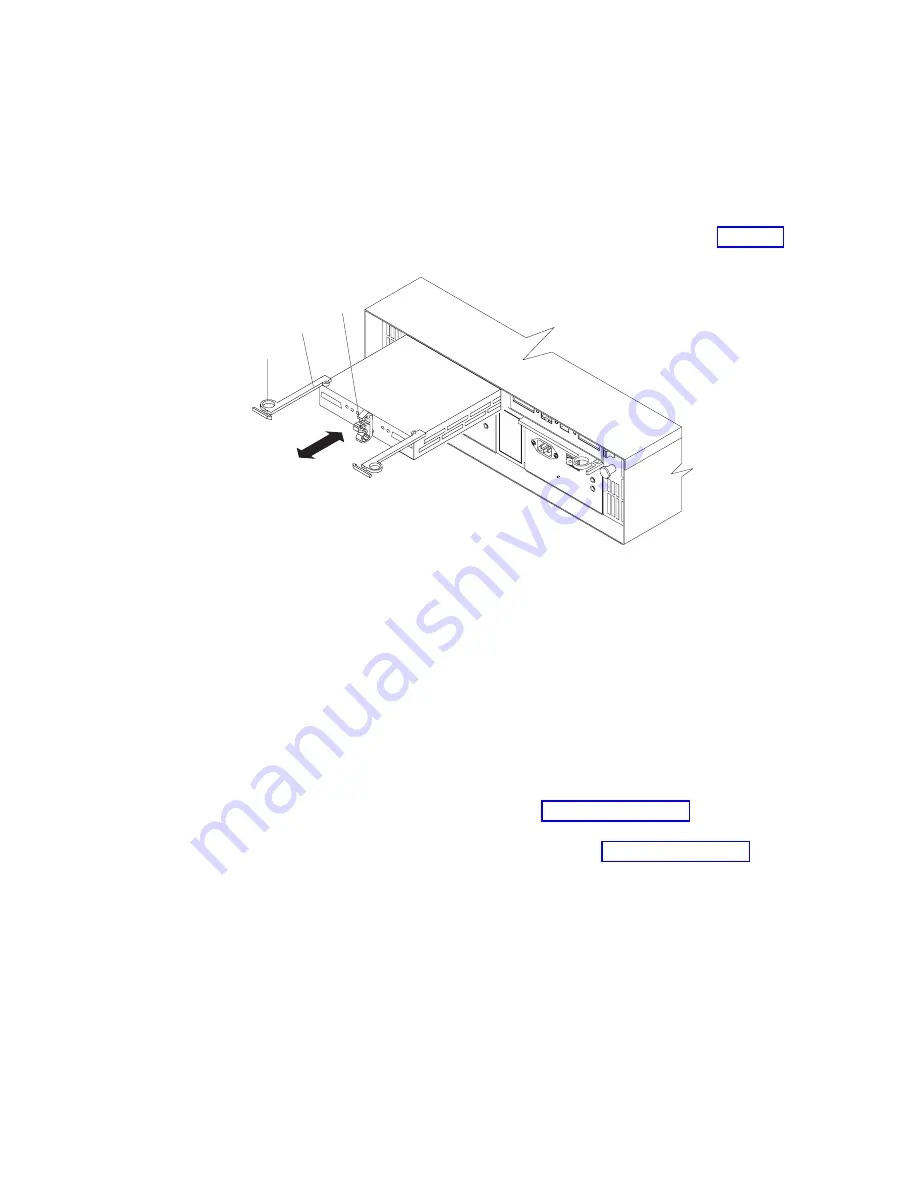
1.
Slide
one
ESM
into
the
empty
slot
in
the
expansion
enclosure.
Be
sure
that
the
levers
are
pulled
straight
out
as
you
slide
the
ESM
in,
as
shown
in
2.
After
you
install
the
ESM
into
the
bay,
the
ESM
latch
locks
into
place.
Close
the
levers
until
the
pull-ring
latches
lock
in
place.
Attention:
Make
sure
that
the
levers
lock
into
place
in
the
expansion
enclosure
chassis.
3.
Repeat
step
1
and
step
2
to
replace
the
second
ESM.
Replacing
a
power
supply
Complete
the
following
steps
to
replace
the
power
supplies
that
you
removed
before
the
installation:
1.
Slide
one
power
supply
into
the
expansion
enclosure.
Be
sure
to
replace
the
power
supplies
so
that
the
lever
on
each
power
supply
opens
toward
the
interior
of
the
expansion
enclosure,
as
shown
in
Attention:
Be
sure
that
the
lever
is
pulled
straight
out
as
you
slide
the
power
supply
into
the
expansion
enclosure,
as
shown
in
ESM latch
Lever
Pull ring
Figure
23.
Replacing
an
ESM
42
IBM
TotalStorage
DS4000
EXP100
Storage
Expansion
Enclosure:
Installation,
User’s
and
Maintenance
Guide
Summary of Contents for TotalStorage EXP100
Page 2: ......
Page 187: ......
Page 188: ... Part Number 39M5947 Printed in USA GC26 7694 01 1P P N 39M5947 ...


