background image

Attention:

Failure to replace the hard disk drives in their correct bays might result

in loss of data. If you are replacing a hard disk drive that is part of a RAID level 1
or RAID level 5 logical drive, ensure that you install the replacement hard disk drive
in the correct bay. Check the hardware and software documentation provided with
your system to see if there are restrictions regarding hard disk drive configurations.
Some system Fibre Channel configurations might not allow mixing different drive
capacities or types within an array.

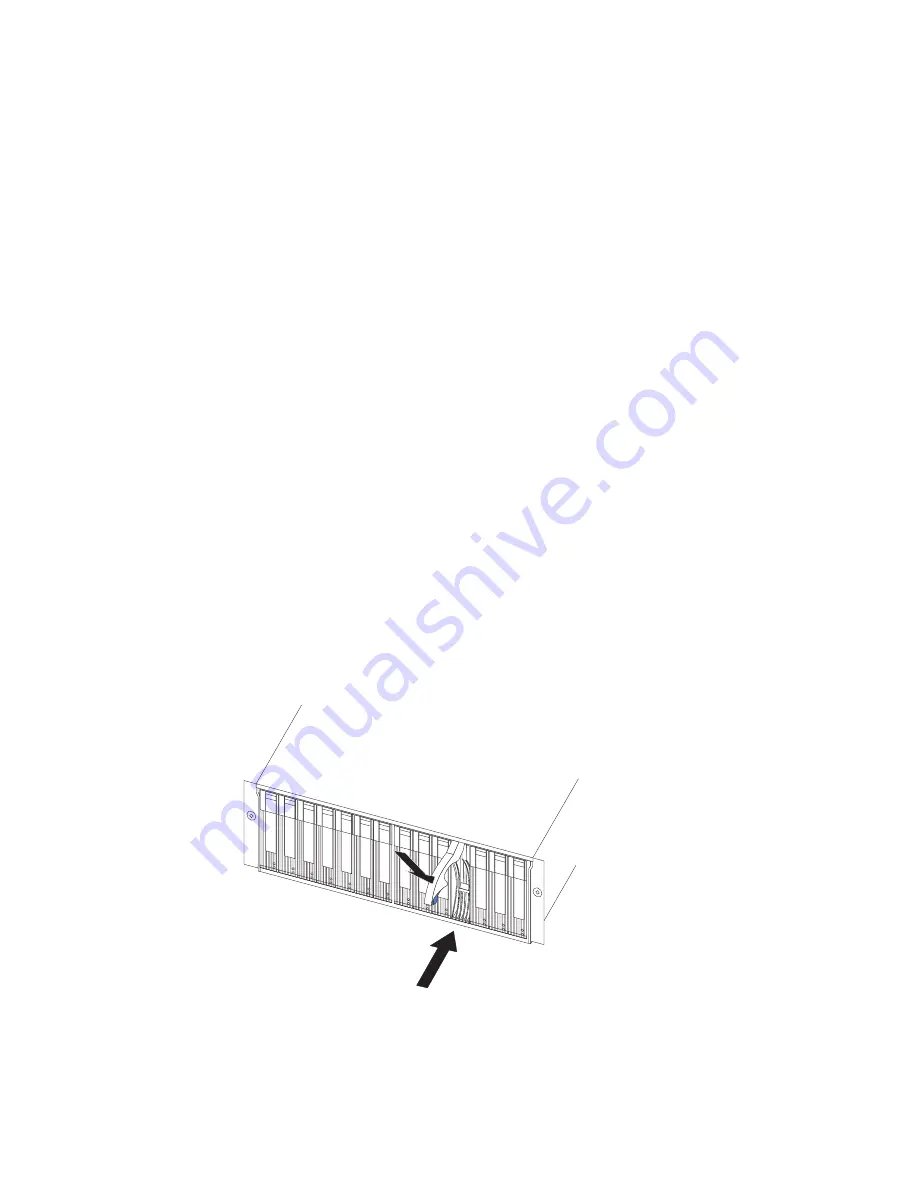
Complete the following steps to replace a hot-swap hard disk drive:

1. Determine the location of the drive that you want to remove.

Attention:

Never hot-swap a drive CRU when its green Activity LED is

flashing. Hot-swap a drive CRU only when its amber Fault LED is lit and not
flashing or when the green Activity LED is lit and flashing at one-second
intervals.

2. Remove the drive CRU:

a. Press on the inside of the bottom of the tray handle to release the blue latch

as shown in Figure 37 on page 41.

b. Pull the tray handle out into the open position.

c. Lift the drive CRU partially out of the bay.

d. To avoid possible damage to the drive, wait at least 20 seconds before fully

removing the drive CRU from the expansion unit to allow the drive to stop
(spin down).

e. Verify that there is proper identification (such as a label) on the drive CRU,

and then slide it completely out of the expansion unit.

3. Install the new drive CRU:

a. Gently push the drive CRU into the empty bay until the tray handle touches

the expansion-unit bezel.

b. Push the tray handle down into the closed (latched) position, as shown in

Figure 39.

4. Check the drive LEDs:

v

When a drive is ready for use, the green Activity LED is lit and the amber
Fault LED is off.

Figure 39. Closing the hot-swap hard disk drive tray handle

42

IBM TotalStorage FAStT EXP700 Storage Expansion Unit: Installation and User’s Guide

Summary of Contents for TotalStorage FAStT EXP700

Page 1: ...IBM IBM TotalStorage FAStT EXP700 Storage Expansion Unit Installation and User s Guide ...

Page 2: ......

Page 3: ...IBM TotalStorage FAStT EXP700 Storage Expansion Unit Installation and User s Guide ...

Page 4: ...in Appendix C Warranty information on page 57 and Appendix D Notices on page 69 First Edition July 2002 Copyright International Business Machines Corporation 2002 All rights reserved US Government Users Restricted Rights Use duplication or disclosure restricted by GSA ADP Schedule Contract with IBM Corp ...

Page 5: ...ng static sensitive devices 11 Preparing the site 12 Preparing the rack 12 Preparing the FAStT EXP700 13 Installing the support rails and the FAStT EXP700 into a rack cabinet 16 Replacing the FAStT EXP700 CRUs 16 Setting the interface options 19 Fibre Channel loop and ID settings 19 Enclosure ID settings 19 Expansion unit speed settings 20 Cabling the expansion unit 20 Installing SFP modules 20 Re...

Page 6: ...g help and technical assistance 55 Before you call 55 Using the documentation 55 Getting help and information from the World Wide Web 55 Software service and support 56 Hardware service and support 56 Appendix C Warranty information 57 Warranty period 57 Problem determination 57 Running diagnostics 57 Checking software 57 Warranty service and support 58 International Warranty Service 58 Purchasing...

Page 7: ...Taiwanese Class A warning statement 72 Japanese Voluntary Control Council for Interference VCCI statement 72 Power cords 72 Index 75 Contents v ...

Page 8: ...vi IBM TotalStorage FAStT EXP700 Storage Expansion Unit Installation and User s Guide ...

Page 9: ...adapter 26 24 Removing the LC SC cable adapter protective caps 27 25 Connecting an LC LC cable into the LC SC cable adapter 28 26 LC LC Fibre Channel cable lever and latches 28 27 Removing the LC LC Fibre Channel cable from an LC SC Fibre Channel cable adapter 29 28 Installing a GBIC in a FAStT200 29 29 Connecting the FAStT200 to the FAStT EXP700 30 30 Installing a GBIC in a FAStT500 31 31 Connect...

Page 10: ...viii IBM TotalStorage FAStT EXP700 Storage Expansion Unit Installation and User s Guide ...

Page 11: ...n Unit specifications 8 3 IBM TotalStorage FAStT EXP700 Storage Expansion Unit features 9 4 Expansion unit configurations with the FAStT500 and FAStT700 35 5 Expansion unit configurations with the FAStT200 35 6 Drive LED activity 39 7 Solving problems 49 8 Hard disk drive record 53 Copyright IBM Corp 2002 ix ...

Page 12: ...x IBM TotalStorage FAStT EXP700 Storage Expansion Unit Installation and User s Guide ...

Page 13: ...talleert eerst de veiligheidsvoorschriften Ennen kuin asennat tämän tuotteen lue turvaohjeet kohdasta Safety Information Avant d installer ce produit lisez les consignes de sécurité Vor der Installation dieses Produkts die Sicherheitshinweise lesen Prima di installare questo prodotto leggere le Informazioni sulla Sicurezza Les sikkerhetsinformasjonen Safety Information før du installerer dette pro...

Page 14: ...cables v Never turn on any equipment when there is evidence of fire water or structural damage v Disconnect the attached power cords telecommunications systems networks and modems before you open the device covers unless instructed otherwise in the installation and configuration procedures v Connect and disconnect cables as described in the following table when installing moving or opening covers ...

Page 15: ...iceable parts inside the device v Use of controls or adjustments or performance of procedures other than those specified herein might result in hazardous radiation exposure DANGER Some laser products contain an embedded Class 3A or Class 3B laser diode Note the following Laser radiation when open Do not stare into the beam do not view directly with optical instruments and avoid direct exposure to ...

Page 16: ... the power switch on the power supply do not turn off the electrical current supplied to the device The device also might have more than one power cord To remove all electrical current from the device ensure that all power cords are disconnected from the power source 1 2 xiv IBM TotalStorage FAStT EXP700 Storage Expansion Unit Installation and User s Guide ...

Page 17: ...as the following label attached Hazardous voltage current and energy levels are present inside any component that has this label attached There are no serviceable parts inside these components If you suspect a problem with one of these parts contact a service technician Safety xv ...

Page 18: ...xvi IBM TotalStorage FAStT EXP700 Storage Expansion Unit Installation and User s Guide ...

Page 19: ... and emergency situations Chapter 3 Installing and replacing devices on page 39 contains step by step instructions for installing and removing customer replaceable units CRUs such as hard disk drives power supplies environmental services monitors ESMs and fan units Chapter 4 Solving problems on page 49 contains problems symptoms and error messages that are specific to your expansion unit Appendix ...

Page 20: ...statement is placed just before the description of a potentially lethal or extremely hazardous procedure step or situation Related publications The following publications are available in Adobe Acrobat Portable Document Format PDF on the World Wide Web at http www ibm com pc support v IBM LC SC Fibre Channel Cable Adapter Option Installation Information v IBM LC LC Fibre Channel Cable Option Insta...

Page 21: ...on Units together to support a large number of disk drives on a Fibre Channel loop The IBM TotalStorage FAStT EXP700 Storage Expansion Unit is referred to throughout this book as the FAStT EXP700 Fibre Channel defined Fibre Channel technology is outlined in the SCSI 3 Fibre Channel Protocol SCSI FCP standard Fibre Channel is a high speed data transport technology used for mass storage and networki...

Page 22: ...s section shows the location of FAStT EXP700 hot swap CRU bays and describes the functionality of each CRU The hot swap features of the FAStT EXP700 enable you to remove and replace FAStT 2 GB Fibre Channel hard disk drives power supplies ESMs and fan units without turning off the expansion unit Hot swap drive bays The hot swap drive bays that are accessible from the front of your expansion unit a...

Page 23: ...the ESM bays The ESMs provide a 1 GB or 2 GB Fibre Channel interface to the drives and monitor the overall status of the expansion unit Each ESM has two SFP module connector ports for connecting your expansion unit to the controller or connecting two or more FAStT EXP700 units together The ESMs provide redundancy when both of them are configured into redundant Fibre Channel loops See your Fibre Ch...

Page 24: ...ed by the controller This LED is also lit when the devices that are part of a Fibre Channel loop are identified Note Enclosure identity LED activity is supported when an IBM TotalStorage FAStT700 Fibre Channel Storage Server is running FAStT Storage Manager software version 8 21 or later and storage server firmware version 05 21 xxxx or later v Tray handle Use this multipurpose handle to insert an...

Page 25: ...y CRUs must be installed even if one power supply is not working Fan controls and indicators The FAStT EXP700 comes with two fan units Each expansion unit has two fans as shown in Figure 5 on page 6 The fan units in your FAStT EXP700 are hot swappable and redundant One fan will continue to operate if the other fan fails You can remove and replace the fan unit while the FAStT EXP700 is powered on a...

Page 26: ...trols are shown in Figure 6 v SFP module input output ports Each ESM has two SFP module connector ports for connecting your expansion unit to the controller or connecting two or Latch Latch Fault LED Fault LED Fan CRU Fan CRU Handle Handle 1 Gb s 2 Gb s X10 X1 Tray Number Conflict Figure 5 Fan controls and indicators 1 Gb s 2 Gb s X10 X1 Tray Number Conflict ESM boards Enclosure ID switch tens pla...

Page 27: ... rear of the FAStT EXP700 These switches are used to identify the FAStT EXP700 on a Fibre Channel loop and to assign physical addresses to the drives You can use the push buttons to set the values between 0 and 7 The X1 value assigns the physical addresses of the drives and the ESM The X10 value identifies the loop where the FAStT EXP700 is located v 1 Gb s 2 Gb s switch Use the 1 Gb s 2 Gb s swit...

Page 28: ...mum 198 V ac Maximum 257 V ac v Input kilovolt amperes kVA approximately Minimum configuration 0 06 kVA Maximum configuration 0 39 kVA Environment v Air temperature Expansion unit on 10 to 35 C 50 to 95 F Altitude 0 to 914 m 3000 ft Expansion unit off 10 to 32 C 50 to 90 F Altitude 914 m 3000 ft to 2133 m 7000 ft v Humidity 8 to 80 Heat dissipation v Fully configured expansion unit 14 FAStT 2 GB h...

Page 29: ...on the back of each power supply v 14 disk drives run continuously from a single power supply Two fan units v Hot pluggable fan units accessible from the rear of the expansion unit one on each side v Two fan units with two fans per unit for a total of four fans The fans are redundant meaning that if one fan is disabled the remaining three fans continue to cool the FAStT EXP700 Environmental servic...

Page 30: ...10 IBM TotalStorage FAStT EXP700 Storage Expansion Unit Installation and User s Guide ...

Page 31: ...ing container and check the contents see Inventory checklist on page 1 If any items are missing contact your IBM reseller before proceeding 4 Assemble the tools and equipment you will need for installation These might include v Power cords comes with the FAStT EXP700 v Number 2 Phillips and medium flat blade screwdrivers v Antistatic protection such as a grounding wrist strap v Fibre Channel FC an...

Page 32: ...les and connections see Cabling the expansion unit on page 20 Floor space The floor area at the installation site must provide the following v Enough stability to support the weight of the fully configured FAStT EXP700 and associated systems v Sufficient space to install the FAStT EXP700 Weight The FAStT EXP700 total weight depends on the number of FAStT 2 GB Fibre Channel hard disk drives that ar...

Page 33: ...e CRUs You will use the following procedure to prepare the FAStT EXP700 for installation These instructions can be used after you have completed all applicable site rack cabinet and FAStT EXP700 preparations discussed in Preparing for installation on page 11 The FAStT EXP700 comes with a rack mounting hardware kit for installation into a rack cabinet It is easier to lift the FAStT EXP700 and insta...

Page 34: ...SM levers will pop out of the locked position 2 Grasp the pull rings and pull out on the levers then remove the ESM from the bay as shown in Figure 7 3 Place the ESM on a level surface Complete the following steps to remove a power supply CRU 1 Grasp the pull ring on the power supply lever and squeeze the latch to release it 2 Pull the lever open and remove the power supply as shown in Figure 8 on...

Page 35: ...drive from the tray 1 Use Table 8 on page 53 to record the location and identify your FAStT 2 GB Fibre Channel hard disk drives This record is required for replacing the hard disk drives in the original order before they were removed 2 Release the blue latch on the drive CRU by pressing on the inside of the bottom of the tray handle 3 Pull the handle on the tray out so that it is in the open posit...

Page 36: ...re you place the support rails in the cabinet depends on where you intend to position the expansion unit Use the rack mounting installation assembly package that comes with the expansion unit to locate the rack mounting holes and install the unit into a rack cabinet Instructions for removing and replacing the bezel are included in the Rack Mounting Template that comes with the expansion unit After...

Page 37: ...ion unit Be sure the levers are pulled straight out as you slide the power supply into the expansion unit as shown in Figure 12 2 Close the lever until the pull ring latch locks in place Make sure the lever locks into place in the expansion unit chassis 3 Repeat steps 1 and 2 to replace the second power supply Complete the following steps to replace the fan unit CRUs that you removed 1 Place the f...

Page 38: ... second fan Complete the following steps to replace the hot swap hard disk drives that you removed 1 Lift up on the handle and gently push the drive CRU into the empty bay until the tray handle touches the expansion unit bezel 2 Push the tray handle down into the closed latched position as shown in Figure 14 3 Repeat steps 1 and 2 to replace additional drives Continue with Setting the interface op...

Page 39: ... of the two enclosure ID switches when used together provide a two digit ID of the expansion unit The storage management software uses the enclosure ID to provide a correlation between the storage management graphics and the physical expansion unit The ID indicates which physical unit corresponds to the storage management software status Use Enclosure ID switches X10 and X1 to set the expansion un...

Page 40: ... such as system management logic chips Refer to your storage server documentation for information about controller dependent hardware configuration details Some controllers might have restrictions on the maximum number of disk drives supported on a loop cabling restrictions and other requirements v SFP module ports Your FAStT EXP700 supports large complex and redundant disk drive loop configuratio...

Page 41: ... devices or transmitters are installed note the following v Do not remove the covers Removing the covers of the laser product could result in exposure to hazardous laser radiation There are no serviceable parts inside the device v Use of controls or adjustments or performance of procedures other than those specified herein might result in hazardous radiation exposure DANGER Some laser products con...

Page 42: ...nel cable before you remove the SFP module 1 Remove the LC LC Fibre Channel cable from the SFP module For more information see Handling static sensitive devices on page 11 and Using LC LC Fibre Channel cables on page 23 2 Unlock the SFP module latch by pulling the plastic tab outward 10 as shown in Figure 17 Protective cap SFP module 10o Plastic tab 3 With the SFP latch in the unlocked position sl...

Page 43: ...es The LC LC Fibre Channel cable shown in Figure 18 is a fiber optic cable that is used to connect into one of the following devices v SFP module installed in an IBM FAStT EXP700 Storage Expansion Unit v SFP module installed in an IBM FAStT700 Fibre Channel Storage Server For more information about cabling these devices see the documentation that comes with the LC LC Fibre Channel cable Note If yo...

Page 44: ... view directly with optical instruments and avoid direct exposure to the beam 1 Read the information in Handling fiber optic cables on page 23 2 If necessary remove the protective cap from the SFP module as shown in Figure 16 on page 22 Save the protective cap for future use 3 Remove the two protective caps from one end of the LC LC cable as shown in Figure 19 Save the protective caps for future u...

Page 45: ...on To avoid damaging the LC LC cable or SFP module make sure you press and hold the lever to release the latches before you remove the cable from the SFP module Ensure that the levers are in the released position when removing the cable When removing the cable from the SFP module make sure you do not grasp the SFP module plastic tab 1 On the end of the LC LC cable that connects into the SFP module...

Page 46: ...nclosure Unit For more information about connecting to these devices see the documentation that comes with the LC SC Fibre Channel cable adapter The following sections provide the procedures for properly connecting and removing an LC SC Fibre Channel cable Connecting an LC SC cable adapter to a device Complete the following steps to connect an LC SC Fibre Channel cable adapter to a device Figure 2...

Page 47: ...diation when open Do not stare into the beam do not view directly with optical instruments and avoid direct exposure to the beam 1 Read the information in Handling fiber optic cables on page 23 2 Connect one end of an LC LC cable to an SFP module in the FAStT EXP700 For instructions see Installing SFP modules on page 20 3 Remove the two protective caps from the LC connector end of the LC SC cable ...

Page 48: ...re you press and hold the lever to release the latches before you remove the cable from an LC SC cable adapter Ensure that both levers are in the released position when removing the cable When removing the cable from the SFP module make sure you do not grasp the SFP module plastic tab 1 On the end of the cable that connects into the LC connector end of the LC SC cable adapter press down and hold t...

Page 49: ...AStT700 you need optional LC LC and LC SC cable adapters Cabling the FAStT EXP700 to a FAStT200 Storage Server Complete the following steps to cable the FAStT EXP700 to a FAStT200 1 Insert a GBIC into the expansion port located on the back of a FAStT200 and remove the protective cap as shown in Figure 28 2 Using Figure 29 on page 30 as a guide complete the following steps to connect the FAStT200 t...

Page 50: ...roller Enclosure Unit Complete the following steps to cable the FAStT EXP700 to a FAStT500 1 Insert a GBIC into a drive mini hub port located on the back of a FAStT500 as shown in Figure 30 on page 31 1 Gb s 2 Gb s X10 X1 Tra y Num ber Con flict GBIC RAID controller LC SC cable adapter SFP module LC LC cable FAStT200 FAStT EXP700 Figure 29 Connecting the FAStT200 to the FAStT EXP700 30 IBM TotalSt...

Page 51: ... of an LC SC cable adapter to the GBIC b Connect one end of an LC LC cable to the LC end of the LC SC cable adapter c Insert an SFP module into the SFP port located on the back of the FAStT EXP700 then connect the other end of the LC LC cable to the SFP module GBIC Figure 30 Installing a GBIC in a FAStT500 Chapter 2 Installing the FAStT EXP700 31 ...

Page 52: ...i hub port on the back of a FAStT700 Fibre Channel Storage Server 2 Connect an LC LC fiber optic cable into the SFP module as shown in Figure 32 on page 33 1 Gb s 2 Gb s X10 X1 Tra y Num ber Co nf lic t LC SC cable adapter FAStT500 SFP module LC LC cable FAStT EXP700 Figure 31 Connecting the FAStT500 to the FAStT EXP700 32 IBM TotalStorage FAStT EXP700 Storage Expansion Unit Installation and User ...

Page 53: ... loop refer to the Fibre Channel Cabling Instructions that come with your storage server for specific instructions OUT IN 2 Gb s 1 Gb s OUT IN 2 Gb s 1 Gb s OUT IN 2 Gb s 1 Gb s OUT IN 2 Gb s 1 Gb s OUT IN 2 Gb s 1 Gb s OUT IN 2 Gb s 1 Gb s OUT IN 2 Gb s 1 Gb s OUT IN 2 Gb s 1 Gb s Mini hub SFP module Drive mini hub ports LC LC cable FAStT700 Figure 32 Installing an SFP module and LC LC cable in a...

Page 54: ... 4 on page 35 gives examples of FAStT EXP700 and FAStT EXP500 expansion unit configurations with one FAStT500 or one FAStT700 storage server For each configuration the maximum number of expansion units that you can connect to one storage server are listed In addition it shows the maximum number of hard disk drives that are supported in each configuration Drive enclosures group 1 Drive enclosures g...

Page 55: ...the maximum number of hard disk drives that are supported in each configuration Table 5 Expansion unit configurations with the FAStT200 Storage server1 Number of FAStT EXP700 expansion units Number of FAStT EXP500 expansion units Maximum number of hard disk drives 1 FAStT200 HA 1 up to 4 64 2 up to 2 58 3 1 62 4 0 66 1 Running FAStT Storage Manager version 7 10 and firmware version 04 01 02 30 or ...

Page 56: ...rap the strain relief clamp around the power cable approximately 20 cm 8 in from the power supply connection end 2 Attach the power supply nut and tighten it securely 3 Connect the power cable to the power supply 4 Plug the supply power cable into a properly grounded electrical outlet 5 Continue with Turning the expansion unit on and off for the initial startup of the expansion unit Turning the ex...

Page 57: ...re lit If other amber LEDs remain lit see Chapter 4 Solving problems on page 49 Turning off the expansion unit Use this procedure to turn off the power for the expansion unit Attention Except in an emergency never turn off the power if any Fault LEDs are lit on the expansion unit Correct the fault before you turn off the power using the proper troubleshooting or servicing procedure This will ensur...

Page 58: ...all activity and check all of the LEDs Make a note of any Fault LEDs that are lit so that you can correct the problem when you turn on the power 2 Turn off all power supply switches then unplug the power cables from the expansion unit Restoring power after an emergency Complete the following steps to restart the expansion unit if you turned off the power supply switches during an emergency shutdow...

Page 59: ...e you remove it Ensure that you keep track of the drives and their corresponding bays Also record the location information in Table 8 on page 53 If you install a drive in the wrong bay you might lose data v Drive LEDs Each drive tray has two LEDs which indicate the status for that drive See Table 6 for the drive LED states and descriptions Table 6 Drive LED activity LED LED state Descriptions Acti...

Page 60: ... blank tray a Insert a finger into the square hole at the top of the blank tray to grip and pull the tray out of the drive bay b Save the blank tray for later use 5 Install the hard disk drive Note The hard disk drive comes installed in a drive tray Do not attempt to detach the drive from the tray a Release the blue latch on the drive CRU by pressing on the inside of the bottom of the tray handle ...

Page 61: ... 38 Replacing hot swap hard disk drives Drive problems include any malfunctions that delay interrupt or prevent successful input ouput activity between the hosts and the hard disk drives in the expansion unit This includes transmission problems between the host controllers the ESMs and the drives This section explains how to replace a failed hard disk drive Figure 37 Drive CRU latch Figure 38 Clos...

Page 62: ...ED is lit and flashing at one second intervals 2 Remove the drive CRU a Press on the inside of the bottom of the tray handle to release the blue latch as shown in Figure 37 on page 41 b Pull the tray handle out into the open position c Lift the drive CRU partially out of the bay d To avoid possible damage to the drive wait at least 20 seconds before fully removing the drive CRU from the expansion ...

Page 63: ...swap power supply Complete the following steps to remove the failed hot swap power supply 1 Turn the power supply switch to the off position 2 Unplug the power supply cable from the electrical outlet 3 Disconnect the power cable from the power supply ac connector 4 Remove the nut and clamp from the rear of the power supply 5 Remove the power supply from the expansion unit a Grasp the pull ring on ...

Page 64: ... installing is in the off position 2 Install the power supply in the expansion unit a Slide the power supply into the expansion unit Be sure the lever is pulled straight out as you slide the power supply into the expansion unit see Figure 40 b Close the lever until the pull ring latch locks in place Make sure the lever locks into place in the expansion unit chassis 3 Wrap the strain relief clamp a...

Page 65: ... properly connected to the new ESM 3 Label the SFP modules when you remove them You must install the SFP modules in the same positions on the new ESM 4 Remove the SFP modules and Fibre Channel cables from the failed ESM Attention Be careful not to bend the Fibre Channel cables at a sharp angle or pinch them with objects This can decrease the performance or cause data loss 5 Be sure the Fault indic...

Page 66: ...e damage to the internal components and circuitry The fans are interchangeable and replaceable and do not require preventive maintenance The fans help maintain proper air circulation across the components inside the expansion unit Air flows through the expansion unit from the front to the back You can hot swap the fans replace them while the expansion unit is turned on and running provided that yo...

Page 67: ...latch does not automatically lock when you have successfully inserted the fan unit into the bay pull back on the fan slightly and then push it in again until the latch snaps into place 4 Check the LEDs 5 The Fault LEDs are no longer lit after a few seconds if they remain on see Chapter 4 Solving problems on page 49 2 Gb s X10 X1 Tray Num ber Con flict 1 Gb s Figure 43 Replacing a hot swap cooling ...

Page 68: ...48 IBM TotalStorage FAStT EXP700 Storage Expansion Unit Installation and User s Guide ...

Page 69: ...eplace the ESM See your controller documentation for more information ESM Bypass LED No incoming signal detected Reconnect the SFP modules and Fibre Channel Fibre Channel cables Replace input and output SFP modules or cables as necessary ESM failure If the ESM Fault LED is lit replace the ESM Front panel General machine fault A Fault LED is lit somewhere on the expansion unit check for Amber LEDs ...

Page 70: ... the midplane contact an IBM technical support representative Several CRUs Hardware failure Replace the affected CRUs If this does not correct the problem have the ESMs replaced followed by the midplane Contact an IBM technical support representative Front panel Power supply problem Make sure that the power cables are plugged in and that the power supplies are turned on Hardware failure If any oth...

Page 71: ...t expansion unit ID settings Ensure that the Fibre Channel optical cables are undamaged and properly connected Check the expansion unit ID settings Note Change switch position only when your expansion unit is powered off ESM failure Have one or both ESMs replaced Random errors Subsystem Midplane feature Have the midplane replaced Chapter 4 Solving problems 51 ...

Page 72: ...52 IBM TotalStorage FAStT EXP700 Storage Expansion Unit Installation and User s Guide ...

Page 73: ...ansion Unit Machine type 1740 Model number 1RU 1RX Serial number The expansion unit serial number is located on the bottom inside surface on the rear and on the bottom right on the front Installed device records Use the following table to record the number of the hard disk drives that you replaced and the corresponding bay number Attention If you replace a hard disk drive in the wrong drive bay it...

Page 74: ...54 IBM TotalStorage FAStT EXP700 Storage Expansion Unit Installation and User s Guide ...

Page 75: ...es and IntelliStation systems operating systems and programs come with information that contains troubleshooting procedures and explanations of error messages and error codes If you suspect a software problem see the information for the operating system or program Using the documentation Information about your IBM xSeries or IntelliStation system and preinstalled software if any is available in th...

Page 76: ...sage configuration and software problems with xSeries servers IntelliStation workstations and appliances For information about which products are supported by Support Line in your country or region go to http www ibm com services sl products For more information about Support Line and other IBM services go to http www ibm com services or go to http www ibm com planetwide for support telephone numb...

Page 77: ...tatement of Limited Warranty for IBM Machines a glossary of terms used in the Statement of Limited Warranty Frequently Asked Questions FAQ and links to Product Support Web pages The IBM Statement of Limited Warranty is available from this Web site in 29 languages in Portable Document Format PDF Machine IBM TotalStorage FAStT EXP700 Storage Expansion Unit Country or region Warranty period Service d...

Page 78: ...after a product has been shipped from IBM In those instances IBM will make Engineering Changes ECs available that apply to your hardware v Customer replaceable units CRUs Some parts of IBM xSeries and IntelliStation systems are designated as customer replaceable units IBM ships CRUs to you for replacement by you CRUs include keyboards monitors memory diskette drives hard disk drives and mice this ...

Page 79: ...of a particular machine type In addition some countries or regions might have fees and restrictions that apply at the time of service To determine whether your system is eligible for IWS go to http www ibm com pc support and click Warranty lookup Purchasing additional services During and after the warranty period you can purchase additional services such as support for IBM and non IBM hardware ope...

Page 80: ...e that is at least functionally equivalent you may return it to your place of purchase and your money will be refunded Extent of Warranty The warranty does not cover the repair or exchange of a Machine resulting from misuse accident modification unsuitable physical or operating environment improper maintenance by you or failure caused by a product for which IBM is not responsible The warranty is v...

Page 81: ...s involve the removal of parts and their return to IBM A part that replaces a removed part will assume the warranty service status of the removed part Before IBM or your reseller exchanges a Machine or part you agree to remove all features parts options alterations and attachments not under warranty service You also agree to 1 ensure that the Machine is free of any legal obligations or restriction...

Page 82: ...T ALLOW THE EXCLUSION OR LIMITATION OF INCIDENTAL OR CONSEQUENTIAL DAMAGES SO THE ABOVE LIMITATION OR EXCLUSION MAY NOT APPLY TO YOU Governing Law Both you and IBM consent to the application of the laws of the country in which you acquired the Machine to govern interpret and enforce all of your and IBM s rights duties and obligations arising from or relating in any manner to the subject matter of ...

Page 83: ...r arbitrators designated in conformity with those rules shall have the power to rule on their own competence and on the validity of the Agreement to submit to arbitration The arbitration award shall be final and binding for the parties without appeal and the arbitral award shall be in writing and set forth the findings of fact and the conclusions of law All proceedings shall be conducted including...

Page 84: ...IC OF CHINA PRC Governing Law The following replaces this Section Both you and IBM consent to the application of the laws of the State of New York except when local law requires otherwise to govern interpret and enforce all your and IBM s rights duties and obligations arising from or relating in any manner to the subject matter of this Agreement without regard to conflict of law principles Any dis...

Page 85: ...ich the warranty service is being provided except that in 1 Albania Bosnia Herzegovina Bulgaria Croatia Hungary Former Yugoslav Republic of Macedonia Romania Slovakia Slovenia Armenia Azerbaijan Belarus Georgia Kazakhstan Kyrgyzstan Moldova Russia Tajikistan Turkmenistan Ukraine and Uzbekistan the laws of Austria apply 2 Estonia Latvia and Lithuania the laws of Finland apply 3 Algeria Benin Burkin...

Page 86: ...nt you paid for the Machine that is the subject of the claim For purposes of this item the term Machine includes Machine Code and Licensed Internal Code Applicability of suppliers and resellers unchanged FRANCE Limitation of Liability The following replaces the second sentence of the first paragraph of this Section In such instances regardless of the basis on which you are entitled to claim damage...

Page 87: ...WAZILAND Limitation of Liability The following is added to this Section IBM s entire liability to you for actual damages arising in all situations involving nonperformance by IBM in respect of the subject matter of this Statement of Warranty will be limited to the charge paid by you for the individual Machine that is the subject of your claim from IBM UNITED KINGDOM Limitation of Liability The fol...

Page 88: ...68 IBM TotalStorage FAStT EXP700 Storage Expansion Unit Installation and User s Guide ...

Page 89: ... IMPLIED INCLUDING BUT NOT LIMITED TO THE IMPLIED WARRANTIES OF NON INFRINGEMENT MERCHANTABILITY OR FITNESS FOR A PARTICULAR PURPOSE Some jurisdictions do not allow disclaimer of express or implied warranties in certain transactions therefore this statement may not apply to you This information could include technical inaccuracies or typographical errors Changes are periodically made to the inform...

Page 90: ...ossible When referring to processor storage real and virtual storage or channel volume KB stands for approximately 1000 bytes MB stands for approximately 1 000 000 bytes and GB stands for approximately 1 000 000 000 bytes When referring to hard disk drive capacity or communications volume MB stands for 1 000 000 bytes and GB stands for 1 000 000 000 bytes Total user accessible capacity may vary de...

Page 91: ... connectors or by unauthorized changes or modifications to this equipment Unauthorized changes or modifications could void the user s authority to operate the equipment This device complies with Part 15 of the FCC Rules Operation is subject to the following two conditions 1 this device may not cause harmful interference and 2 this device must accept any interference received including interference...

Page 92: ...ntary Control Council for Interference VCCI statement Power cords For your safety IBM provides a power cord with a grounded attachment plug to use with this IBM product To avoid electrical shock always use the power cord and plug with a properly grounded outlet IBM power cords used in the United States and Canada are listed by Underwriter s Laboratories UL and certified by the Canadian Standards A...

Page 93: ...vory Coast Jordan Lebanon Luxembourg Malagasy Mali Martinique Mauritania Mauritius Monaco Morocco Mozambique Netherlands New Caledonia Niger Norway Poland Portugal Romania Senegal Slovakia Spain Sudan Sweden Syria Togo Tunisia Turkey former USSR Vietnam former Yugoslavia Zaire Zimbabwe 13F9997 Denmark 14F0015 Bangladesh Burma Pakistan South Africa Sri Lanka 14F0033 Antigua Bahrain Brunei Channel I...

Page 94: ...74 IBM TotalStorage FAStT EXP700 Storage Expansion Unit Installation and User s Guide ...

Page 95: ... Electronic emission notices Australia and New Zealand Class A statement 71 European Union EMC Directive conformance statement 71 Federal Communications Commission FCC statement 71 Industry Canada Class A emission compliance statement 71 Japanese Voluntary Control Council for Interference VCCI statement 72 Taiwanese Class A warning statement 72 United Kingdom telecommunications safety requirement ...

Page 96: ...tement of Limited Warranty Z125 4753 06 8 2000 part 1 general terms 60 IBM TotalStorage FAStT EXP700 activity LED 4 components 2 drive latches 4 enclosure ID switches 7 enclosure identity LED 4 environmental services monitor location 6 fan controls and indicators 5 fault LED 4 features 9 front controls 3 general system error LED 4 hot swap bays location of 3 hot swap CRU bays 2 hot swap drive CRU ...

Page 97: ...ail installation 16 site preparation 11 RAID controller unit 29 rear indicators fault LED 4 5 power LED 5 redundant power supply 4 related publications xviii removing an SFP module 22 replacing a failed hot swap ESM 45 a failed hot swap fan unit 46 a failed hot swap power supply 43 a hot swap hard disk drive 41 replacing CRUs ESM 16 fan unit 17 hat swap hard disk drives 18 power supply 17 restrict...

Page 98: ...78 IBM TotalStorage FAStT EXP700 Storage Expansion Unit Installation and User s Guide ...

Page 99: ......

Page 100: ... Part Number 32P0178 Printed in U S A 1P P N 32P0178 ...

Reviews: