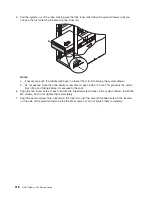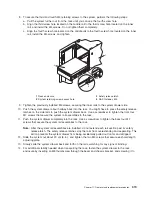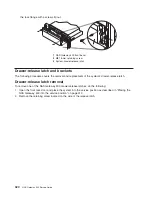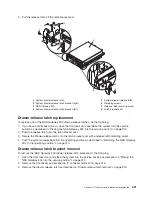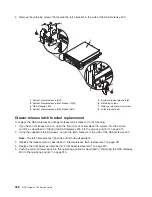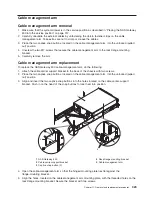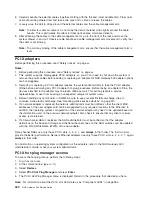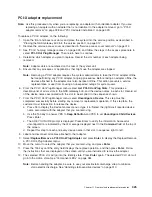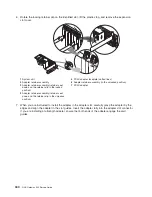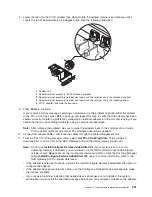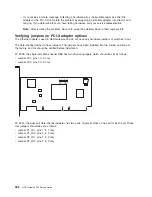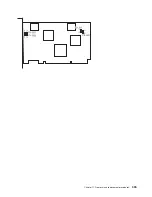
PCI-X adapter replacement
Note:
Use this procedure only when you are replacing an adapter with an identical adapter. If you are
replacing an adapter with an adapter that is not identical to the adapter removed, go to “PCI-X
adapter removal” on page 328 and “PCI-X adapter installation” on page 329.
To replace a PCI-X adapter, do the following:
1. Open the front and back rack doors and place the system into the service position as described in
“Placing the NAS Gateway 500 into the service position” on page 312.
2. Remove the service access cover as described in “Service access cover removal” on page 314.
3. See “PCI-X hot-plug manager access” on page 324, and follow the steps in the access procedure to
select
PCI-X Hot Plug Manager
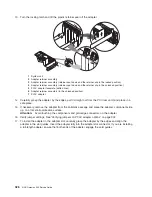
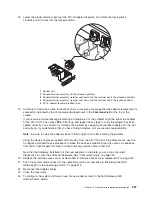
. Then return here to continue.
4. Determine which adapter you plan to replace. Record the slot number of each adapter being
removed.
Note:
Adapter slots are numbered on the rear of the system unit.
5. Ensure that any processes or applications that might use the adapter are stopped.
Note:
Removing a PCI-X adapter requires the system administrator to take the PCI-X adapter offline
before performing any PCI-X adapter hot-plug procedures. Before taking an adapter offline, the
devices attached to the adapter must also be taken offline. This action prevents a service
representative or user from causing an unexpected outage for system users.
6. From the PCI-X Hot-Plug Manager menu, select
List PCI-X Hot-Plug Slots
. This provides a
descriptive list of all six slots in the NAS Gateway 500, and the device names in each slot. Record all
of the device names associated with the slot to be emptied, in the sequence shown.
7. From the PCI-X Hot-Plug Manager menu, select
Unconfigure a Device
. This step must be
completed successfully before starting any removal or replacement operation. If this step fails, the
customer must take action to release the device.
a. Press F4 to display the Device Names menu or type it in. Select the (rightmost) reported device
name associated with the adapter that you are removing.
b. Use the Tab key to answer YES to
Keep Definition
and YES to set
Unconfigure Child Devices
.
Press Enter.
c. The ARE YOU SURE prompt is displayed. Press Enter to verify the information. Successful
unconfiguration is indicated by the
OK
message displayed next to the
Command
field at the top of
the screen.
d. Repeat this step for each and every device name in that slot, in sequence right to left.
8. Label and disconnect all cables attached to that adapter.
9. Select
Replace/Remove a PCI-X Hot-Plug Adapter
and press
Enter
to display the Replace/Remove
a PCI-X Hot-Plug Adapter menu.
10. Move the cursor to select the adapter that you are removing, and press
Enter
.
11. Press the Tab key until the entry field displays the replace operation, and then press
Enter
. Follow
the instructions that are displayed on the screen until you are instructed to remove the adapter.
12. The selected PCI-X slot will go into the Identify state. Press
Enter
again. The selected PCI-X slot will
go into the Action state. See “Component LEDs” on page 384.
Note:
Before handling the adapter, be sure to use your electrostatic discharge strap to minimize
static-electric discharge. See “Handling static-sensitive devices” on page 310.
Chapter 11. Removal and replacement procedures
325
Summary of Contents for TotalStorage NAS Gateway 500
Page 1: ...IBM TotalStorage NAS Gateway 500 Service Guide GY27 0418 00 ...
Page 2: ......
Page 3: ...IBM TotalStorage NAS Gateway 500 Service Guide GY27 0418 00 ...
Page 16: ...xiv NAS Gateway 500 Service Guide ...
Page 20: ...xviii NAS Gateway 500 Service Guide ...
Page 36: ...System logic flow Note Not all components are supported 16 NAS Gateway 500 Service Guide ...
Page 52: ...32 NAS Gateway 500 Service Guide ...
Page 58: ...38 NAS Gateway 500 Service Guide ...
Page 112: ...92 NAS Gateway 500 Service Guide ...
Page 266: ...246 NAS Gateway 500 Service Guide ...
Page 326: ...306 NAS Gateway 500 Service Guide ...
Page 353: ...Chapter 11 Removal and replacement procedures 333 ...
Page 392: ...372 NAS Gateway 500 Service Guide ...
Page 402: ...382 NAS Gateway 500 Service Guide ...
Page 412: ...392 NAS Gateway 500 Service Guide ...
Page 440: ...420 NAS Gateway 500 Service Guide ...
Page 446: ...426 NAS Gateway 500 Service Guide ...
Page 448: ...428 NAS Gateway 500 Service Guide ...
Page 466: ...446 NAS Gateway 500 Service Guide ...
Page 469: ......
Page 470: ... Printed in U S A GY27 0418 00 ...
Page 471: ...Spine information IBM TotalStorage NAS Gateway 500 NAS Gateway 500 Service Guide GY27 0418 00 ...


