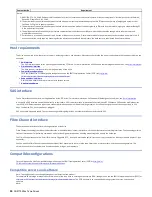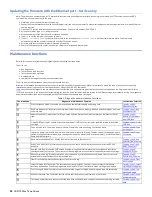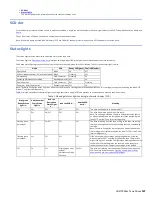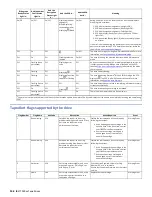
The drive exits Maintenance mode automatically after it completes a maintenance function or after 10 minutes if no action occurs.
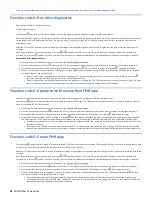
Function code 1: Run drive diagnostics
Approximate Run Time = 5 minutes per loop
Total Number of Loops = 1
Function code runs tests that determine whether the drive can properly load and unload cartridges and read and write data.
Record the time that it takes for the test to complete. Compare the recorded time with the "Approximate Run Time". If the test runs successfully but the execution
time is longer than the "Approximate Run Time," run
Function code F: Write performance test
. If the Write Performance Test fails, replace the media and exit
Maintenance mode.
Attention: For this test, insert only a scratch (blank) data cartridge or a cartridge that might be overwritten. During the test, the drive overwrites the data on the
cartridge.
Note: If you inserted an invalid tape cartridge, error code or appears in the SCD. If you inserted a write-protected cartridge, or the media has read-only
compatibility, error code appears in the SCD. In either case, the tape drive unloads the cartridge and exits Maintenance mode after the cartridge is removed.
Steps to Run Drive Diagnostic Tests:
1. Place the drive in Maintenance mode. For instructions, see
.
2. Press Unload once per second until displays in the SCD. (If you cycle past the wanted code, press Unload once per second until the code reappears.)
3. Press and hold Unload for 3 or more seconds, then release it to select function . Wait for the SCD to change to a flashing , requesting a cartridge.
4. Insert a scratch (blank) data cartridge. The SCD changes to a flashing and the test begins. During the test, the drive unloads and loads the cartridge. Do
not remove the cartridge during the test.
If no error is detected, the diagnostic test loops and begin again. To stop the loop, press Unload for 1 second and release. When the loop ends,
temporarily displays in the SCD, and the tape drive exits Maintenance mode.
If an error is detected, the Fault light flashes and the drive posts an error code to the SCD. To determine the error, locate the code in
. To clear
the error either turn the power off and then on again, or reboot the drive by pressing and holding Unload for 10 seconds.
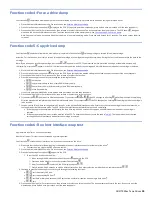
Function code 2: Update drive firmware from FMR tape
Attention: When drive firmware is updated, do not turn the drive off until the update is complete or the firmware might be lost.
Function code loads drive firmware from a field microcode replacement (FMR) tape. The FMR tape must be created from an LTO Ultrium 8 tape drive with the
same host interface (SAS or Fibre Channel).
1. Place the drive in Maintenance mode. For instructions, see
.
2. Press Unload once per second until displays in the SCD. (If you cycle past the wanted code, press Unload once per second until the code reappears.)
3. Press and hold Unload for 3 or more seconds, then release it to select the function. The SCD changes to a flashing , requesting a cartridge.
4. Insert the FMR tape cartridge. The SCD changes to a flashing . The Fault light is ON solid during tape movement and flashing while code is being loaded.
The Ready light is OFF. The tape drive loads the updated firmware from the FMR tape into its erasable programmable read-only memory (EPROM) area.
If the update completes successfully, the tape drive rewinds and unloads the FMR tape, resets itself, and is ready to use the new firmware. The drive
automatically reboots.
If the update fails, the tape drive posts an error code to the SCD. To determine the error, locate the code in
. The drive then unloads the FMR
tape and exits Maintenance mode after the cartridge is removed. Contact IBM technical support for problem determination or machine replacement.
Function code 3: Create FMR tape
Function code copies the drive's field microcode replacement (FMR) data to a scratch data cartridge. The resulting FMR tape is used only to update the firmware
on other LTO Ultrium 8 tape drives with the same host interface (SAS or Fibre Channel).
Attention: For this function, insert only a scratch (blank) data cartridge or a cartridge that might be overwritten. During the test, the drive overwrites the data on the
cartridge.
Note: If you inserted an invalid tape cartridge, error code or appears in the SCD. If you inserted a write-protected cartridge, or the media has read-only
compatibility, error code appears in the SCD. In either case, the tape drive unloads the cartridge and exits Maintenance mode after the cartridge is removed.
1. Place the drive in Maintenance mode. For instructions, see
.
2. Press Unload once per second until appears in the SCD. (If you cycle past the wanted code, press Unload once per second until the code reappears.).
3. Press and hold Unload for 3 or more seconds, then release it to select the function. The SCD changes to a flashing , requesting a cartridge.
4. Insert a scratch (blank) data cartridge that is not write protected (or the tape drive exits Maintenance mode). The SCD changes to a flashing . The tape
drive copies the FMR data to the scratch data cartridge.
If the tape drive creates the FMR tape successfully, it rewinds and unloads the new tape, exits Maintenance mode, and the tape is ready to use.
If the tape drive fails to create the FMR tape, it displays an error code. To determine the error, see
. The tape drive then unloads the FMR tape,
and exits Maintenance mode after the cartridge is removed.
94
IBM TS22xx Tape Drives
Summary of Contents for TS22 Series
Page 1: ...IBM TS22xx Tape Drives IBM...

