background image

9


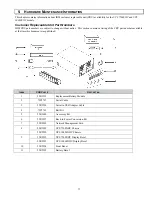
Connecting Equipment and Power to the Rear Panel of the Uninterruptible Power Supply 


INDEX ITEM 

DESCRIPTION 

Outlets 

Connect equipment to the uninterruptible power supply. 

Output Circuit Breakers  

Each circuit breaker protects its nearest outlet. 

EPO Terminal  

The optional Emergency Power Off (EPO) feature enables connected 
loads to be immediately de-energized from a remote location, without 
switching to battery operation. See 

Emergency Power Off (EPO) Option

Bypass Switch 

This switch will put the unit in bypass mode. See 

Operation

5  

Serial Port 


Power management software and serial port communication can be used 
with the uninterruptible power supply. Use only cables supplied or ap-
proved by IBM. 

Note: 

Use the supplied serial cable to connect to the serial port. 

Do not


use a standard serial interface cable because it is incompatible with the 
uninterruptible power supply connector.


6 Integrated 

Environmental 


Monitor 

This Network Management Card monitor features a tempera-
ture/humidity probe, two input contacts, and a two-position output relay. 
For information on connecting and using the probes, contacts, and relay, 
see the 

Network Management Card CD.


Input Circuit Breaker 

The uninterruptible power supply is protected from extreme overloads when in 
the on position. 

The breaker must be on for the unit to operate. 

Ethernet Port/ Network 
Management Card 

Connect the uninterruptible power supply to the network. 

Battery Pack Connectors 

Optional battery packs provide extended runtime during power outages. 
See 

3U Extend Run Battery Pack Operation and Setup Guide.


10 

Access Panel 

Provides access to the terminal blocks. See 

Hardwiring the Uninterrupti-

ble Power Supply.


11 

TVSS Screw 

The uninterruptible power supply features a transient voltage surge-
suppression (TVSS) screw for connecting the ground lead on surge sup-
pression devices such as telephone and network line protectors. When 
connecting a grounding cable, disconnect the uninterruptible power sup-
ply from the utility power outlet. 


Startup 

1.  Hardwire the uninterruptible power supply. See 

Hardwiring the Uninterruptible Power Supply


2.  Connect equipment to the uninterruptible power supply.  

3.  Turn on all connected equipment. To use the uninterruptible power supply as a master on/off switch, be sure all connected 

equipment is turned on. 

4. Press 

the   button on the front panel to turn on the uninterruptible power supply. 

5.  Select the ouput voltage (default is 230 V). See 

Setting the Output Voltage via Terminal Mode

Note: 

For setting the number of external battery packs through Terminal Mode, see the 

3U Extend Run Battery Pack Op-

eration and Setup Guide.


6.  Configure the Network Management Card (optional). 

Summary of Contents for UPS 10000XHV

Page 1: ...IBM UPS 7500XHV IBM UPS 10000XHV Uninterruptible Power Supply Operation and Setup Guide 25R5636 ...

Page 2: ......

Page 3: ...me 12 Battery Runtime Tables 12 3 USER CONFIGURABLE ITEMS 14 Emergency Power Off EPO Option 15 4 STORAGE MAINTENANCE SHIPPING AND SERVICE 16 Storage 16 Replacing the Battery Modules 16 Replacing the Network Management Card 16 Shipping and Service 16 5 HARDWARE MAINTENANCE INFORMATION 17 Customer Replaceable Unit Part Numbers 17 6 TROUBLESHOOTING 18 7 GETTING HELP AND TECHNICAL ASSISTANCE 20 Before...

Page 4: ......

Page 5: ...rer dette produkt Lees voordat u dit product installeert eerst de veiligheidsvoorschriften Ennen kuin asennat tämän tuotteen lue turvaohjeet kohdasta Safety Information Avant d installer ce produit lisez les consignes de sécurité Vor der Installation dieses Produkts die Sicherheitshinweise lesen Prima di installare questo prodotto leggere le Informazioni sulla Sicurezza Les sikkerhetsinformasjonen...

Page 6: ... you to lead a chemical known to the State of California to cause cancer and birth defects or other reproductive harm Wash hands after handling ADVERTENCIA El contacto con el cable de este producto o con cables de accesorios que se venden junto con este producto pueden exponerle al plomo un elemento químico que en el estado de California de los Estados Unidos está considerado como un causante de c...

Page 7: ...rom the utility power outlet before installing or connecting to other equipment Reconnect the power only after all connections are made Do not handle any metallic connector before the power has been disconnected Connect the equipment to a three wire utility outlet two poles plus ground The receptacle must be connected to appropriate branch circuit mains protec tion fuse or circuit breaker Connecti...

Page 8: ...dents and damage can occur during shipment Notify the carrier and your IBM marketing representative or authorized reseller if there is damage The packaging is recyclable save it for reuse or dispose of it properly Check the package contents Uninterruptible power supply Two front bezels Rail kit Tower conversion kit Accessory kit containing Quick Installation Guide Documentation CD PowerChute Busin...

Page 9: ...ctrician 1 Install a utility circuit breaker according to local electrical codes see tables below for input wiring Input Connections Output Connection optional Single Phase Wire to L1 N and Three Phase Wire to L1 L2 L3 N and Wire to L1A N1 and System Wiring Number of Phases Voltage Current Full Load Nominal External Circuit Breaker typical Wire Size typical Input 1 200 208 220 230 240 V 38 amps 50...

Page 10: ...e hardwired input and output power cables 7 For three phase input set the Input Phase Selector switch see C in the diagram to 3 For single phase input leave the switch in the default position of 1 8 Switch the circuit breakers on 9 Check the line voltages 10 Replace the access panel Mounting the Uninterruptible Power Supply in a Rack and Attaching the Front Bezel Attach the mounting brackets Insta...

Page 11: ...lling and Connecting the Batteries and Attaching the Front Battery Bezel Install all battery modules Connect the batteries Reinstall and secure the battery doors with the captive screws Make sure the cords are positioned so that they do not get pinched Attach the front battery bezel ...

Page 12: ...ion and remove the display bezel by sliding to the left and out Rotate the display bezel and reinstall Install the first battery module at the bottom Reinstall the remaining three battery modules Connect the batteries Reinstall and secure the battery doors with captive screws Make sure that the cords are positioned so that they do not get pinched Attach the top panels Attach the bezels ...

Page 13: ...om extreme overloads when in the on position The breaker must be on for the unit to operate 8 Ethernet Port Network Management Card Connect the uninterruptible power supply to the network 9 Battery Pack Connectors Optional battery packs provide extended runtime during power outages See 3U Extend Run Battery Pack Operation and Setup Guide 10 Access Panel Provides access to the terminal blocks See H...

Page 14: ...is played Click OK b Select the COM port that is connected to your uninterruptible power supply The port settings are bits per second 2400 data bits 8 parity none stop bit 1 flow control none c Click Enter 4 Once the blank terminal window is open follow these steps to configure the output voltage a Press Enter to initiate terminal mode Press Enter multiple times until the User Name prompt is displ...

Page 15: ...Overload This LED is lit and the uninterruptible power supply emits a sustained alarm tone when the connected loads are drawing more than the uninterruptible power supply power rating See Troubleshooting Replace Battery Failure of a battery self test causes the uninterruptible power supply to emit short beeps for one minute and this LED to be lit See Troubleshooting FEATURE FUNCTION Power On Press...

Page 16: ...s extremely high and should be checked by an electrician On Battery Operation The uninterruptible power supply automatically switches to battery operation if the utility power fails While running on battery an alarm beeps four times every 30 seconds Press the button to silence this uninterruptible power supply alarm If the utility power does not return the uninterruptible power supply continues to...

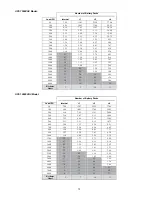
Page 17: ...5 1 65 4000 13 28 46 1 36 5000 10 21 35 1 06 6000 7 16 28 52 Recharge Hours 3 7 10 17 UPS 10000XHV Model Number of Battery Packs Load W Internal 1 2 4 50 7 56 13 83 21 55 37 68 100 6 00 10 93 17 06 29 83 200 4 16 7 65 11 93 20 90 300 3 16 5 83 9 11 16 00 400 2 55 4 68 7 35 12 88 500 2 11 3 91 6 12 10 75 600 1 80 3 33 5 24 9 21 700 1 56 2 90 4 56 8 03 800 1 38 2 56 4 05 7 11 900 1 23 2 30 3 61 6 38...

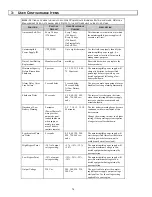
Page 18: ...le all existing alarms permanently Shutdown Delay 20 seconds 0 20 60 120 240 480 720 960 sec onds The interval is set between the times when the uninterruptible power supply receives a shutdown command and actual shutdown Duration of Low Battery Warning 2 minutes PowerChute soft ware provides automatic unat tended shutdown when approxi mately two min utes of battery runtime remain 2 5 7 10 12 15 1...

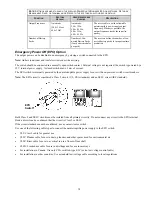
Page 19: ...the switch is powered by a 12 V internal power supply A closed switch draws 2 mA of current The EPO switch is internally powered by the uninterruptible power supply for use with non powered switch circuit breakers Note The EPO circuit is considered a Class 2 circuit UL CSA standards and an SELV circuit IEC standard Both Class 2 and SELV circuits must be isolated from all primary circuitry Do not c...

Page 20: ...mation about the disposal of sealed lead acid batteries outside of the United States contact your local IBM service or ganization Replacing the Network Management Card Refer to the Network Management Card CD for removal and replacement procedures Shipping and Service Prepare the uninterruptible power supply for shipping Shut down and disconnect any equipment attached to the uninterruptible power s...

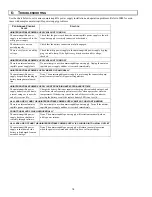
Page 21: ...ing of the CRU part numbers available at the time this document was published INDEX CRU PART DESCRIPTION 1 25R5591 Replacement Battery Module 2 73P5767 Serial Cable 3 25R5596 Serial to USB Adapter Cable 4 73P5769 Rail Kit 5 25R5600 Accessory Kit 6 25R5597 Rack to Tower Conversion Kit 7 25R5599 Network Management Card 8 25R5589 UPS 7500XHV Chassis 25R5590 UPS 10000XHV Chassis 9 25R5592 UPS 7500XHV ...

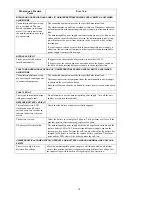
Page 22: ...ptible power supply is protecting the connected equip ment from occasional utility power irregularities UNINTERRUPTIBLE POWER SUPPLY IS NOT PROVIDING EXPECTED BACKUP TIME The uninterruptible power supply battery is weak due to a recent outage or is near the end of its service life Charge the battery Batteries require recharging after extended outages and wear faster when frequently put into servic...

Page 23: ...wer to connected equipment The connected equipment exceeds the specified maximum load Disconnect nonessential equipment from the uninterruptible power supply to eliminate the overload condition Press the off button then the on button to restore power to connected equip ment FAULT LED LIT There is an internal uninterrup tible power supply fault Do not attempt to use the uninterruptible power supply...

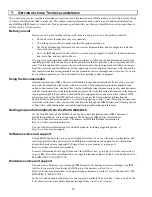
Page 24: ... the diagnostic programs The troubleshooting information or the diagnos tic programs might tell you that you need additional or updated device drivers or other software IBM maintains pages on the World Wide Web where you can get the latest technical information and download device drivers and updates To access these pages go to http www ibm com pc support and follow the instructions Also you can o...

Page 25: ...ge in transit Never use Styrofoam beads for packaging Damage sustained in transit is not covered under war ranty Attention Always disconnect the battery before shipping The battery can remain in the uninterruptible power supply it does not have to be removed Complete the following steps 1 Shut down and disconnect any equipment attached to the uninterruptible power supply 2 Shut down the uninterrup...

Page 26: ... described in this publication at any time without notice Any references in this information to non IBM Web sites are provided for convenience only and do not in any manner serve as an endorsement of those Web sites The materials at those Web sites are not part of the materials for this IBM product and use of those Web sites is at your own risk IBM may use or distribute any of the information you ...

Page 27: ...cuit boards cables electromagnetic compatibility gaskets and connectors which may contain lead and copper beryllium alloys that require special handling and disposal at end of life Before this unit is disposed of these materials must be removed and recycled or discarded according to applicable regulations IBM offers product return programs in several countries Information on product recycling offe...

Page 28: ...uding interference that may cause undesired operation Industry Canada Class A emission compliance statement This Class A digital apparatus complies with Canadian ICES 003 Avis de conformité à la réglementation d Industrie Canada Cet appareil numérique de la classe A est conforme à la norme NMB 003 du Canada Australia and New Zealand Class A statement Attention This is a Class A product In a domest...

Page 29: ...25 Taiwan electronic emission statement Chinese Class A warning statement Statement of Conformity to the Voluntary Control Council for Interference from Informa tion ...

Reviews: