


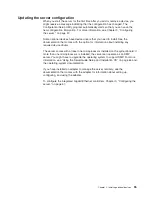

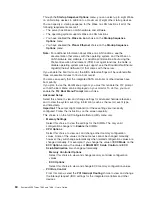
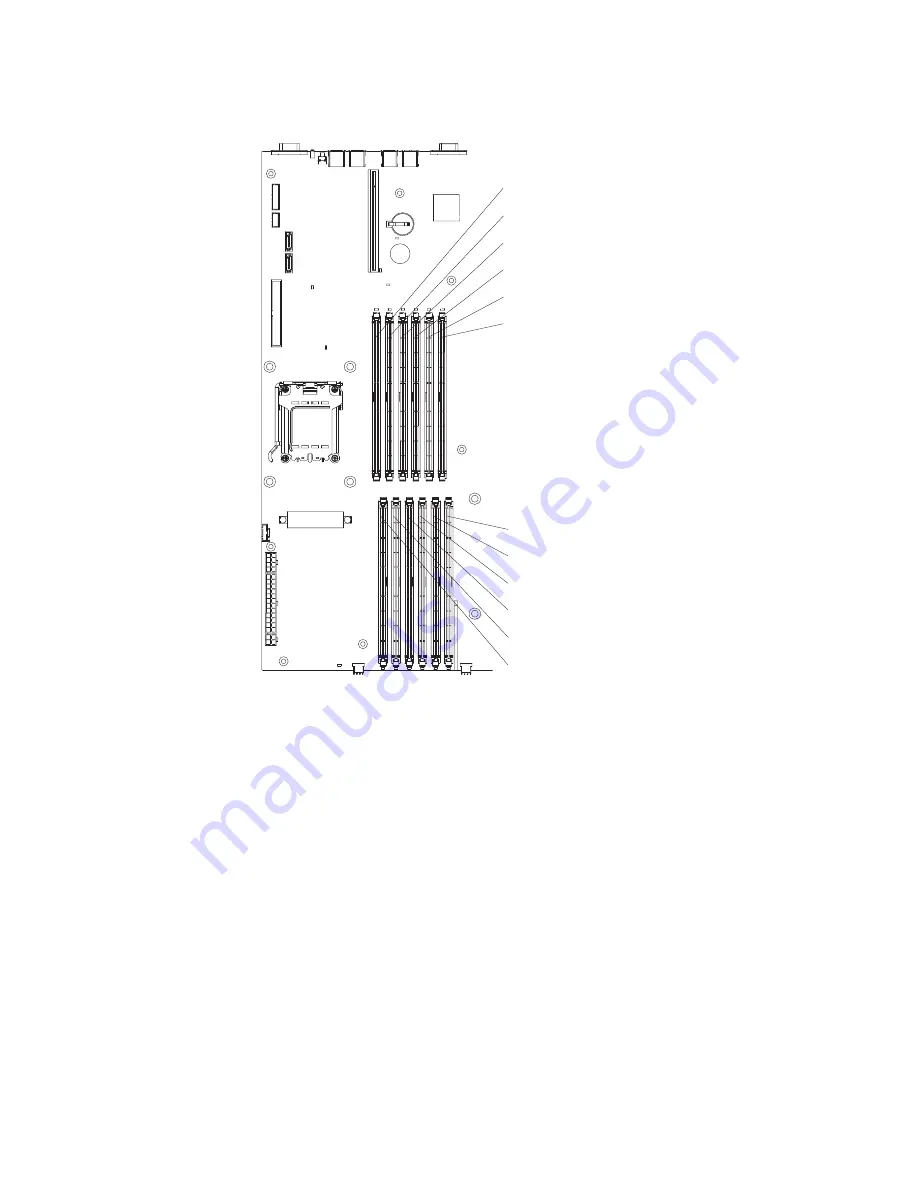
The
following
illustration
shows
the
DIMM
connectors
on
the
system
board.
DIMM 12
DIMM 6
DIMM 11
DIMM 5
DIMM 10
DIMM 4
DIMM 9
DIMM 3
DIMM 8
DIMM 2
DIMM 7
DIMM 1
To
install
a
DIMM,
complete
the
following
steps.
1.
Read
the
safety
information
that
begins
on
page
v
and
“Installation
guidelines”
on
page
21.
2.
Turn
off
the
server
and
peripheral
devices,
and
disconnect
the
power
cords
and
all
external
cables.
3.
Remove
the
server
from
the
rack;
then,
remove
the
server
cover
(see
“Removing
the
cover”
on
page
23).
4.
According
to
your
server
configuration,
select
the
applicable
DIMM
installation
sequence
from
Table
2
on
page
44.
Attention:
To
avoid
breaking
the
retaining
clips
or
damaging
the
DIMM
connectors,
open
and
close
the
clips
gently.
5.
Open
the
retaining
clip
on
each
end
of
the
DIMM
connector.
6.
Touch
the
static-protective
package
that
contains
the
DIMM
to
any
unpainted
metal
surface
on
the
server.
Then,
remove
the
DIMM
from
the
package.
Chapter
2.
Installing
optional
devices
45
Summary of Contents for x3455 - System - 7984
Page 1: ...System x3455 Types 7984 and 7986 User s Guide...
Page 2: ......
Page 3: ...System x3455 Types 7984 and 7986 User s Guide...
Page 70: ...56 System x3455 Types 7984 and 7986 User s Guide...
Page 111: ......
Page 112: ...Part Number 42D2184 Printed in USA 1P P N 42D2184...


