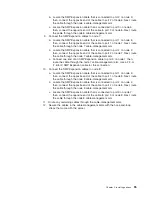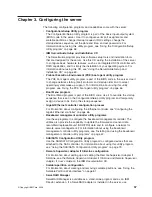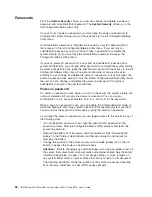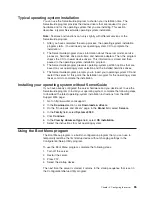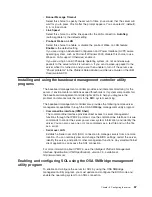
the
Linux
console
through
an
SOL
session
and
directs
Linux
output
to
the
serial
console.
See
the
documentation
for
your
specific
Linux
operating-system
type
for
information
and
instructions.
Use
one
of
the
following
procedures
to
enable
SOL
sessions
for
your
Linux
operating
system.
You
must
be
logged
in
as
a
root
user
to
perform
these
procedures.
Configuring
Red
Hat
Enterprise
Linux
ES
2.1:
Note:
This
procedure
is
based
on
a
default
installation
of
Red
Hat
Enterprise
Linux
ES
2.1.
The
file
names,
structures,
and
commands
might
be
different
for
other
versions
of
Red
Hat
Linux.
To
configure
the
general
Linux
parameters
for
SOL
operation
when
using
the
Red
Hat
Enterprise
Linux
ES
2.1
operating
system,
complete
the
following
steps.
Note:
Hardware
flow
control
prevents
character
loss
during
communication
over
a
serial
connection.
You
must
enable
it
when
using
a
Linux
operating
system.
1.
Add
the
following
line
to
the
end
of
the
#
Run
gettys
in
standard
runlevels
section
of
the
/etc/inittab
file.
This
enables
hardware
flow
control
and
enables
users
to
log
in
through
the
SOL
console.
7:2345:respawn:/sbin/agetty
-h
ttyS1
19200
vt102
2.
Add
the
following
line
at
the
bottom
of
the
/etc/securetty
file
to
enable
a
user
to
log
in
as
the
root
user
through
the
SOL
console:
ttyS1
LILO
configuration:
If
you
are
using
LILO,
complete
the
following
steps:
1.
Modify
the
/etc/lilo.conf
file:
a.
Add
the
following
text
to
the
end
of
the
first
default=linux
line:
-Monitor
b.
Comment
out
the
map=/boot/map
line
by
adding
a
#
at
the
beginning
of
the
line.
c.
Comment
out
the
message=/boot/message
line
by
adding
a
#
at
the
beginning
of
the
line.
d.
Add
the
following
line
before
the
first
image=
line:
#
This
will
allow
you
to
only
Monitor
the
OS
boot
via
SOL
e.
Add
the
following
text
to
the
end
of
the
first
label=linux
line:
-Monitor
f.
Add
the
following
line
to
the
first
image=
section.
This
enables
SOL.
append="console=ttyS1,19200n8
console=tty1"
g.
Add
the
following
lines
between
the
two
image=
sections:
#
This
will
allow
you
to
Interact
with
the
OS
boot
via
SOL
image=/boot/vmlinuz-2.4.9-e.12smp
label=linux-Interact
initrd=/boot/initrd-2.4.9-e.12smp.img
read-only
root=/dev/hda6
append="console=tty1
console=ttyS1,19200n8
"
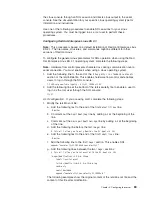
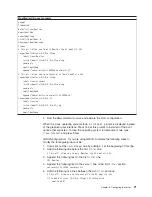
The
following
examples
show
the
original
content
of
the
/etc/lilo.conf
file
and
the
content
of
this
file
after
modification.
Chapter
3.
Configuring
the
server
69
Summary of Contents for x3950 8872
Page 1: ...IBM System x3950 Type 8872 and System x3950 E Type 8874 User s Guide...
Page 2: ......
Page 3: ...IBM System x3950 Type 8872 and System x3950 E Type 8874 User s Guide...
Page 68: ...56 IBM System x3950 Type 8872 and System x3950 E Type 8874 User s Guide...
Page 98: ...86 IBM System x3950 Type 8872 and System x3950 E Type 8874 User s Guide...
Page 100: ...88 IBM System x3950 Type 8872 and System x3950 E Type 8874 User s Guide...
Page 109: ......
Page 110: ...Part Number 31R1856 Printed in USA 1P P N 31R1856...

