


Attention:
Failure to complete the instructions in the prescribed order might
cause damage to the microprocessor pins and cause the microprocessor to
fail.
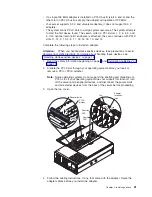
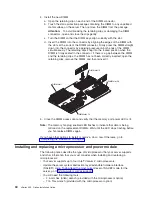
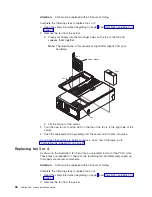
Power module
Microprocessor
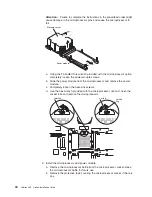
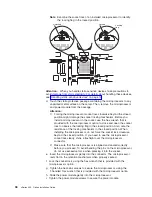
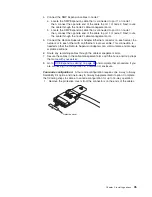
a. Using the T-handled Torx wrench provided with the microprocessor option,
completely loosen the power-module screws.
b. Slide the power module from the microprocessor and remove the power
module.
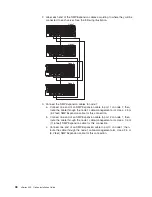
c. Completely loosen the heat-sink screws.
d. Use the hex wrench provided with the microprocessor option to open the
socket lock and remove the microprocessor.
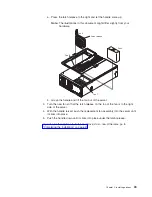
Unlocked
Locked
Locking
flag
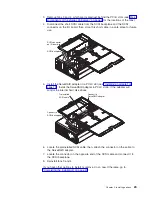
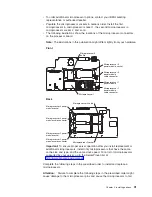
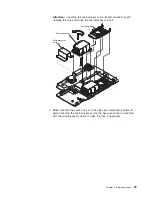
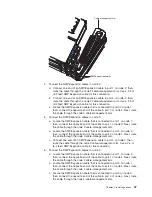
9. Install the microprocessor and power module:
a. Remove the microprocessor baffle from the microprocessor socket. Keep
the microprocessor baffle for future use.
b. Remove the protective tape covering the microprocessor socket, if there is
any.
34
xSeries 455: Option Installation Guide
Summary of Contents for xSeries 455
Page 1: ...xSeries 455 Option Installation Guide ERserver...
Page 2: ......
Page 3: ...xSeries 455 Option Installation Guide SC88 P919 80 ERserver...
Page 12: ...x xSeries 455 Option Installation Guide...
Page 24: ...12 xSeries 455 Option Installation Guide...
Page 70: ...58 xSeries 455 Option Installation Guide...
Page 74: ...62 xSeries 455 Option Installation Guide...
Page 82: ...70 xSeries 455 Option Installation Guide...
Page 85: ......
Page 86: ...Part Number 88P9198 Printed in U S A SC88 P919 80 1P P N 88P9198...


