Note:
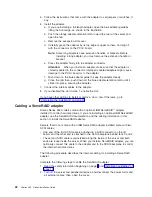
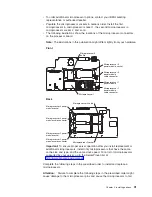
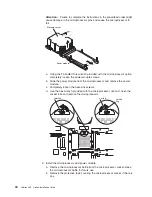
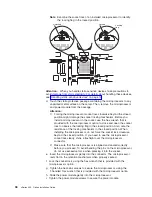
Examine the socket lock of an installed microprocessor to identify
the locking flag in the locked position.
Unlocked
Locked
Locking
flag
Attention:
When you handle static-sensitive devices, take precautions to
avoid damage from static electricity. For details about handling these devices,
see “Handling static-sensitive devices” on page 14.
d. Touch the static-protective package containing the microprocessor to any
unpainted metal surface on the server. Then, remove the microprocessor
and power module from the package.
Attention:
1) Forcing the microprocessor socket lock clockwise beyond the closed
position might damage the socket locking mechanism. Before you
install a microprocessor in the socket, use the hex wrench that is
provided with the microprocessor option to close and open the socket
lock to observe the locking flag in the closed position. Also, note the
resistance of the locking mechanism in the closed position. When
installing the microprocessor, do not force the socket lock clockwise
beyond the closed position. If you need to see the microprocessor
socket lock clearly, shine a flashlight over the microprocessor
connector.
2) Make sure that the microprocessor is aligned and seated correctly
before you proceed. To avoid bending the pins on the microprocessor,
do not use excessive force when pressing it into the socket.
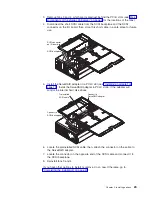
e. Insert the microprocessor gently into the connector. The microprocessor
rests flat on the retention mechanism when properly seated.
f. Lock the socket lock, using the hex wrench that is provided with the
microprocessor option.
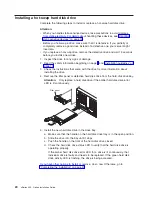
g. Tighten the heat-sink screws to secure the microprocessor, using the
T-handled Torx wrench that is provided with the microprocessor option.
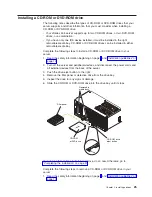
h. Slide the power module gently into the microprocessor.
i. Tighten the power-module screws to secure the power module.
36
xSeries 455: Option Installation Guide
Summary of Contents for xSeries 455
Page 1: ...xSeries 455 Option Installation Guide ERserver...
Page 2: ......
Page 3: ...xSeries 455 Option Installation Guide SC88 P919 80 ERserver...
Page 12: ...x xSeries 455 Option Installation Guide...
Page 24: ...12 xSeries 455 Option Installation Guide...
Page 70: ...58 xSeries 455 Option Installation Guide...
Page 74: ...62 xSeries 455 Option Installation Guide...
Page 82: ...70 xSeries 455 Option Installation Guide...
Page 85: ......
Page 86: ...Part Number 88P9198 Printed in U S A SC88 P919 80 1P P N 88P9198...

