


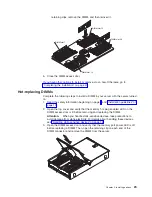

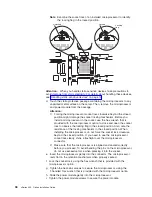


retaining clips, remove the DIMM, and then reinsert it.
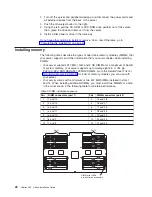
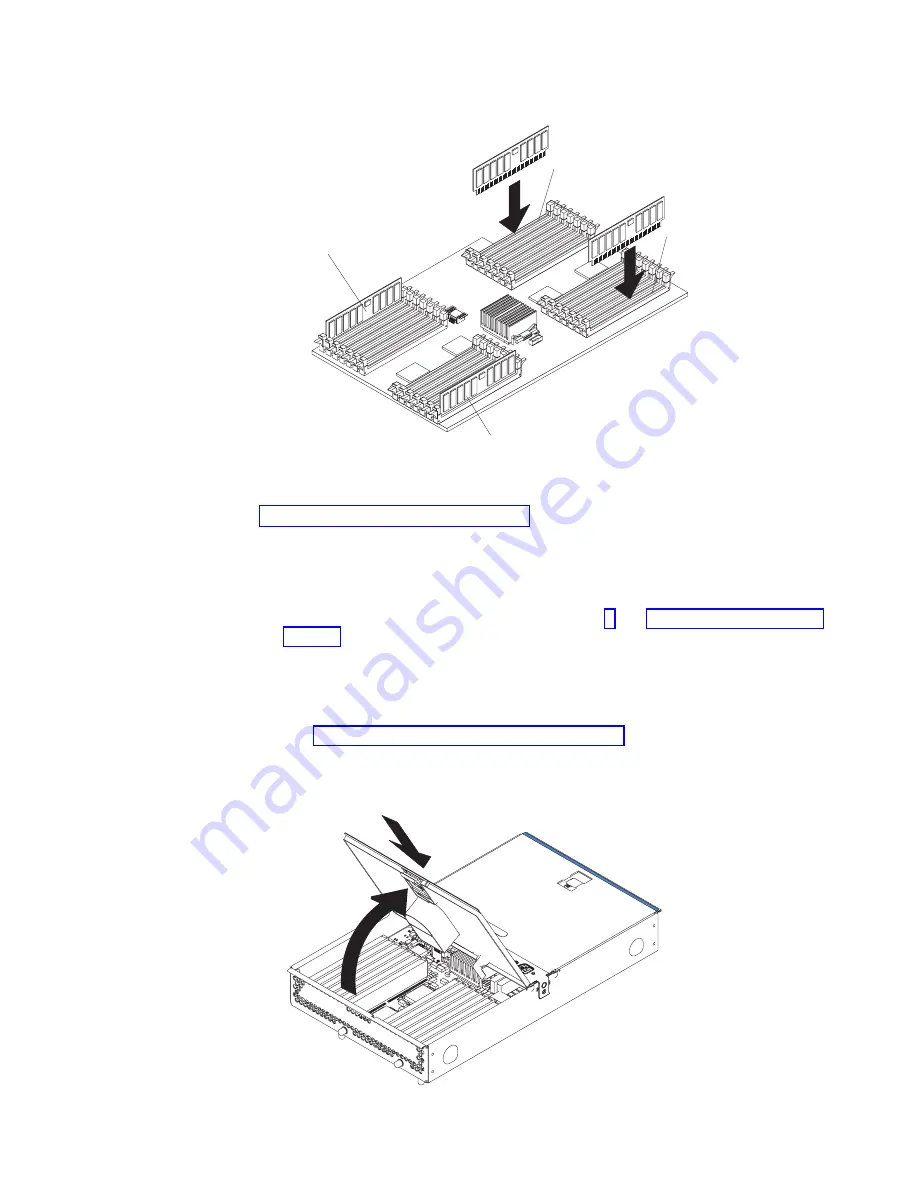
DIMM slot 15
DIMM slot 1
DIMM slot 28
DIMM slot 14
5. Close the DIMM access door.
If you have other options to install or remove, do so now. Otherwise, go to
“Completing the installation” on page 41.
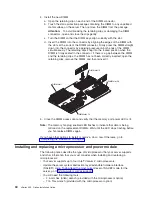
Hot-replacing DIMMs
Complete the following steps to install a DIMM in your server with the server turned
on:
1. Read the safety information beginning on page v and “Installation guidelines” on
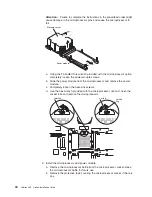
2. Open the top cover and verify that the memory hot-plug enabled LED on the
DIMM access door is lit before removing and replacing the DIMM.
Attention:
When you handle static-sensitive devices, take precautions to
avoid damage from static electricity. For details about handling these devices,
see “Handling static-sensitive devices” on page 14.
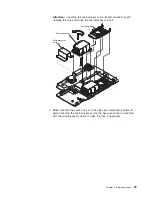
3. Open the DIMM access door and verify that the memory port power LED is off
before replacing a DIMM. Then, open the retaining clip on each end of the
DIMM connector and remove the DIMM from the server.
Chapter 2. Installing options
29
Summary of Contents for xSeries 455
Page 1: ...xSeries 455 Option Installation Guide ERserver...
Page 2: ......
Page 3: ...xSeries 455 Option Installation Guide SC88 P919 80 ERserver...
Page 12: ...x xSeries 455 Option Installation Guide...
Page 24: ...12 xSeries 455 Option Installation Guide...
Page 70: ...58 xSeries 455 Option Installation Guide...
Page 74: ...62 xSeries 455 Option Installation Guide...
Page 82: ...70 xSeries 455 Option Installation Guide...
Page 85: ......
Page 86: ...Part Number 88P9198 Printed in U S A SC88 P919 80 1P P N 88P9198...


