


Attention:
A fan must be replaced within 48 hours of failing.
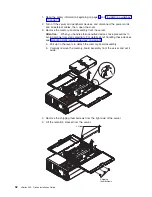
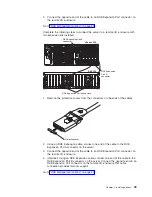
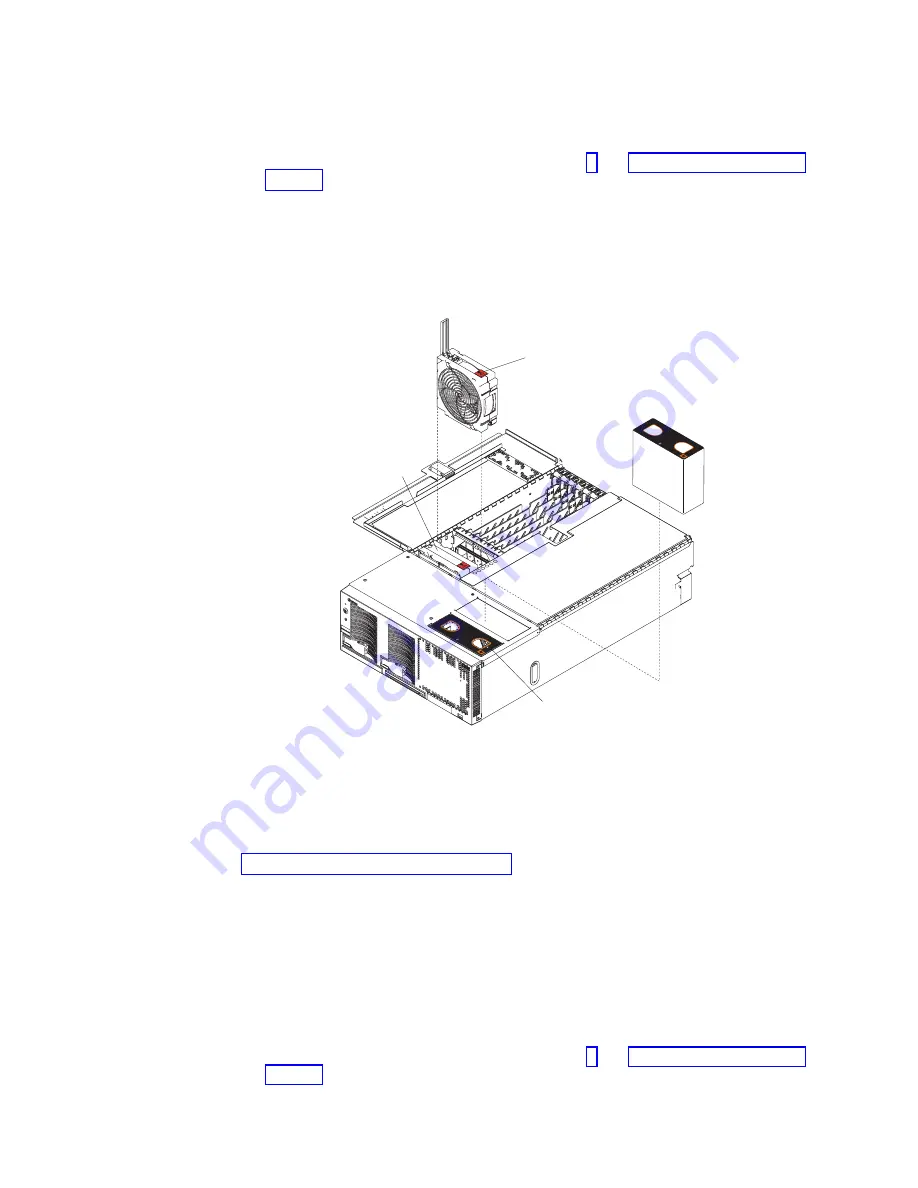
Complete the following steps to replace fan 1 or 2:
1. Read the safety information beginning on page v and “Installation guidelines” on
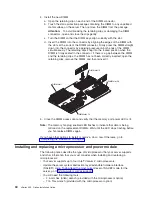
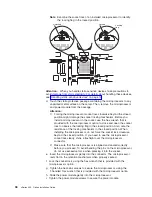
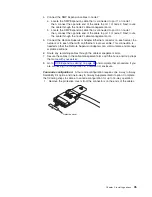
2. Remove the fan from the server:
a. Place your fingers into the two finger holes on the top of the fan and
squeeze them together.
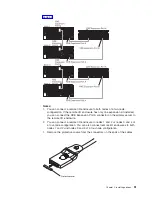
Note:
The illustrations in this document might differ slightly from your
hardware.
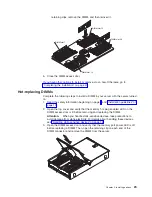
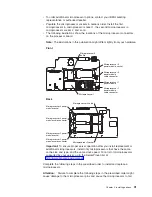
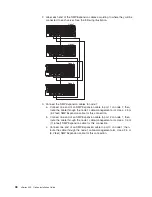
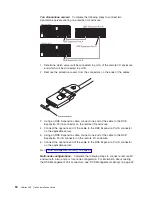
Fan 1
Fan 2
Fan 3
Fan 4
NO
TE:
FOR PR
OP
ER AIRFLO
W, REPLA
CE F
AN
WITHIN 2 MINUTES
FR
ONT OF BO
X
NO
TE:
FOR
PR
OPER AIRFLO
W,
R
EPLA
CE
FAN
W
ITHIN 2 MINU
TE
S
FR
ONT O
F BO
X
Latch release
b. Lift the fan out of the server.
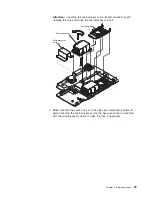
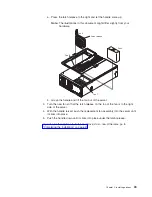
3. Turn the new fan so that the LED on the top of the fan is to the right side of the
server.
4. Push the replacement fan assembly into the server until it clicks into place.
If you have other options to install or remove, do so now. Otherwise, go to
“Completing the installation” on page 41.
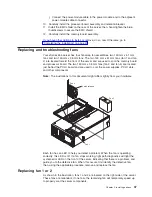
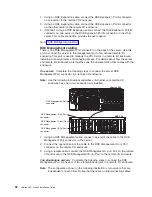
Replacing fan 3 or 4
As shown in the illustration, fan 3 and fan 4 are located in front of the PCI-X slots.
These fans are redundant; if one fails, the remaining fan will temporarily speed up
to properly cool server components.
Attention:
A fan must be replaced within 48 hours of failing.
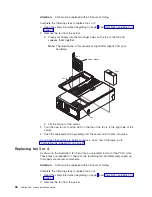
Complete the following steps to replace fan 3 or 4:
1. Read the safety information beginning on page v and “Installation guidelines” on
2. Remove the fan from the server:
38
xSeries 455: Option Installation Guide
Summary of Contents for xSeries 455
Page 1: ...xSeries 455 Option Installation Guide ERserver...
Page 2: ......
Page 3: ...xSeries 455 Option Installation Guide SC88 P919 80 ERserver...
Page 12: ...x xSeries 455 Option Installation Guide...
Page 24: ...12 xSeries 455 Option Installation Guide...
Page 70: ...58 xSeries 455 Option Installation Guide...
Page 74: ...62 xSeries 455 Option Installation Guide...
Page 82: ...70 xSeries 455 Option Installation Guide...
Page 85: ......
Page 86: ...Part Number 88P9198 Printed in U S A SC88 P919 80 1P P N 88P9198...


