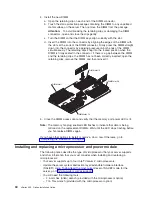

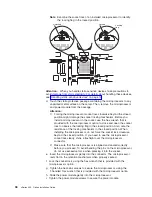


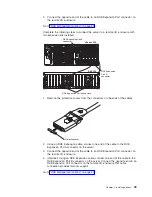
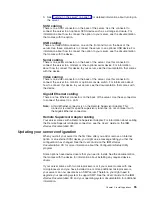
4. Remove the battery:
a. Use one finger to press the top of the battery clip away from the battery.
b. Lift and remove the battery from the socket.
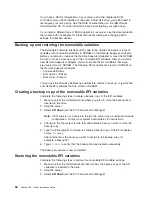
5. Insert the new battery:
a. Use one finger to press the top of the battery clip away from the battery.
b. Press the battery into the socket until it clicks into place. Make sure that the
battery clip holds the battery securely.
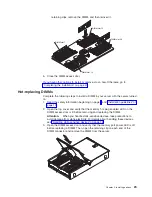
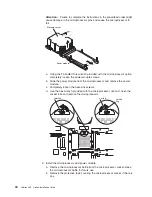
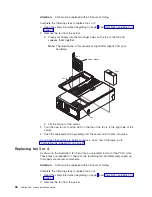
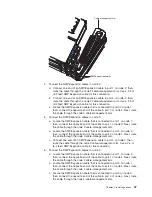
6. Install fans 3 and 4 in the server (see “Replacing fan 3 or 4” on page 38 for
details).
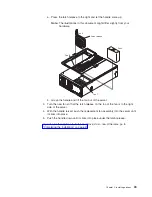
7. Close the server cover, and connect the cables.
8. Turn on the server.
9. Start the Configuration/Setup Utility program and set configuration parameters.
v
Set the system date and time.
v
Set the power-on password.
v
Reconfigure your server.
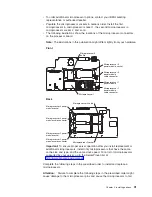
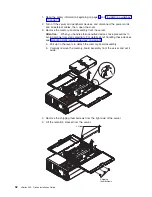
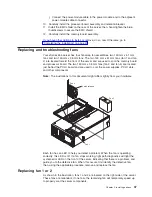
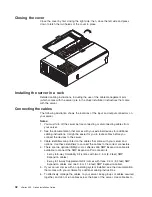
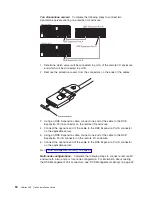
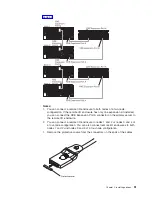
Completing the installation
To complete your installation, close the server cover, install your server in a rack,
reconnect all cables that you disconnected earlier, and for certain options, run the
Configuration/Setup Utility program. Follow the instructions in this section.
Attention:
For proper cooling and airflow, close the server cover before or shortly
after turning on the server. Operating the server for extended periods of time (over
15 minutes) with the server cover open might damage server components.
Chapter 2. Installing options
41
Summary of Contents for xSeries 455
Page 1: ...xSeries 455 Option Installation Guide ERserver...
Page 2: ......
Page 3: ...xSeries 455 Option Installation Guide SC88 P919 80 ERserver...
Page 12: ...x xSeries 455 Option Installation Guide...
Page 24: ...12 xSeries 455 Option Installation Guide...
Page 70: ...58 xSeries 455 Option Installation Guide...
Page 74: ...62 xSeries 455 Option Installation Guide...
Page 82: ...70 xSeries 455 Option Installation Guide...
Page 85: ......
Page 86: ...Part Number 88P9198 Printed in U S A SC88 P919 80 1P P N 88P9198...