background image

66 

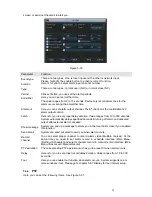
Figure 6-2 

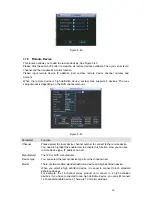
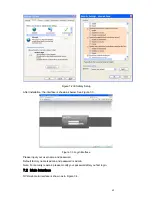
Select the “Open Device Web” item; you can go to the corresponding web login interface. See 

307H

Figure 6-3. 


Figure 6-3 

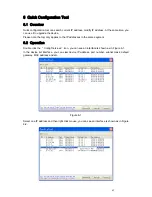
If you want to modify the device IP address without logging in the device web interface, you can 
go to the configuration tool main interface to set.  
In the configuration tool search interface (

308H

Figure 6-1), please select a device IP address and then 

double click it to open the login interface. Or you can select an IP address and then click the 
Login button to go to the login interface. See 

309H

Figure 6-4. 

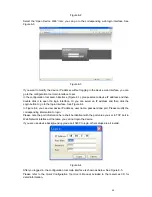
In 

310H

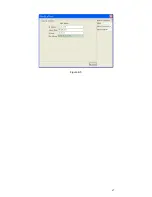
Figure 6-4, you can view device IP address, user name, password and port. Please modify the 

corresponding information to login.  
Please note the port information here shall be identical with the port value you set in TCP port in 
Web Network interface. Otherwise, you can not login the device.  
If you are use device background upgrade port 3800 to login, other setups are all invalid. 


Figure 6-4 

After you logged in, the configuration tool main interface is shown as below. See 

311H

Figure 6-5. 

Please refer to the 

Quick Configuration Tool User's Manual

 included in the resources CD for 

detail information. 

Summary of Contents for Network Video Recorder

Page 1: ...1 Network Video Recorder User s Manual Applies to A L S series only ...

Page 2: ...ont Panel 13 2 1 1 A Series 13 2 1 2 L Series 13 2 1 3 S Series 15 2 2 Rear Panel 18 2 2 1 A Series 18 2 2 2 L Series 19 2 2 3 S Series 21 2 3 Bidirectional talk 23 2 3 1 Device end to PC end 23 2 3 2 PC end to the device end 24 2 4 Mouse Operation 24 2 5 Remote Control 25 3 HDD Installation 28 3 1 A Series 28 3 2 L Series 29 3 3 S Series 31 ...

Page 3: ...5 4 Search and Playback 38 5 5 Information 40 5 5 1 HDD Information 40 5 5 2 BPS 41 5 5 3 Log 42 5 5 4 Version 42 5 5 5 Online Users 43 5 6 Setting 43 5 6 1 General 44 5 6 2 Schedule 45 5 6 3 RS232 46 5 6 4 Network 47 5 6 4 1 Advanced Setup 48 5 6 4 2 IP Filter 48 5 6 4 3 PPPoE 48 5 6 4 4 NTP Setup 49 5 6 4 5 DDNS Setup 49 5 6 4 6 DNS 50 5 6 4 7 Network Storage 51 5 6 5 Alarm 51 ...

Page 4: ... 8 Remote Device 60 5 8 Backup 61 5 8 1 Detect Device 61 5 8 2 Local Backup 62 5 8 3 Network Backup 63 5 9 Shutdown 64 6 Quick Configuration Tool 65 6 1 Overview 65 6 2 Operation 65 7 Web 68 7 1 General Introduction 68 7 1 1 Preparation 68 7 1 2 Log in 68 7 2 Main Interface 69 7 2 1 Monitor Channel Menu Tree 70 7 2 2 System Menu 72 7 2 3 Monitor Window Switch 72 7 2 4 Preview Window Switch 72 7 2 ...

Page 5: ...1 7 3 2 4 Network 82 7 3 2 5 Alarm 88 7 3 2 6 PTZ 90 7 3 2 7 Default Backup 91 7 3 3 Advanced 91 7 3 3 1 HDD Management 92 7 3 3 2 Alarm I O 92 7 3 3 3 Record 93 7 3 3 4 Account 94 7 3 3 5 Auto Maintenance 95 7 3 3 6 Abnormity 95 7 3 4 Additional Function 96 7 3 4 1 DNS 96 7 3 4 2 Remote Device 97 7 4 Search 98 7 5 Alarm 100 7 6 About 101 7 7 Log out 102 8 FAQ 103 9 Appendix A HDD Capacity Calcula...

Page 6: ...6 11 Appendix C Compatible USB List 110 12 Appendix D Compatible Displayer List 111 13 Appendix E No IP DDNS 112 ...

Page 7: ...ation environment Keep away from extreme hot places and sources Avoid direct sunlight Keep away from extreme humid places Avoid violent vibration Do not put other devices on the top of the NVR Be installed in well ventilated place do not block the vent z Accessories Check the following accessories after opening the box z Please refer to the packing list in the box Component Name A Series L S Serie...

Page 8: ...mportant We assume no liability or responsibility for all the fires or electrical shock caused by improper handling or installation We are not liable for any problems caused by unauthorized modifications or attempted repair ...

Page 9: ...nitor centre to the monitor zone The whole project is featuring of simple connection low cost low maintenance work This series NVR can be widely used in many areas such as public security water conservancy transportation and education 1 2 Features User Management Each group has different management powers that can be edited freely Every user belongs to an exclusive group Storage Via corresponding ...

Page 10: ...rded files can be saved in network storage server peripheral USB device burner and etc Network Management Supervise NVR configuration and control power via Ethernet Support management via WEB Peripheral Equipment Management Support peripheral equipment management such as protocol setup and port connection Support transparent data transmission through RS232 RS485 Auxiliary Support switch between NT...

Page 11: ...larm Input 4 8 16 ch alarm input 3 ch alarm output 6 ch alarm output 6 ch alarm output Alarm Output Relay output Relay DC 30V 1A AC 125V 0 5A Activation output Including one controllable DC 12V output 2 built in SATA port s 4 built in SATA ports 8 built in SATA ports Storage N A 1 peripheral eSATA port 1 peripheral eSATA port RS232 Port One RS232 port to debug transparent COM data RS485 port One R...

Page 12: ...atus indication light 16 record status indication lights One system running status indication light One remote control indication light 16 record status indication lights One system running status indication light One remote control indication light Indication Light Power Consumption 12W Excluding HDD 40W Excluding HDD 40W Excluding HDD Working Temperature 0 50 Working Humidity 10 90 Air pressure ...

Page 13: ...when the power connection is normal Alarm status indication light The light becomes red when there is an input alarm Network status indication light The light becomes red when network connection is abnormal HDD status indication light The light becomes red when HDD error occurs Record status indication light The light becomes green when corresponding channel is recoding 2 1 2 L Series The L series...

Page 14: ...rol interface click it to switch PTZ control menu Backspace function in numeral control or text control press it for 1 5seconds to delete the previous character before the cursor In motion detection setup working with Fn and direction keys to realize setup In HDD information interface click it to view HDD record time and other information menu prompt Fn Auxiliary button Realize other special funct...

Page 15: ...ated control jumping to up down left right When playback click these buttons to control playback bar In text mode input number 2 English character A B C 3 English character D E F Confirm Confirm current operation Go to default button Go to menu Power Power button press this button to boot up or shut down NVR USB port To connect USB storage device USB mouse 2 1 3 S Series The S series NVR front pan...

Page 16: ...ch the channel For number more than 10 When you channel number is more than 9 please click this button and then input the number you desire Shuttle outer ring In real time monitor mode it works as left right direction key Playback mode counter clockwise to forward and clock wise to backward Jog inner dial Up down direction key Playback mode turn the inner dial to realized frame frame playback Only...

Page 17: ...en playback click it to restore real time monitor mode Enter Confirm Confirm current operation Go to default button Go to menu One window monitor mode click this button to display assistant function PTZ control and image color After you entered the PTZ control interface click it to switch PTZ control menu Backspace function in numeral control or text control press it for 1 5seconds to delete the p...

Page 18: ...r to the following sheet for detailed information Port Name Connection Function USB port Connect to USB mouse Network port 10M 100M self adaptive Ethernet port Connect to the network cable RS232 232 debug COM It is for general COM debug to configure IP address or transfer transparent COM data VGA VGA video output port VGA VGA video output port Output analog video signal It can connect to the monit...

Page 19: ...there is power to the external alarm device z NO Normal open alarm output port z C Alarm output public end A RS485_A port It is the cable A You can connect to the control devices such as speed dome PTZ B RS485 communication port RS485_B It is the cable B You can connect to the control devices such as speed dome PTZ Power port Input 12V DC Power button Power on off button 2 2 2 L Series The L serie...

Page 20: ...e the same ground Ground end Alarm input ground end NO1 NO5 C1 C5 NC5 Alarm output port 1 5 z 5 groups of alarm output ports Group 1 port NO1 C1 Group 2 port NO2 C2 Group 3 port NO3 C3 group 4 port NO4 C4 Group 5 port NO5 C5 NC5 Output alarm signal to the alarm device Please make sure there is power to the external alarm device z NO Normal open alarm output port z C Alarm output public end z NC No...

Page 21: ... It is for general COM debug to configure IP address or transfer transparent COM data HDMI High definition multimedia interface High definition video signal output port Transmit the clear video and multiple track data Uncompressed to the device of HDMI High definition media interface VGA VGA video output port VGA VGA video output port Output analog video signal It can connect to the monitor to vie...

Page 22: ...ort 1 5 z 5 groups of alarm output ports Group 1 port NO1 C1 Group 2 port NO2 C2 Group 3 port NO3 C3 group 4 port NO4 C4 Group 5 port NO5 C5 NC5 Output alarm signal to the alarm device Please make sure there is power to the external alarm device z NO Normal open alarm output port z C Alarm output public end z NC Normal close alarm output port A RS485_A port It is the cable A You can connect to the...

Page 23: ... transparent COM data HDMI High definition multimedia interface VGA VGA video output port VGA VGA video output port Output analog video signal It can connect to the monitor to view analog video Power button Power on off button 2 3 Bidirectional talk 2 3 1 Device end to PC end Device Connection Please connect the speaker or the pickup to the first audio input port in the device rear panel Then conn...

Page 24: ... rear panel Login the Web and then enable the corresponding channel real time monitor Please refer to the above interface Figure 2 7 to enable bidirectional talk Listening Operation At the PC end speak via the speaker or the pickup and then you can get the audio from the earphone or sound box at the device end 2 4 Mouse Operation Please refer to the following sheet for mouse operation instruction ...

Page 25: ...trol operation such as double click one item in the file list to playback the video Double left click mouse In multiple window mode double left click one channel to view in full window Double left click current video again to go back to previous multiple window mode In real time monitor mode pops up shortcut menu Right click mouse Exit current menu without saving the modification In numeral input ...

Page 26: ...he input method In textbox click this button to switch between numeral English Small Capitalized donation Chinese and etc In textbox click this button to switch between numeral English Small Capitalized donation Chinese and etc Open close tour 3 If your channel number is more than 10 please click this button and then input the corresponding number 4 Record Enable or disable record function manuall...

Page 27: ... When playback click these buttons to control playback bar 9 Forward Various forward speeds and normal speed playback 10 Previous Please refer to the previous in the front panel 11 Backward Various backward speeds and normal speed playback 12 Stop Stop record 13 Next In playback mode playback the next video 14 Slow play Multiple slow play speeds or normal playback Reverse playback or paused mode c...

Page 28: ...front cover See 238HFigure 3 1 Figure 3 1 Place the HDD in accordance with the four holes in the device chassis See 239HFigure 3 2 Figure 3 2 After you fix the HDD in the chassis manually please turn the device and the HDD up for 90 degrees you can use the screwdriver to fix the four screws in the bottom of the chassis to secure the HDD See 240HFigure 3 3 Figure 3 3 ...

Page 29: ...ure 3 4 Please put the cover back and then fix the screws in the rear panel See 242HFigure 3 5 Figure 3 5 3 2 L Series Use the screwdriver to loose the screws in the rear panel and the side panel and then remove the front cover See 243HFigure 3 1 Figure 3 6 Place the HDD on the HDD bracket in accordance with the four holes in the device chassis Use the ...

Page 30: ...ble in the chassis and then connect the power cable to the other port of the HDD See 245HFigure 3 8 Figure 3 8 After you fix the HDD please connect the data cable to the main board first and then connect the power cable to the main board See 246HFigure 3 9 Figure 3 9 Please put the cover back and then fix the screws in the rear panel and the side panel See 247HFigure 3 10 ...

Page 31: ...e 3 11 Figure 3 11 Place the HDD on the HDD bracket in accordance with the four holes in the device chassis Use the screwdriver to secure the HDD in the HDD bracket See 249HFigure 3 12 Figure 3 12 Connect the HDD data cable to the main board and HDD port respectively Loosen the power cable in the chassis and then connect the power cable to the other port of the HDD See 250HFigure 3 13 ...

Page 32: ...13 Please put the cover back and then fix the screws in the rear panel See 251HFigure 3 14 Figure 3 14 Important Before you replace the HDD please make sure you have shut down the device and unplug the power cable ...

Page 33: ...ion 4 1 A Series Connection Please refer to the following figure for A series connection See 252HFigure 4 1 Figure 4 1 4 2 L Series Connection Please refer to the following figure for L series connection See 253HFigure 4 2 ...

Page 34: ...34 Figure 4 2 4 3 S Series Connection Please refer to the following figure for S series connection See 254HFigure 4 3 ...

Page 35: ...35 Figure 4 3 ...

Page 36: ...en You can refer to the following sheet for channel record or alarm status information Figure 5 1 Right click mouse you can see the login interface Please input user name and password See 256HFigure 5 2 System consists of four accounts z Username admin Password admin z Username 888888 Password 888888 z Username 666666 Passwords 666666 z Username default Password default You can use USB mouse to in...

Page 37: ...rch records remote device and etc The local playback window includes 1 4 9 16 You can set the detail channel amount in 1 4 window Figure 5 3 5 3 Main Menu After you logged in the system main menu is shown as below See 258HFigure 5 4 There are total six icons search Information setting backup advanced and shutdown Move the cursor to highlight the icon then double click mouse to enter the sub menu F...

Page 38: ...n view the file list on the right side System displays the first 100 files by default You do not need to set the end time Playback Select the file name and double click mouse or click enter button you can view file content at your local end Backup System supports backup operation You can draw a before file name multiple choices Then click backup button File clip When a file is playback you can cli...

Page 39: ...he next channel You can click it to realize I frame playback Click it to play the searched files repeatedly Click it to go to full screen display Digital zoom When the system is in full screen playback mode drag your mouse in the screen to select a section and then left click mouse to realize digital zoom You can right click mouse to exit In playback mode click this button to switch between play p...

Page 40: ...am statistics Log and version and online user See 260HFigure 5 7 Figure 5 7 5 5 1 HDD Information Here is to list hard disk type total space free space and status See 261HFigure 5 8 For A series product there are max 2 HDDs For L series product there are max 4 HDDs For S series product there are max 8 HDDs means current HDD is normal means there is no HDD If disk is damaged system shows as Please ...

Page 41: ...t the device connected to 2 means the second HDD is current working HDD Type The corresponding HDD property Total space The HDD total capacity Free space The HDD free capacity Status HDD can work properly or not Page up Click it to view previous page Page down Click it to view the next page View recording time Click it to view HDD record information file start time and end time 5 5 2 BPS Here is f...

Page 42: ...leased select log end time Search Please click search button you can view the log files in the specified time There are max ten files in one page Log time Event occurred time Log time Event Detail log information Page up Go to previous log page Page down Go to the next log page Clear You can select the log file s and then click clear button to remove 5 5 4 Version Here is for you to view some vers...

Page 43: ...onnected to the local device See 267HFigure 5 13 You can disconnect one user or block one user if you have proper system right Figure 5 13 5 6 Setting In main menu highlight setting icon and double click mouse System setting interface is shown as below See 268HFigure 5 14 ...

Page 44: ...t do not modify time casually unless there is a must Before your time modification please stop record operation first After completing all the setups please click save button system goes back to the previous menu Figure 5 15 Figure 5 16 Figure 5 17 Parameter Function System time Here is for you to set system time Please click save button to save current setup Date format There are three types YYYY...

Page 45: ...ch device for your management You need to press the address button in the remote control and then input the corresponding address to manage the device Video standard There are two formats NTSC and PAL Auto logout Here is for you to set auto logout interval once login user remains inactive for a specified time The value ranges from 0 to 60 minutes 5 6 2 Schedule Before your set schedule parameter p...

Page 46: ...tion Please note before enable this function please set at least one HDD as redundant Main menu Advanced HDD Management Week Please select from the dropdown list Period You can set detail period here There are max 6 periods in one day 00 00 24 00 Record type There are three types regular and alarm 5 6 3 RS232 RS232 interface is shown as below There are five items See 275HFigure 5 20 After completi...

Page 47: ... ways for you to access the device from the WAN The first way is you get the static IP address from your ISP Internet service provider and you can use the static IP to access the device via PC The other way is you can use the DDNS to access the device Please refer to chapter 5 6 4 6 DDNS setup DHCP It is to auto search IP When enable DHCP function you can not modify IP Subn mask Gateway These valu...

Page 48: ...fter you enabled this function only the IP listed below can access current device If you disable this function all IP addresses can access current device Figure 5 23 5 6 4 3 PPPoE PPPoE interface is shown as in 279HFigure 5 24 Input PPPoE name and PPPoE password you get from your ISP Internet service provider Click OK button you need to restart to activate your configuration After rebooting device...

Page 49: ...in GMT 1 Cairo GMT 2 Moscow GMT 3 New Deli GMT 5 Bangkok GMT 7 Beijing Hong Kong GMT 8 Tokyo GMT 9 Sydney GMT 10 Hawaii GMT 10 Alaska GMT 9 Pacific Time P T GMT 8 American Mountain Time M T GMT 7 American Central Time C T GMT 6 American Eastern Time E T GMT 5 Atlantic Time GMT 4 Brazil GMT 3 Middle Atlantic Time GMT 2 Figure 5 25 5 6 4 5 DDNS Setup DDNS setup interface is shown as in 281HFigure 5 ...

Page 50: ...select as you requirement Please refer to appendix NO IP DDNS for detail information 5 6 4 6 DNS There are two modes Manual setup and auto setup z Manual Setup You can double click DNS to set DNS address manually See 282HFigure 5 27 Please input preferred DNS server IP and alternative DNS server IP Figure 5 27 z Auto gets DNS address Please enable DHCP function first and then double click DNS item...

Page 51: ... the corresponding input port and output port Go to the system setup interface and then select the alarm setup item you can see the following interface See 285HFigure 5 30 Please select the alarm type from the dropdown list There are two types local alarm and net alarm The local alarm is from your local alarm device and net alarm is from the network Then you can select the corresponding alarm inpu...

Page 52: ...m automatically delays specified seconds in turning off alarm and activated output after external alarm cancelled Show message System can pop up a message to alarm you in the local host screen if you enabled this function Send email System can send out email to alert you when alarm occurs Record channel You can select proper channel to record alarm video Multiple choices At the same time you need ...

Page 53: ...lt value is 115200 Data bit Select corresponding data bits Default value is 8 Stop bit Select corresponding stop bits Default value is 1 Parity You can select from the dropdown list Default value is none 5 6 7 Display Display setup interface is shown as below See 287HFigure 5 32 Please highlight icon to select the corresponding function After completing all the setups please click save button syst...

Page 54: ...m supports 1 4 9 16 window s tour Alarm tour type Right now system supports 1 window tour when alarm occurs In tour mode you can see the following interface On the right corner right click mouse or click shift button you can control the tour There are two icons stands for enabling window switch and stands for enabling window function See 288HFigure 5 33 Figure 5 33 5 6 8 Default Click default icon...

Page 55: ...e interface is shown as below See 290HFigure 5 35 There are total eight function keys HDD management alarm output abnormity manual record account auto maintenance TV adjust and remote device Figure 5 35 5 7 1 HDD Management The HDD management interface is shown as below See 291HFigure 5 36 You can select the HDD and then set its property The types include read only read write snapshot clear all da...

Page 56: ...the HDD is full You can click this button to disable the alarm Disk check You can click the disk check button to set the HDD check time The options include restart every day every week every month and never HDD No You can select the HDD from the dropdown list There are 11 portions by default Set to The types include read only read write snapshot clear all data set sub areas and etc Execute Then yo...

Page 57: ...ically delays specified seconds in turning off alarm and activated output after external alarm cancelled Show message System can pop up the message in the local screen to alert you when alarm occurs Send email System can send out email to alert you when alarm occurs 5 7 3 Alarm Output Here is for you to set proper alarm output Please highlight icon to select the corresponding alarm output After al...

Page 58: ... manual stop Please highlight icon to select corresponding channel Figure 5 39 Parameter Function Record mode There are two record modes Schedule manual Schedule The channel records record period record type as you have set in recording setup Main Menu Setting Schedule Manual The manual record has the highest priority After manual setup all selected channels will begin ordinary recording Stop Stop...

Page 59: ...user should belong to one group User right can not exceed group right z About reusable function this function allows multiple users use the same account to login After all the setups please click save button system goes back to the previous menu Figure 5 40 5 7 6 Auto Maintain Here you can set auto reboot time See 296HFigure 5 41 You can select proper setup from the dropdown list After all the set...

Page 60: ...hannel Please select the local device channel number to connect to the remote device You need to highlight the enable item to activate this function Now you can see remote device type IP address and etc Manufacturer The IPC or NVS manufacturer Device type You can select the remote device type from the dropdown list Model There are two models standard definition device and high definition device Wh...

Page 61: ...d TCP port Please note for the 16 ch device the system max supports 4 high definition devices You can see the following dialogue box if the remote device configuration exceeds the local device max setup See 299HFigure 5 45 You need to stop some channels since it already exceeds the device decoding capacity Figure 5 44 5 8 Backup Device support USB device backup and network download Here we introdu...

Page 62: ...vice you can click it to remove the file in the backup device Stop Click it to stop current backup operation 5 8 2 Local Backup Select backup device and then set channel file start time and end time Click add button system begins search All matched files are listed below System automatically calculates the capacity needed and remained See 301HFigure 5 46 system only backup files with a before chan...

Page 63: ...work Backup The network backup interface is shown as in 303HFigure 5 48 Pease set network backup type and upload time Right now the network backup supports FTP only You can go to chapter 5 6 4 7 Network storage Main menu Setting Network Network storage to set storage path There are two upload periods You can highlight the corresponding icon to select the upload time Then you can set the record per...

Page 64: ...sword when you login the next time z Restart application reboot device z Shutdown system shuts down and turns off power z Restart system system begins rebooting z Switch user you can use another account to login If you shut down the device there is a process bar for your reference system waits for 3 seconds and then shut down You can not cancel Please note sometimes you need to input the proper pa...

Page 65: ...nly applies to the IP addresses in the same segment 6 2 Operation Double click the ConfigTools exe icon you can see an interface is shown as in 305HFigure 6 1 In the device list interface you can view device IP address port number subnet mask default gateway MAC address and etc Figure 6 1 Select one IP address and then right click mouse you can see an interface is shown as in 306HFigure 6 2 ...

Page 66: ...ick the Login button to go to the login interface See 309HFigure 6 4 In 310HFigure 6 4 you can view device IP address user name password and port Please modify the corresponding information to login Please note the port information here shall be identical with the port value you set in TCP port in Web Network interface Otherwise you can not login the device If you are use device background upgrade...

Page 67: ...67 Figure 6 5 ...

Page 68: ...input corresponding gateway and subnet mask if there are routers z Use order ping NVR IP address to check connection is OK or not Usually the return TTL value should be less than 255 7 1 2 Log in Open the IE and then input the NVR IP address in the address column For example if your NVR IP address is 192 168 1 108 then please input http 192 168 1 108 in IE address column See Figure 7 1 Figure 7 1 ...

Page 69: ...w See Figure 7 3 Figure 7 3 Login interface Please input your user name and password Default factory name is admin and password is admin Note For security reasons please modify your password after you first login 7 2 Main Interface NVR web main interface is shown as in Figure 7 4 ...

Page 70: ...menu z Section 3 PTZ control z Section 4 Video setup and other setup z Section 5 Preview window z Section 6 Monitor window switch 7 2 1 Monitor Channel Menu Tree The monitor channel menu tree is shown as in Figure 7 5 Figure 7 5 Monitor Channel Menu Tree Please refer to the following sheet for detailed information ...

Page 71: ...ick local play button to select file to play in PC Refresh Click this button to refresh monitor channel name Please left click one monitor to view real time video the monitor window is shown as in 312HFigure 7 6 Figure 7 6 Real time Monitor Please refer to the following sheet for monitor window parameter information SN Parameter Function 1 4 Display device information z 1 NVR IP address z 2 Channe...

Page 72: ... is shown as in Figure 7 7 Please refer to chapter 7 3 Configuration chapter 7 4 Search chapter 7 5 Alarm chapter 7 6 About chapter 7 7 Log out for detailed information Figure 7 7 System Menu 7 2 3 Monitor Window Switch The monitor window switch interface is shown as in Figure 7 8 Figure 7 8 Monitor Window Switch System supports 1 4 6 8 9 13 16 20 25 36 window real time preview It is video quality...

Page 73: ...uttons are for speed dome only z PTZ direction PTZ supports eight directions left right up down upper left upper right bottom left bottom right z Speed The step 8 speed is faster than step 1 Figure 7 10 PTZ Interface Click PTZ set button the interface is shown as in Figure 7 11 You can click this icon to display or hide the PTZ control platform These six buttons are for speed dome only ...

Page 74: ...sets in one tour z Or you can click delete button to remove one preset from the tour Pattern You can input pattern value and then click start record button to begin PTZ movement Please go back to Figure 7 10 to implement camera operation Then you can click stop record button in Figure 7 11 Now you have set one pattern Assistant The assistant items include BLC Digital zoom night vision camera brigh...

Page 75: ...ideo hue Video setup Reset Restore system default value Note All the operation here applies to WEB end only Click more button the interface is shown as in 314HFigure 7 13 Figure 7 13 Color and More Please refer to the following sheet for detailed information Parameter Function Picture Path Click picture path button system pops up an interface for you to modify path Record Path Click record path bu...

Page 76: ...e version information See 315HFigure 7 14 Figure 7 14 Version Information 7 3 1 2 HDD information Here you can view local storage status such as free capacity and total capacity See 316HFigure 7 15 Figure 7 15 HDD Information 7 3 1 3 Log Here you can view system log See 317HFigure 7 16 ...

Page 77: ...peration user management log clear and file operation Search You can select log type from the drop down list and then click search button to view the list Clear You can click this button to delete all displayed log files Please note system does not support clear by type Backup You can click this button to backup log files to current PC 7 3 2 System Configuration Please click save button to save yo...

Page 78: ...Setup Figure 7 19 DST Figure 7 20 DST Please refer to the following sheet for detailed information Parameter Function System Time Here is for you to modify system time Please click Save button after your completed modification Sync PC You can click this button to save the system time as your PC current time ...

Page 79: ...e two options stop recording or overwrite the previous files when HDD is full Pack Duration Here you can select file size The value ranges from 1 to 120 minute Default setup is 60 minutes Device No When you are using one remote control to manage multiple devices you can give a serial numbers to the device Please note current series product does not support this function Video Standard Here you can...

Page 80: ...ivating the record operation into the file Depends on data size Setup z In 321HFigure 7 21 click set button you can go to the corresponding setup interface z Please set schedule period and then select corresponding record type schedule motion detection and alarm z Please select date Current setup applies to current day by default You can draw a circle before the week to apply the setup to the whol...

Page 81: ...RS232 The RS232 interface is shown as in 323HFigure 7 24 Figure 7 24 RS232 Please refer to the following sheet for detailed information Parameter Function RS232 There is only one option COM 01 corresponding to RS232 Console is for debug Control keyboard Switch between RS232 and control keyboard Network keyboard COM control protocol You can use network keyboard to control NVR via COM Transparent CO...

Page 82: ...ation Parameter Function Ethernet Please select the network card first DHCP Dynamically get IP address You can get the device IP from the DHCP server if you enabled this function TCP Port Default value is 37777 HTTP Port Default value is 80 UDP Port Default value is 37778 Max Connection Network user max amount The value ranges from 1 to 10 Network transmission QoS You can set the priority between ...

Page 83: ... via PPPoE after reboot You can get the IP address in the WAN from the IP address column Note If you want to reboot the device please make sure z The Web logged in account has the right to reboot the device z There is no logged in user at the local end Email The email interface is shown as in 325HFigure 7 26 Figure 7 26 Email Please refer to the following sheet for detailed information Parameter F...

Page 84: ...t three addresses Interval Please input the send interval value here DDNS The DDNS interface is shown as in 326HFigure 7 27 Figure 7 27 DDNS Please refer to the following sheet for detailed information Parameter Function Server Type You can select DDNS protocol from the dropdown list and then enable DDNS function The private DDNS protocol means you use our self defined private protocol to realize ...

Page 85: ...terval z Device sends out alive signal to the server regularly z You can set interval value between the device and DDNS server here NAS NAS interface is shown as in 327HFigure 7 28 Figure 7 28 NAS Figure 7 29 NAS Setup Please refer to the following sheet for detailed information ...

Page 86: ...t schedule period and then select corresponding record type schedule alarm Please note device does not support motion detect record function now z Please select date Current setup applies to current day by default You can draw a circle before the week to apply the setup to the whole week z After complete setup please go back to Figure 7 28 and then click save to save current time period setup Save...

Page 87: ...IP address Port Server port System supports TCP only and default port value is 123 Time Zone Device current time zone Update Interval Time update interval value Alarm Centre Alarm centre interface is shown as below Please input alarm centre server IP port number Once there is an alarm occurred system can notify the alarm centre as you specified here ...

Page 88: ...88 Figure 7 31 7 3 2 5 Alarm Alarm setup interface is shown as in 329HFigure 7 32 Figure 7 32 Alarm Setup ...

Page 89: ... week z Click OK button system goes back to alarm setup interface please click save button to exit Anti dither System only memorizes one event during the anti dither period The value ranges from 0 to 15s Normal Out Enable alarm activation function You need to select alarm output port so that system can activate corresponding alarm device when alarm occurs For 6 ch alarm output port device the 6th ...

Page 90: ... can complete the whole setups and then click save button Refresh Click this button to get device latest configuration information 7 3 2 6 PTZ PTZ interface is shown as in 330HFigure 7 34 Please note before operation please make sure you have set speed dome address and the NVR and speed dome connection is OK Figure 7 34 PTZ Please refer to the following sheet for detailed information Parameter Fun...

Page 91: ...ton to get device latest configuration information 7 3 2 7 Default Backup Default Restore factory default setup You can select corresponding items Backup Export current configuration to local PC or import configuration from current PC Please refer to 331HFigure 7 35 Please note system can not restore some information such as network IP address Figure 7 35 Default and Backup Please refer to the fol...

Page 92: ... HDD Management Please refer to the following sheet for detailed information Parameter Function Format Clear data in the HDD Read write Set current HDD as read write Read only Set current HDD as read Redundant Set current HDD as redundant HHD Recover Fix the HDD error Right now the device does not support this function 7 3 3 2 Alarm I O Here you can search alarm output status See 333HFigure 7 37 ...

Page 93: ...er Function Alarm output For A series product there are three channels For L and S series product there are six channels The 6th channel is the controllable 12V alarm output Please click the corresponding number and then click the trigger button Trigger Enable disable alarm output Please note once you activate an alarm manually you need to click the output channel number again and then click trigg...

Page 94: ...auto record function as you set in schedule setup chapter 7 3 2 2 Manual Enable corresponding channel to record no matter what period applied in the record setup Stop Stop current channel record no matter what period applied in the record setup 7 3 3 4 Account Here you can add remove user or modify password See 335HFigure 7 39 ...

Page 95: ... 7 3 3 5 Auto Maintenance Here you can select auto reboot and auto delete old files interval from the dropdown list See 336HFigure 7 40 Figure 7 40 Auto Maintenance 7 3 3 6 Abnormity The abnormity interface is shown as below ...

Page 96: ...nges from 10s to 300s Record channel After you selected the disk connection option once the device is offline the activated channel can begin alarm record Record latch System can delay the record for specified time after alarm ended The value ranges from 10s to 300s Send email If you enable this function system can send out email to alarm the specified user Show message Once you check the box to e...

Page 97: ...97 the domain name Figure 7 42 DNS 7 3 4 2 Remote Device Click remote device item the interface is shown as below Figure 7 43 Remote Device Please refer to the following sheet for detailed information ...

Page 98: ...annel number and account User password Please input account to login the remote device IP search Please click the search IP button to search the all remote devices available Please note system can only search the devices in the same segment and the device shall disable the firewall Remote device information Here you can view remote device name Mac address IP address and TCP port 7 4 Search Click s...

Page 99: ...rd alarm record and motion detection record Alarm Search alarm record Motion Detection Search motion detection record This function is not available in current device Local Search local record Snapshot Search snapshot file This function is not available in current device Type Card This function is not available in current device Item Start time Set the file start time ...

Page 100: ...see system begins download and the download becomes stop button There is a progress bar for your reference Operation Open local record Select local record to play Multiple channel playback System supports playback one file in several monitor channels During the playback process you can see there are control buttons such as play pause stop slow play and fast play in the play process bar You can vie...

Page 101: ... not available in current device Alarm Type External alarm Alarm input device sends out an alarm Listening alarm System notifies web when alarm occurs you select from the above event type and then web can notify user Video When alarm occurs system auto enables video monitor This function only applies to video detection alarm motion detection video loss and camera masking This function is not avail...

Page 102: ...102 Figure 7 47 About 7 7 Log out Click log out button you can go back to log in interface See Figure 7 48 Figure 7 48 Alarm ...

Page 103: ... environment is too harsh too much dust z Hardware malfunction 3 System can not detect hard disk There are following possibilities z HDD is broken z HDD ribbon is damaged z HDD cable connection is loose z Main board SATA port is broken 4 There is no video output whether it is one channel multiple channel or all channel output There are following possibilities z Program is not compatible Please upg...

Page 104: ...here are following possibilities z It is not a power picker z It is not a power acoustics z Audio cable is damaged z Device hardware malfunctions 9 There is audio when monitor but there is no audio when system playback There are following possibilities z Setup is not correct Please enable audio function z Corresponding channel has no video input Playback is not continuous when the screen is blue 1...

Page 105: ...ows VISTA control z ActiveX control has been disabled z No dx8 1 or higher Please upgrade display card driver z Network connection error z Network setup error z Password or user name is invalid z Client end is not compatible with device program 14 There is only mosaic no video when preview or playback video file remotely There are following possibilities z Network fluency is not good z Client end ...

Page 106: ...em Please upgrade your system 19 Alarm function is null There are following possibilities z Alarm setup is not correct z Alarm cable connection is not correct z Alarm input signal is not correct z There are two loops connect to one alarm device 20 Remote control does not work There are following possibilities z Remote control address is not correct z Distance is too far or control angle is too sma...

Page 107: ...l mode from the client end There are following possibilities z The network bandwidth is not sufficient The multiple channel monitor operation needs at least 100M or higher z Your PC resources are not sufficient For 16 ch remote monitor operation the PC shall have the following environment Quad Core 2G or higher memory independent displayer display card memory 256M or higher Daily Maintenance z Ple...

Page 108: ...capacity i m which is storage of each channel needed unit Mbyte i m i q i h i D 2 In the formula i h means the recording time for each day hour i D means number of days for which the video shall be kept Step 3 According to Formula 3 to calculate total capacity accumulation T q that is needed for all channels in the device during scheduled video recording c i i T m q 1 3 In the formula c means tota...

Page 109: ...Maxtor DiamondMax 20 STM3320820AS 320G SATA Maxtor DiamondMax 20 STM3250820AS 250G SATA Maxtor DiamondMax 21 STM3160211AS 160G SATA Maxtor DiamondMax 21 STM380211AS 80G SATA Maxtor DiamondMax 21 STM340211AS 40G SATA Westem Digital Cariar SE WD3200JD 320G SATA Westem Digital Cariar SE WD3000JD 300G SATA Westem Digital Cariar SE WD2500JS 250G SATA Westem Digital Cariar SE WD2000JD 200G SATA Westem D...

Page 110: ...aveler II 2G Kingston Data Traveler 1G Kingston Data Traveler 2G Maxell USB Flash Stick 128M Maxell USB Flash Stick 256M Maxell USB Flash Stick 512M Maxell USB Flash Stick 1G Maxell USB Flash Stick 2G Kingax Super Stick 128M Kingax Super Stick 256M Kingax Super Stick 512M Kingax Super Stick 1G Kingax Super Stick 2G Netac U210 128M Netac U210 256M Netac U210 512M Netac U210 1G Netac U210 2G Teclast...

Page 111: ... LXB FD17069HB 17 inch LENOVO CRT LXB HF769A 17 inch LENOVO CRT LX GJ556D 17 inch Samsung LCD 2494HS 24 inch Samsung LCD P2350 23 inch Samsung LCD P2250 22 inch Samsung LCD P2370G 23 inch Samsung LCD 2043 20 inch Samsung LCD 2243EW 22 inch LG LCD W1942SP 19 inch LG LCD W2243S 22 inch LG LCD W2343T 23 inch BENQ LCD G900HD 18 5 inch BENQ LCD G2220HD 22 inch PHILIPS LCD 230E 23 inch PHILIPS LCD 220CW...

Page 112: ...er name you get from your DDNS service provider y Password Enter corresponding password Highlight the icon in front of Enable to enable the DDNS server configuration It s a system of dynamic DNS service If you do not have a Static IP address on the Internet you need to have a dynamic IP It is to say your IP address changes after a certain period of time You can follow the steps listed below to dis...

Page 113: ...t is important to note that to gain access to the device in a local network it is necessary to achieve the redirect the port of your modem or router to your device To receive domain name in the No IP DDNS service please follow the steps listed below 1 Please visit www no ip com the page of No IP appears as below See 342HFigure 13 2 Figure 13 2 2 Left click mouse on the Create Account button accoun...

Page 114: ...L in the body of the email See 344HFigure 13 4 Figure 13 4 5 Now you can see an interface is shown as in 345HFigure 13 5 You have successfully created an account Figure 13 5 6 In 346HFigure 13 5 click to sign and enter the email address and password you get earlier Click login to sign up you can see the welcome interface and configuration option of account See 347HFigure 13 6 You can highlight man...

Page 115: ...of a domain name Figure 13 7 8 In 349HFigure 13 8 input corresponding host name in the filed You can use this name to access device from an external network In the field to the right of the name select the desired area This is your domain name for access to the device Click Create Host button at the bottom of the page Figure 13 8 ...

Page 116: ...Internet on the same network with device Then please type the command dynupdate no ping ip com at the command prompt Windows The server s IP will be displayed on the screen See 351HFigure 13 10 Your device can use this IP to find the No IP server Figure 13 10 11 Please go to the device and access the MAIN MENU SETTING NETWORK DDNS Input server IP you get in the above step Select the DDNS Type as N...

Page 117: ... field created in step 8 For example 115Hhttp vd16s480st no ip biz 2 If the device HTTP port is 80 just type the domain name Otherwise enter in the browser address as http nome the field created in Step 8 port number of HTTP For example 116Hhttp vd16s480st no ip biz 9090 3 Press Enter The system will ask install application webrec cab control or not Please click Yes to perform a successful connect...

Page 118: ...or reference only Slight difference may be found in the user interface All the designs and software here are subject to change without prior written notice Please visit our website or contact your local service engineer for more information ...

Reviews: