background image


iii

Welcome


Thank you for purchasing our NVR! 
This quick start guide is designed to be a reference tool for the installation and operation 
of your system.   
Before installation and operation please read the following safeguards and warnings 
carefully! 
Please keep it for future reference! 


Summary of Contents for NVR 6000 Series

Page 1: ...NVR 6000 Series Quick Start Guide V2 0 0 ...

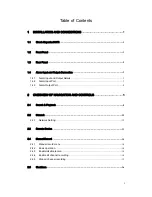
Page 2: ...ut Details 3 1 4 2 Alarm Input Port 3 1 4 3 Alarm Output Port 4 2 OVERVIEW OF NAVIGATION AND CONTROLS 5 2 1 Search Playback 8 2 2 Network 12 2 2 1 Network Setting 12 2 3 Remote Device 13 2 4 Manual Record 14 2 4 1 Manual record menu 14 2 4 2 Basic operation 14 2 4 3 Enable disable record 14 2 4 4 Enable all channel recording 14 2 4 5 Stop all channel recording 15 2 5 Shutdown 16 ...

Page 3: ...ii 3 SYSTEM UPGRADE 17 4 WEB OPERATION 18 4 1 General Introduction 18 4 1 1 Preparation 18 4 2 Login 18 APPENDIX H TOXIC OR HAZARDOUS MATERIALS OR ELEMENTS 21 ...

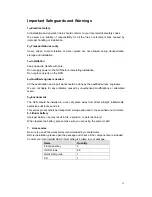
Page 4: ... NVR This quick start guide is designed to be a reference tool for the installation and operation of your system Before installation and operation please read the following safeguards and warnings carefully Please keep it for future reference ...

Page 5: ... be done by the qualified service engineers We are not liable for any problems caused by unauthorized modifications or attempted repair 5 Environment The NVR should be installed in a cool dry place away from direct sunlight inflammable explosive substances and etc This series product shall be transported storage and used in the specified environments 6 Lithium battery Improper battery use may resu...

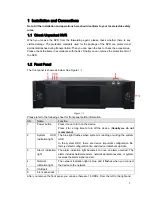
Page 6: ...front panel button information SN Name Function 1 Power button Press it once to turn on the device Press it for a long time to turn off the device Usually we do not recommend 2 System HDD Indication light The blue light flashes when system is reading or writing the system HDD In the system HDD there are device important configuration file factory default configuration file and device initial boot ...

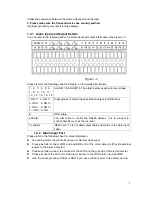
Page 7: ...t 9 HDMI port 5 Network port 10 Alarm input alarm output RS485 port 1 4 Alarm Input and Output Connection Please refer to the following sheet for alarm input and output connection There are two alarm input types for you to select normal open NO and normal close NC 1 Alarm input a Please make sure alarm input mode is grounding alarm input b Grounding signal is needed for alarm input c Alarm input n...

Page 8: ...ups of normal open activation output on off button G GND cable 485 A B The A B cable to control the RS485 devices It is to connect to control decoder such as the recorder Tx and Rx RS232 port Tx is the data output cable and the Rx is the data input cable 1 4 2 Alarm Input Port Please refer to the following sheet for more information z Grounding alarm inputs Normal open or Normal close type z Pleas...

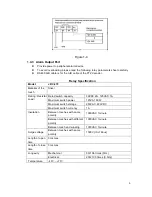
Page 9: ...y 30VDC 2A 125VAC 1A Maximum switch power 125VA 160W Maximum switch voltage 250VAC 220VDC Rating Resistan Load Maximum switch currency 1A Between touches with same polarity 1000VAC 1minute Between touches with different polarity 1000VAC 1minute Insulation Between touch and winding 1000VAC 1minute Surge voltage Between touches with same polarity 1500V 10 160us Length of open time 3ms max Length of ...

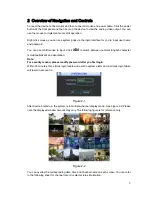
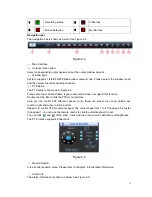
Page 10: ...h between numeral English character small capitalized and denotation Note For security reason please modify password after you first login Within 30 minutes three times login failure will result in system alarm and six times login failure will result in account lo Figure 2 1 After device booted up the system is in multiple channel display mode See Figure 2 2 Please note the displayed window amount...

Page 11: ...e the PTZ menu interface Here you can control PTZ direction speed zoom focus iris preset tour scan pattern aux function light and wiper rotation and etc Speed is to control PTZ movement speed The value ranges from 1 to 8 The speed 8 is faster than speed 1 You can use the remote control to click the small keyboard to set You can click and of the zoom focus and iris to zoom in out definition and bri...

Page 12: ...gement You can use the channel list and the device list to manage the connected remote device The channel list is on the left Here you can view all connected channel information The green color in front of the camera name means current channel is recording now The grey color means current channel is not recording The device list is on the right Here you can view connected device information Green ...

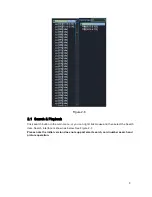
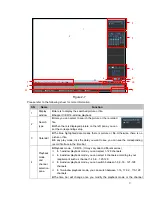
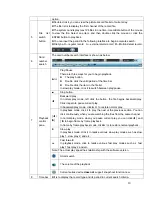
Page 13: ...arch button in the main menu or you can right click mouse and then select the Search item Search interface is shown as below See Figure 2 7 Please note the initial version does not support smart search card number search and picture operation ...

Page 14: ...e or file zIn any play mode click the date you want to see you can see the corresponding record file trace in the time bar 4 Playback mode and channel selection pane zPlayback mode 1 4 9 16 It may vary due to different series In 1 window playback mode you can select 1 128 channels In 4 window playback mode you can select 4 channels according to your requirement such as channel 1 4 5 8 125 128 In 9...

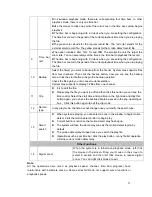
Page 15: ...op button W Backward play In normal play mode left click the button the file begins backward play Click it again to pause current play In backward play mode click to restore normal play W X In playback mode click it to play the next or the previous section You can click continuously when you are watching the files from the same channel In normal play mode when you pause current play you can click ...

Page 16: ...tem max supports to display 32 files from one channel 11 Clip z It is to edit the file z Please play the file you want to edit and then click this button you can see the time control Select the start time and end time on the right side and click this button again you can see the backup data to be saved in the pop up dialogue box Click this button again to exit the clip mode 12 Record type In any p...

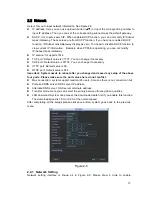
Page 17: ...UDP port Default value is 37778 You can change if necessary z HTTP port Default value is 80 z RTSP port Default value is 554 Important System needs to reboot after you changed and saved any setup of the above four ports Please make sure the port values here do not conflict z Max connection system support maximal 20 users 0 means there is no connection limit z Preferred DNS server DNS server IP add...

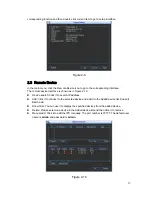
Page 18: ...z Device search Click it to search IP address z Add Click it to connect to the selected device and add it to the Added device list Support Batch add z Show filter You can use it to display the specified devices from the added device z Delete Please select one device in the Added device list and then click it to remove z Manual add Click it to add the IPC manually The port number is 37777 The defau...

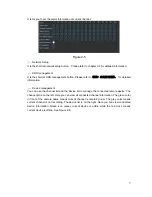
Page 19: ... You can click the PgUp PgDn button to view more channels 2 4 2 Basic operation There are three statuses schedule manual stop Please highlight icon to select corresponding channel z Manual The highest priority After manual setup all selected channels will begin ordinary recording z Schedule Channel records as you have set in recording setup Main Menu Setting Schedule z Stop All channels stop recor...

Page 20: ...ill turn on Figure 2 13 z All channel manual record Please highlight ALL after Manual See Figure 2 14 When system is in manual recording all scheduled set up you have set in will be null Main menu Setting Schedule You can see indication light in front panel turns on system begins manual record now Figure 2 14 2 4 5 Stop all channel recording Please highlight ALL after Stop See Figure 2 15 System s...

Page 21: ...start application reboot device z Shutdown system shuts down and turns off power z Restart system system begins rebooting z Switch user you can use another account to login If you shut down the device there is a process bar for your reference system waits for 3 seconds and then shut down You can not cancel Please note sometimes you need to input the proper password to shut down the device Figure 2...

Page 22: ... layer software did not enable successfully if you can not update via port 3777 Then you can use port 3800 to update 2 Click the Login button on the right side system pops up a dialogue box Here you can input user name admin and password admin Click the OK button you can login And you can see the Login button becomes Logout 3 Click the Open files button and then select the upgrade file click the B...

Page 23: ... and NVR Please input corresponding gateway and subnet mask if there are routers z Use order ping NVR IP address to check connection is OK or not 4 2 Login Open IE and input NVR address in the address column For example if your NVR IP is 10 10 3 16 then please input http 10 10 3 16 in IE address column See Figure 4 1 Figure 4 1 System pops up warning information to ask you whether install webrec c...

Page 24: ... user name and password Default factory name is admin and password is admin Note For security reasons please modify your password after you first login Figure 4 3 After you logged in you can see the main window See Figure 4 4 Please click the channel name on the left pane to begin real time monitor ...

Page 25: ...20 Figure 4 4 For detailed operation instruction please refer to user s manual included in the resources CD ...

Page 26: ... or mutate so that the use of these substances or elements will not result in any severe environmental pollution any bodily injury or damage to any assets The consumer is not authorized to process such kind of substances or elements please return to the corresponding local authorities to process according to your local government statutes Note z For detailed operation introduction please refer to ...

Reviews: