EXCELDirect
®
7
Owner's Manual
6. Move the gas appliance into its final position and mark the dimensions of
the rough opening on the wall where the vent will pass: 8 3/4" x 8 3/4" for
a 4" diameter vent or 10" x 10" for a 5" diameter vent. See the appliance
manufacturer's installation instructions for exact clearance requirements
to the insulated wall thimble. Cut and frame a hole in the interior and
exterior wall making sure that the center of the hole is aligned with the
center of the horizontal vent. The horizontal vent run must be level or have
1/4" rise per linear foot of run towards the termination.
Never allow the
vent to run downward.
Note
:
The EXCELDirect Insulated Wall Thimble (WT) is certified by OMNI test
laboratory for zero clearance in all applications through a wall. This includes
installations on Direct Vent appliances that specify more than standard
clearance (e.g. 3”) or have special adapters that would otherwise be required.
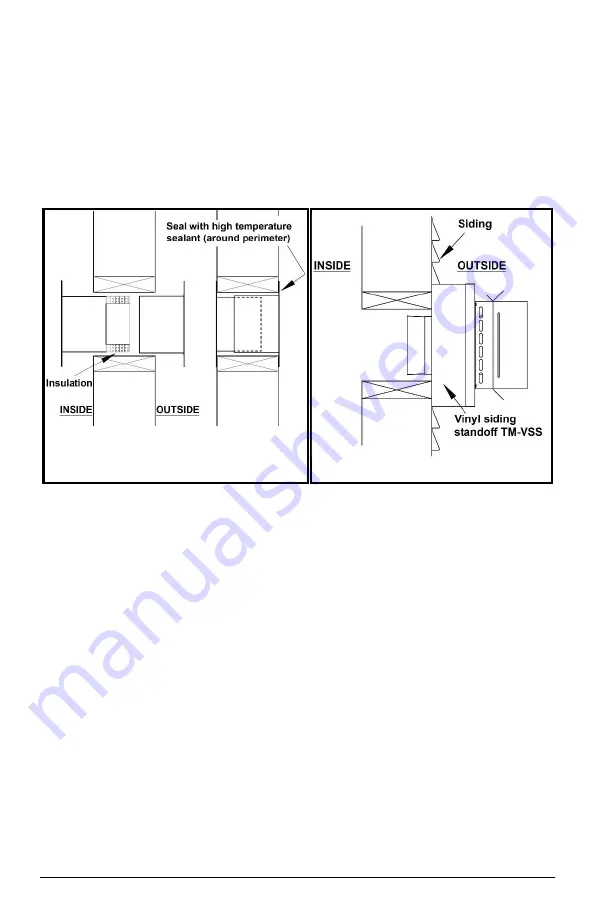
7. Install the interior and exterior portions of the Insulated Wall Thimble (WT)
and screw (or nail) them to the framed opening. The wall thimble is
insulated and will provide 1" clearance to combustible material as the vent
passes through the wall. The insulated portion goes inside the house (see
Figure 4).
8. Seal the perimeter of the exterior wall thimble using high temperature
silicone sealant to prevent water infiltration.
Note
:
The wall thimble will fit wall thickness from 5 3/4" to 10 1/2". For wall
thickness less than 5 3/4", cut both sleeves as required. Once installed, an
overlap of 1" minimum is necessary.
For wall thickness greater than 10 1/2”,
the Wall Thimble Extension (WTE) can be used, and will accommodate walls
up to 20 3/4” thick.
9. The vent portion of the Horizontal Termination is a slip length which
provides up to 6
” of adjustment. If the wall is less than 6” thick you may
Figure 4 -
Insulated Wall Thimble Installation
Figure 5 - Vinyl standoff
Summary of Contents for EXCELDirect
Page 22: ...EXCELDirect 22 Owner s Manual ...


