9
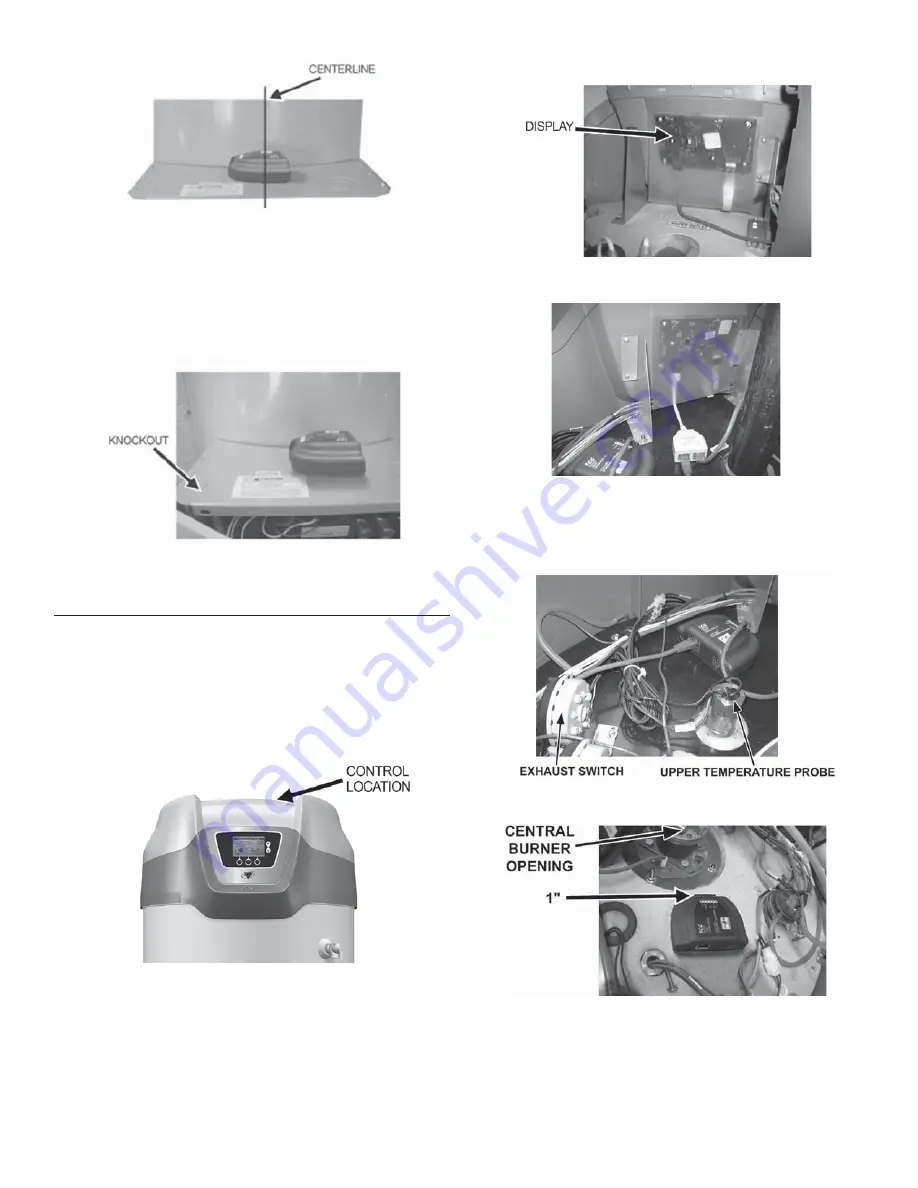
Figure 19. ICC Location Relative to Centerline
5HPRYHWKHKROHSOXJIURPWKH´NQRFNRXWRQWKHOHIWFRUQHU
of the top panel. See
)LJXUH
.
Plug the communications cable into D9 and run the three wire
connection up through the knockout and connect the three wires to
the module as shown on page 4. Once the unit is installed and
connected, the building management system can be connected to
the appropriate connection point on the module.
Figure 20. Location of Communications Wiring Knockout
MEMBRANE SWITCH STYLE DISPLAY INSTALLATION
HIGH EFFICIENCY WATER HEATER INSTALLATION
Follow the directions under general guidelines for connecting the
module to the Energy Management System and power. This section
will guide the installer on how to mount and connect the module to
the water heater.
The control box and mounting location on the water heater is on the
top of the unit behind the display module. See
)LJXUH
.
Figure 21. Locating the Control Box
Removal of the top is not required. Use a ladder to access the top
of taller water heaters. Locate the back of the display as shown in
)LJXUH
. Disconnect the RJ45 plug from the display and connect
the RJ45 plug from the split communication cord into the display
receptacle. Plug the display communication cord back into the
receptacle on the split communication cord as shown in
)LJXUH
.
Plug the supplied wiring harness with the gateway controller into the
remaining open RJ45 port on the Split Communication cord.
Figure 22. Locating the Back of the Display
Figure 23. Reconnecting the Communication cord to the Receptacle
Next locate the upper temperature probe and exhaust switch. See
)LJXUH
.
Position the module between the two about 1 inch from the
central burner opening. See
)LJXUH
.
)RUWKH0%78+PRGHO
this would be next to the upper temperature probe.
Figure 24. Locating Upper Temperature Probe and Exhaust Switch
Figure 25. Connecting the Communications Cable to the Module
Connect the three wires from the end of the communication cable
to the module in accordance with
)LJXUH
. Once the unit is installed
and connected, the building management system can be connected
to the appropriate connection point on the module.
Summary of Contents for 100316044
Page 53: ...53 NOTES NOTES ...


