Model VIP+
9
Owner's Manual
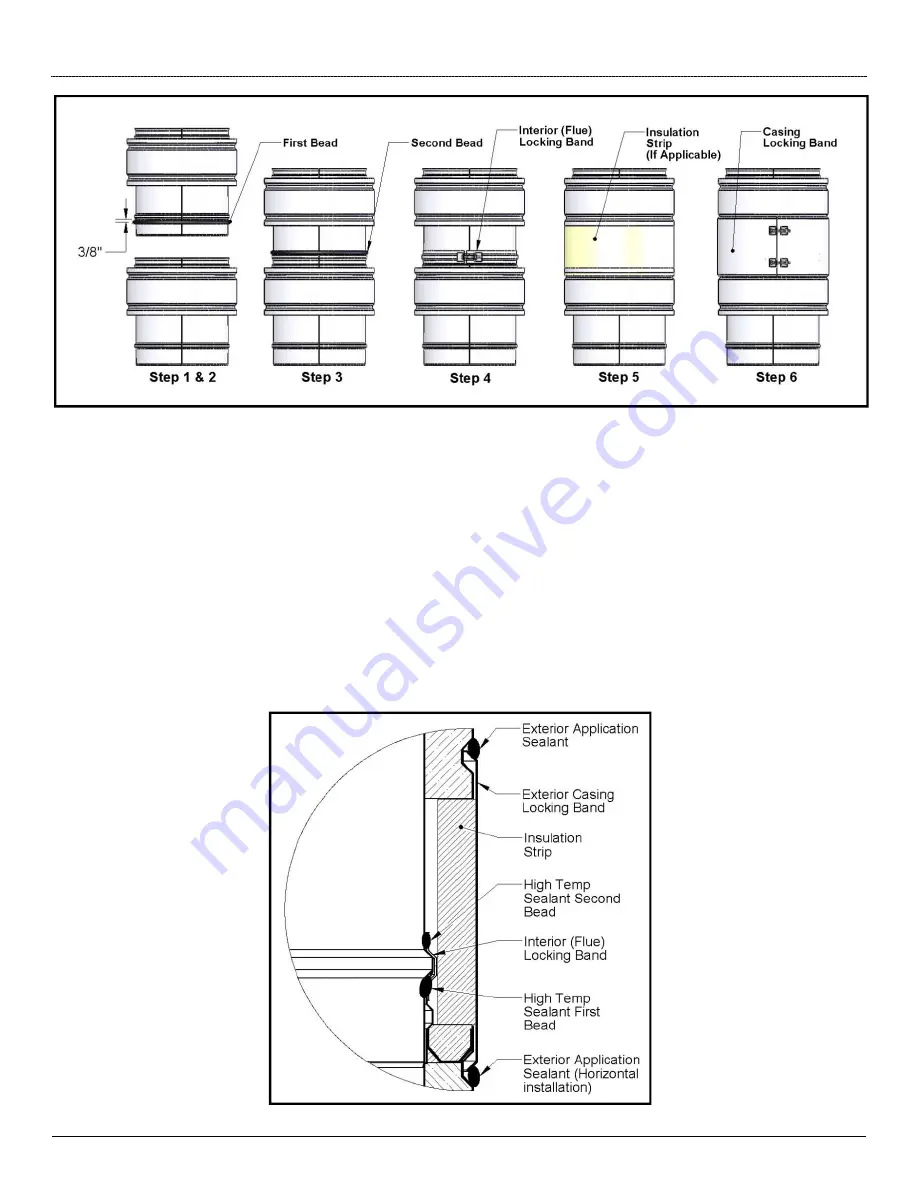
Joint Assembly – High Temperature (Above 600°F) Applications
Figure 4
Step 1
: Apply one bead of Fortafix Ceramix TC on the male end of the flue approximately 3/8” under the formed bead.
Step 2
: Slip the top chimney male end into the expanded side of the lower chimney. Refer to chimney label for flue gases direction.
Step 3
: Apply a second Bead of Fortafix Ceramix TC just above the formed bead when chimneys are joined together (before interior locking band
assembly)
Step 4
: Assemble the interior locking band around the flue and secure by tightening the bolt . Do not remove the excess of sealant.
Step 5
: Install locking band insulation strip around the joint. (if applicable)
Step 6
: Install exterior casing locking band. Secure by tightening the 2 bolts.
Step 7
: Apply a bead of exterior sealant (see
Table 4
and
5C
) on the upper joint of the casing locking band (for outside applications only)
Figure 5


