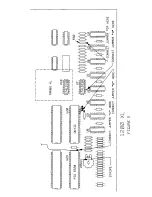
Chapter 3-Installation for 800XL
CHAPTER 3-INSTALLATION FOR 800XL
Turn your computer on its back. Remove the six phillips head
screws which hold the case together and place them in your parts
dish. Turn the computer right side up and lift the left side (near the
ESC key) up and towards the right. Look inside and find the wide
mylar (a clear plastic) ribbon cable which connects the keyboard to
the main computer board. Lift the keyboard and with your thumb
and forefinger pull firmly near the center of the mylar cable straight
up and away from the main computer board. As this pulls free, you
will see that the mylar forms the actual connector and the molded
plastic piece remains with the computer board as the female
connector. Remove the keyboard assembly and set it aside for
now.
Remove the three phillips head screws holding the computer board
in the bottom case. One of these screws is in the upper right hand
corner (holds part of the shield together), another is between the
two joystick connectors, and the third is between the power-in jack
and the channel (2-3) selector switch. (Some 800XLs have four
screws holding the computer board in with the extra screw located
along the top.)
Remove the computer board assembly from the case. Lift the lower
left hand corner up with a flat blade screwdriver. Pull the computer
board out and towards you until all the rear connectors are free.
Then, slide it towards the left to free the joystick connectors and
lift it out of the case.
Remove the metal shields and set them aside. Turn the computer
board over and remove the remaining screws. You may need to
hold the nuts on the other side to prevent them from turning.
Take
note of how the small shield is attached around the parallel bus
connector at the rear of the board. It must go back on the same
way. Also notice as you lift the shields off how the paper insulator
is aligned inside the bottom cover. NOTE: Some metal covers are
held together with bent metal tabs instead of screws. These tabs
should be stra ightened with your needle nose pliers. Then the
shields may be separated.
5


