8
ICE RS26+ / RS32+
OPERATOR MANUAL
MOUNTING THE SQUEEGEE ASSEMBLY
1.
Turn off the 1-Step switch and raise the
Squeegee assembly off the floor.
2. Mount the squeegee assembly to the squeegee
pivot bracket. make sure the knobs are
completely seated into the slots before securing
knobs.
3. Connect the Vacuum hose (Machine
components, #42) to the squeegee assembly.
Loop the hose by using the hose clip provided.
4. Check the squeegee blades for proper
adjustment by adjusting the Squeegee adjusting
knob (Machine components, #44).
FILLING THE SOLUTION TANK
The machine is equipped with a Hose fill port
(Machine components, #3)at the side of the
machine, and a bucket fill-port located under the
recovery tank.
NOTE: Before accessing the bucket fill-port
make sure that the recovery tank is empty.
When filling the solution tank with a bucket,
make sure that the bucket is clean. Do not use
the same bucket for filling and draining the
machine.
AUTO-FILL HOSE PORT(OPTION)
The machine have a optional Auto-fill hose port
(Machine components, #2), you can fill the Solution
tank by using filling hose equipped with Quick
connectors.
1. Connect the Quick connector of the filling hose
to the Auto-fill port and connect the another end
to the water supply connector.
2. Turn the water supply on, the water flow will
automatically shut off when solution tank is full,
and then turn the water supply off.
3. Disconnect the Quick connector from the water
supply end first, and then disconnect the Filling
hose from machineand store in proper location.
WARNING: Do not put any flammable
materials into solution tank. this can cause an
explosion or a fire.
FILLING THE DETERGENT BOTTLE
The machine is equipped with a 4 liters Detergent
bottle under the Recovery tank. You can fill the
Detergent bottle by openning the Deterent bottle
cabin door (Machine components, #25), and
removing the detergent bottle cap.
The ratio of water and detergent is 0~5%, you
can adjust this ratio via pressing the Detergent
adjusting button (Machine components, #33).
NOTE: Only use recommended cleaning
chemicals. Contact your janitorial supply
distributor for recommendations on
properchemicals.
WARNING: Do not operate machine
unless you have read and understand this
manual.
PRE-OPERATION CHECKS
1. Check the tank cover seals for damage.
2. Drain the recovery tank, check the vacuum fan
inlet filter, clean them if necessary.
3. Check the vacuum hose for debris or blockage.
4. Check the squeegees for damage, wear and for
deflection adjustment.
5. Check whether Pad/Brush is installed properly .
6. Check the brakes and steering for proper
operation.
OPERATION THE MACHINE
1.
Sit on the Operator seat, adjusting the seat
to comfortable place by pushing the Seat
adjustment handle (Machine components, #18).
NOTE: The machine will not travel unless the
operator is sitting in the operator seat.
2. Turn on the machine.
Check the Touch screen (machine components,
#15) , if the machine have fault there will have
a Fault icon display and blinking (Machine
components, #39), please Do Not operation the
machine unless the faults have been eliminated
(please see FAULT CODES AND ELIMINATE
section).
3. Select the proper working mode by pressing
the Work mode select button (Machine
components, #32). The machine have 3 Modes
of ECO, HEAVY Duty and User custom.
NOTE: To energy saving, recommend to
using the ECO mode as possible.
For the User custom mode, you can select
the preferred settings by pressing the Solution
flow adjusting button (Machine components,
#30), Detergent adjusting button
(Machine
components, #33), and the Brush pressure
MACHINE OPERATION
Summary of Contents for RS26+
Page 14: ...14 ICE RS26 RS32 OPERATOR MANUAL MAIN FRAME GROUP ...
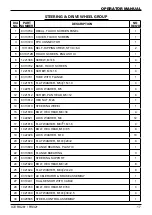
Page 16: ...16 ICE RS26 RS32 OPERATOR MANUAL STEERING DRIVE WHEEL GROUP ...
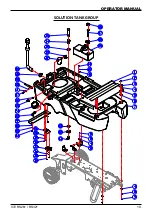
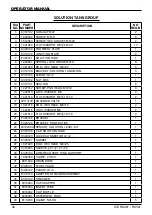
Page 19: ...ICE RS26 RS32 19 OPERATOR MANUAL SOLUTION TANK GROUP ...
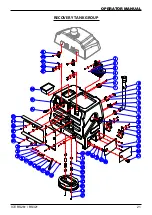
Page 21: ...ICE RS26 RS32 21 OPERATOR MANUAL RECOVERY TANK GROUP ...
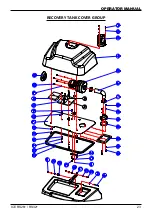
Page 23: ...ICE RS26 RS32 23 OPERATOR MANUAL RECOVERY TANK COVER GROUP ...
Page 25: ...ICE RS26 RS32 25 OPERATOR MANUAL CONTROL PANEL GROUP ...
Page 27: ...ICE RS26 RS32 27 OPERATOR MANUAL MAIN CONTROLLER GROUP ...
Page 29: ...ICE RS26 RS32 29 OPERATOR MANUAL SEAT GROUP ...
Page 31: ...ICE RS26 RS32 31 OPERATOR MANUAL BATTERY GROUP ...
Page 33: ...ICE RS26 RS32 33 OPERATOR MANUAL SCRUB HEAD LIFTING GROUP ...
Page 35: ...ICE RS26 RS32 35 OPERATOR MANUAL SCRUB HEAD GROUP ...
Page 37: ...ICE RS26 RS32 37 OPERATOR MANUAL SQUEEGEE GROUP ...
Page 40: ...40 ICE RS26 RS32 OPERATOR MANUAL SOLUTION DETERGENT SYSTEM ...


