


49
MAINTENANCE
BRUSH CONTROL AND MAINTENANCE (SCRUB 55-65 with PM)
Careful cleaning of the brush guarantees better cleaning of the floor
as well as a longer brush head gearmotor lifespan. To clean the
brush, proceed as follows:
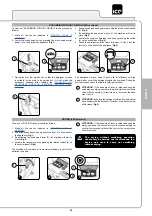
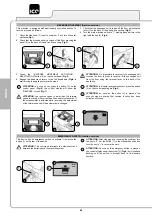
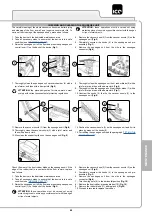
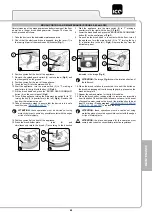
1. Take the device to the dedicated maintenance area.
2. Check that the electronic brake is engaged, turn the lever (1) in
the rear right part of the machine anti-clockwise (
Fig.1
).
3.
Start the appliance, turn the main switch (2) to "I", making a
quarter turn to the right with the key (3)
Fig.2)
).
4. Lower the brush head unit, press the “BRUSH HEAD COMMAND”
button (4) on the control panel (
Fig.3
).
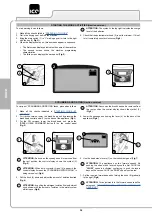
5.
As soon as the brush head is in contact with the floor, turn off
the appliance, turn the main switch (2) to "0", turning the key
(3) a quarter turn to the left (
Fig.4
). Remove the key from the
instrument panel.
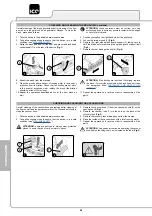
6. Position yourself at the front of the appliance.
7. Remove the splash guard carters (5), remove them (
Fig.5
) and
lay them gently on the ground.
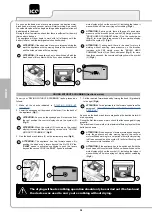
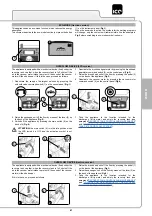
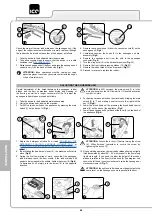
8. Position yourself at the rear of the appliance.
9. Insert the key (3) into the main switch (2).
10.
Start the appliance, turn the main switch (2) to "I", making a
quarter turn to the right with the key (3)
Fig.2)
).
11. Lift the brush head unit, press the “BRUSH HEAD COMMAND”
button (4) on the control panel (
Fig.3
).
12.
Turn off the appliance, turning the main machine switch (2) to "0",
turning the key (3) a quarter turn to the left (
Fig.4
). Remove the
key from the instrument panel.
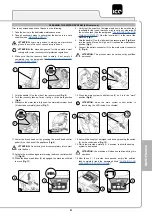
13. Take all necessary steps to ensure that the device is in a safe
condition (see "
’”).
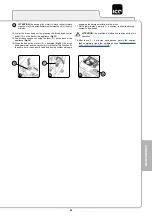
ATTENTION:
these operations must be carried out using
protective gloves to avoid any possible contact with the edges
or tips of metal objects.
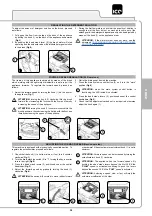
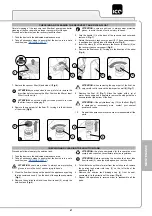
14. Position yourself at the front of the appliance.
15. Press the brush-holder plate
latch
(6)
and
simultaneously rotate the brush (7) according to the direction
indicated in the image (
Fig.6
).
ATTENTION:
The image
Fig.6
shows the rotation direction of
the left brush.
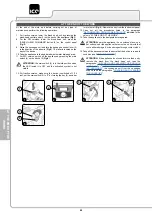
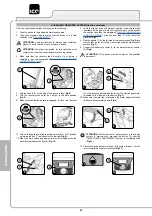
16. When the brush rotation is prevented, turn until the button on
the brush is disengaged from the coupling spring, present on the
brush-holder plate.
17. Repeat the same operation for the right brush also.
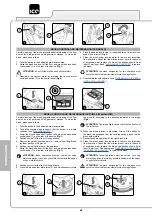
18. Clean the brush under running water to remove any impurities
from its bristles. Check that the bristles are not worn; in the event
of excessive wear, replace the brush (the bristles should be at
least 10 mm long). Read paragraph “
(SCRUB 55 - 65 with PM)
” to replace the brush.
ATTENTION:
these operations must be carried out using
protective gloves to avoid any possible contact with the edges
or tips of metal objects.
ATTENTION:
the place designated for this operation must
comply with current environmental protection regulations.
1
1
3
2
3
4
4
3
2
5
6
6
7
5
5


